Build a Climbing Wall for the Kids
Schools in - schools out - who knows! One thing for sure is that this climbing wall will keep the kids occupied for hours.
23/08/2020
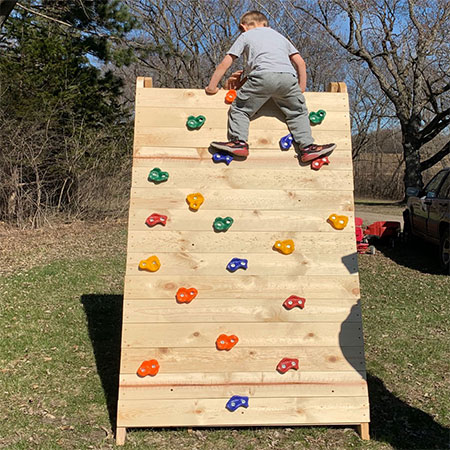
Keeping the kids occupied during the school holidays is difficult enough for most parents, trying to keep them occupied for 4 months is not an easy task when they are constantly complaining that they are bored. This climbing wall is easy enough to build and will most certainly keep the kids occupied for hours,
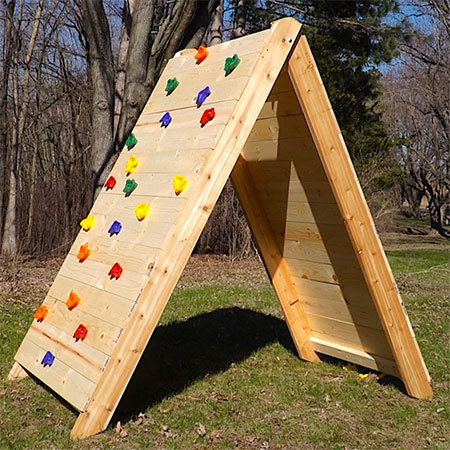
This pine climbing frame has climbing holds on one side and ropes on the other side and will keep kids occupied and give them a much-needed workout during the holidays or absence from school.
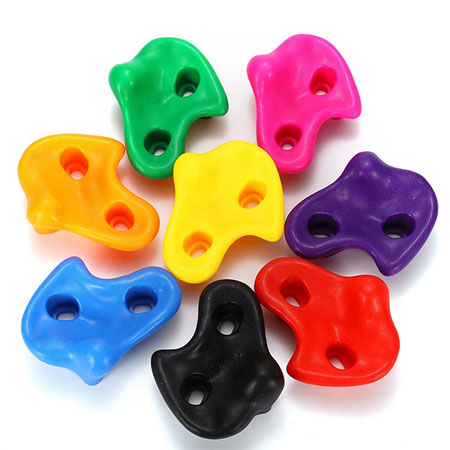
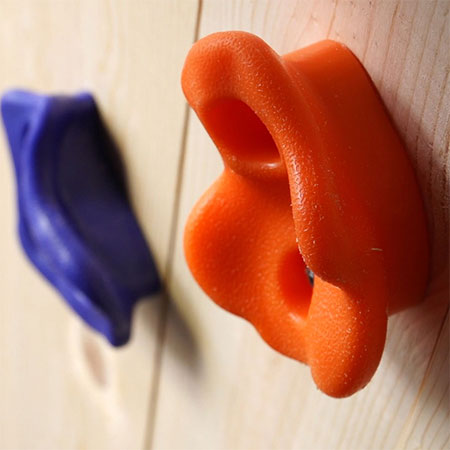
The climbing frame is made using PAR pine that you can purchase at any Builders Warehouse. The climbing holds for kids are available from various online suppliers, simply Google "buy kids climbing holds" and choose one near to you or one that delivers. The climbing holds are also reasonably priced at around R185 per pack.
SAFETY FIRST: Before you let the kids loose on the climbing frame, provide instruction on how to use safely.
YOU WILL NEED:
4 of 38 x 150 x 2400mm PAR pine - legs
4 of 38 x 100 x 2400mm PAR pine, cut to:
- 4 of 1118mm in length - cross brace
- 4 of 1032mm in length - cross brace
15 of 19/22 x 150 x 2400mm PAR pine - slats
2 of 10mm bolts, nuts and [6] washers
6 of screw eyes
40mm and 50mm screws
5 metres of nylon rope
20 of Climbing holds for kids
120-grit sandpaper
TOOLS:
Drill/Driver plus assorted bits
25mm spade bit
Jigsaw, mitre saw or circular saw
Socket wrench
Tape measure and pencil
HERE'S HOW:
1. Cut 45-degree angles at the bottom of each leg. Cut a rounded curve at the top end of each leg.
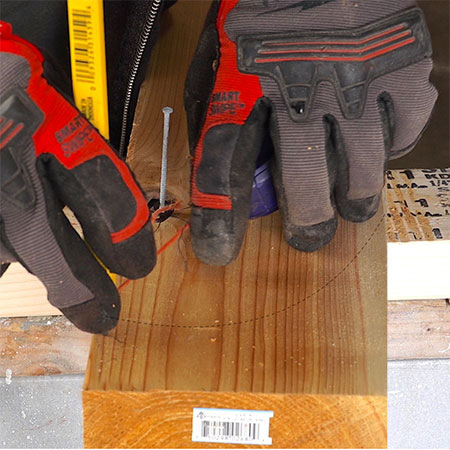
GOOD TO KNOW: The sides of the finished A-frame vary in size from 1118mm to 1032mm to allow these to be folded on top of each other when the climbing frame is not in use.
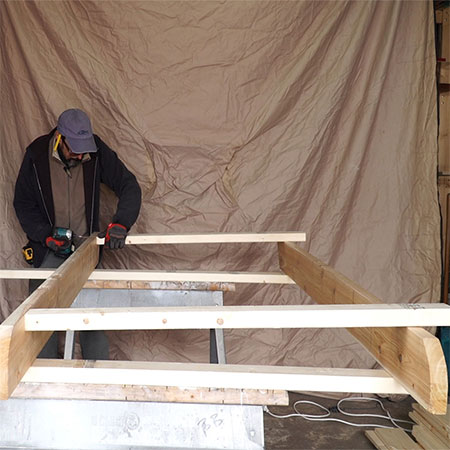
2. Screw the cross braces onto the sides, allowing 150mm down from the top of each leg and 170mm up from the bottom of each leg.
3. Place the legs together at the top and join each side with the other using bolts, nuts and washers. Drill 10mm holes for mounting the bolts and tighten securely. Not too tight, you want to be able to open and close the legs with ease.
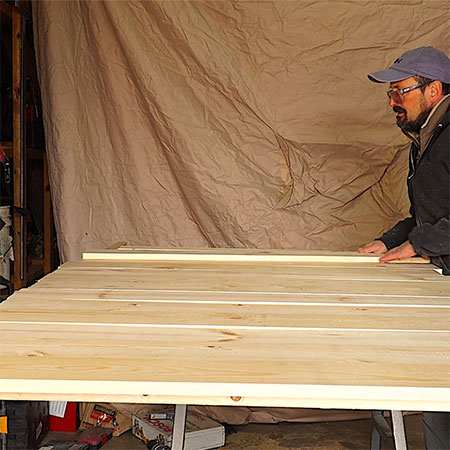
4. Measure and cut the slats to length for each side. Starting 50mm down from the top, secure the boards to the legs using 50mm screws. Pre-drill countersunk pilot holes to prevent any splitting.
GOOD TO KNOW: Push the slats firmly together to avoid gaps.
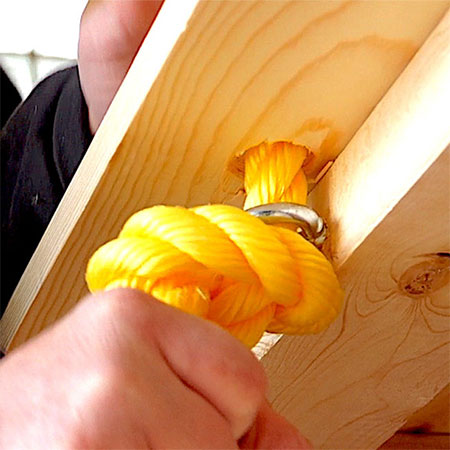
5. At the top of the narrower face, measure approximately 270mm in from both edges and 60mm down from the top board and drill holes for the rope. Affix the screw eyes into the cross brace below and thread the rope through the hole and screw eye and knot. Do this for two lengths of rope. Cut to length and tie both ropes off at the end.
GOOD TO KNOW: This step is optional, but if you want to extend the life of the climbing frame, sand and wipe clean before applying exterior sealer.
6. Now you can install the climbing holes. Don't space these too far apart but give kids a challenge for a bit of reach and stretch.
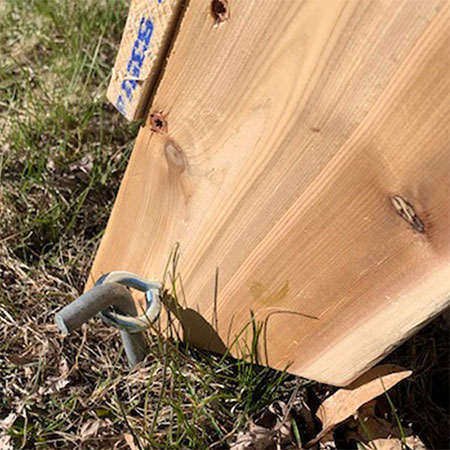
OPTIONAL: Install screw eyes at the bottom of each leg and use steel stakes to hold the climbing frame securely in place.