
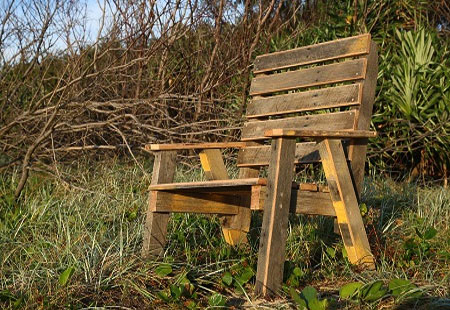
Make a Deck or Garden Chair with Pallet Wood
If you have spent the time in lockdown catching up on jobs around the home, here's your chance to relax in a deck chair made using pallet wood.
25/04/2020

If you have spent most of the time on lockdown doing tasks and jobs in and around the home, now you can sit back and relax and make the most of the last week confined to your home. This project is all about making use of pallet wood to craft a comfortable chair where you can take a seat and enjoy your garden - and why not, you've worked very hard for it!
YOU WILL NEED:
Large pallet or two smaller pallets, cut down to the following sizes:
- 2 of 605mm with 77.5° parallel cut at each end - front and rear leg
- 2 of 620mm with 70.5° parallel cuts at each end - rear legs
- 2 of 505mm with one end cut at 90° and opposite end cut on the acute 76°
- 2 x of 860mm with both ends cut 90°- seat rails - choose one end to be the top and cut a 60mm mitre at the top at 45°
- 9 of slat type material to cut at lengths of 650mm - seat boards
Deck screws or 50mm cut screws
TOOLS:
Drill / Driver plus assorted bits
Mitre saw, table saw, jigsaw or handsaw
Multi or orbital sander plus 180 - 240-grit sanding pads
Planer or angle grinding plus 120-grit flap disks
Tools to breakdown the pallets
Tape measure and pencil
HERE'S HOW:
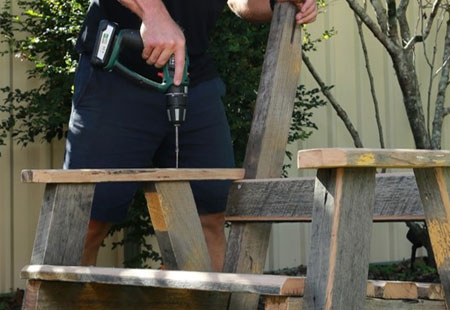
1. The first step will be to break down the pallets into usable pieces. Take care to remove any nails or screws, as these could be hazardous when cutting down the pallet wood.
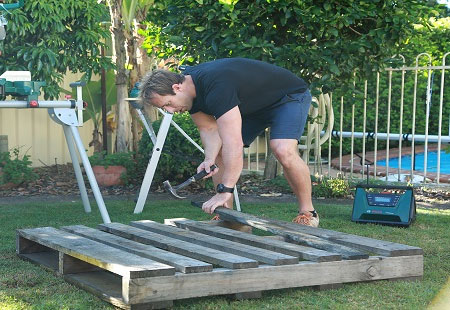
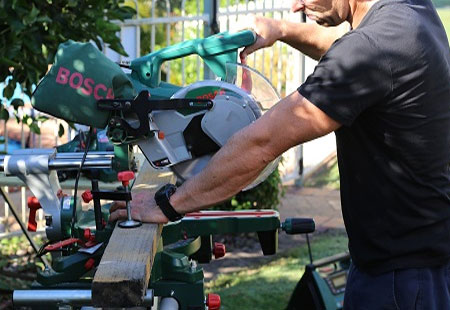
2. Cut all the sections to size as per the list above. There are some angled cuts as well, so make sure not to forget to do these.
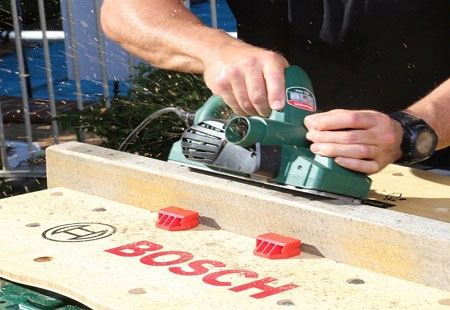
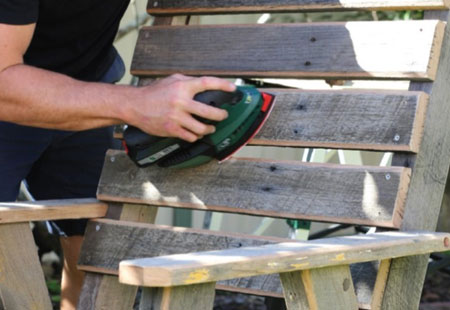
3. Use a planer - or angle grinder fitted with a 120-grit flap disk - to sand all the rough edges.
4. Assemble the seat rail
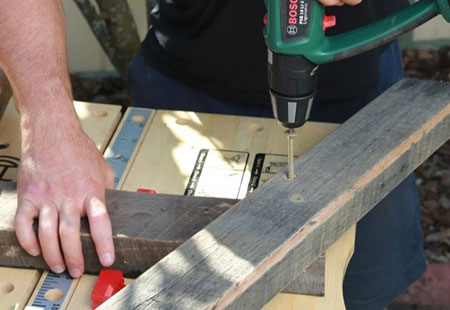
Where possible, pre-drill all the required pilot holes. Take [1] armrest and position on its edge so that 20mm overhangs the outside edge of the rear leg. This will leave a 50mm overhang at the front leg. Secure with screws.
5. Assemble arm and backrest
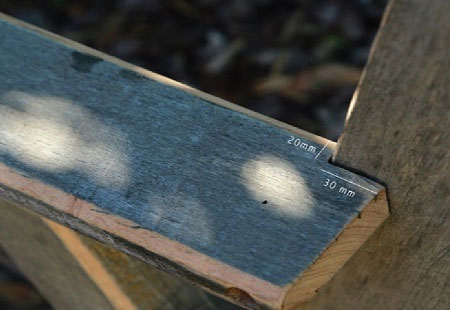
Position the backrest 700mm down from the top, ensuring it lines up with the top of the seat rail. On the inside edge of the armrest piece cut a notch at a depth of 20mm, as shown below. This allows for fitting the backrest.
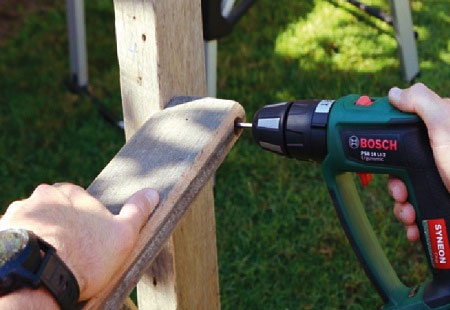
6. With the armrest notched, clamp the pieces in place to secure. Repeat this process for the other side of the chair, mirroring the steps above.
GOOD TO KNOW: Once the sides are finished, stand the chair upright and temporarily clamp a seat slat into position to hold the chair in place.
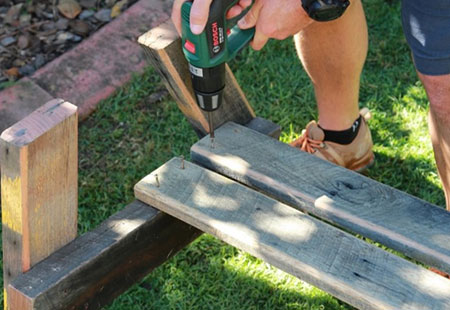
7. Seat Slats
Position the first seat slat on the seat rails with an overhang of 20mm. Drill countersunk pilot hole and secure with screws. Add the remaining seat slats in the same way.
8. To attach the remaining pieces, place a backrest slat 25mm above the edge, drill a countersunk pilot hole and secure.
Finishing
Use a sander to smooth the entire chair and remove any loose splinters or sharp edges.
See the video below for more information and instructions for this project.