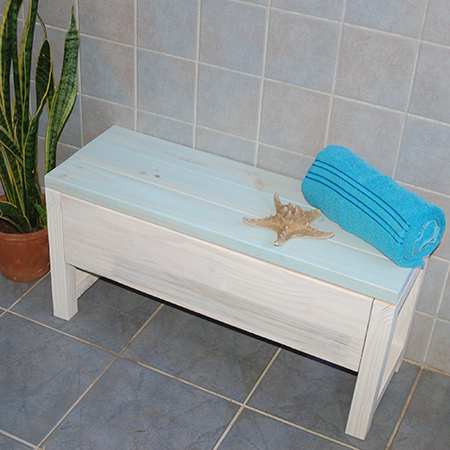
Bathroom storage bench
Make a storage bench using laminated pine shelving and pine planks that you will find at your nearest Builders. It's easy to make and will only take an hour or so.
After designing and making the step-stool / toolbox, I realised the design would also work well for a variety of other projects, including this bathroom storage bench.
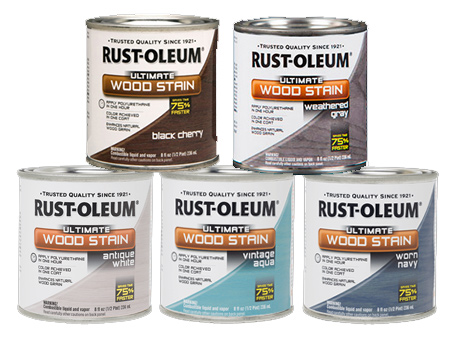
The bathroom storage bench takes up little space, but offers decent sized storage for bathroom essentials like towels, etc. We finished our bathroom storage bench with Rust-Oleum Wood Stain, which comes in a variety of unique colours and is available at your local Builders Warehouse.
YOU WILL NEED:
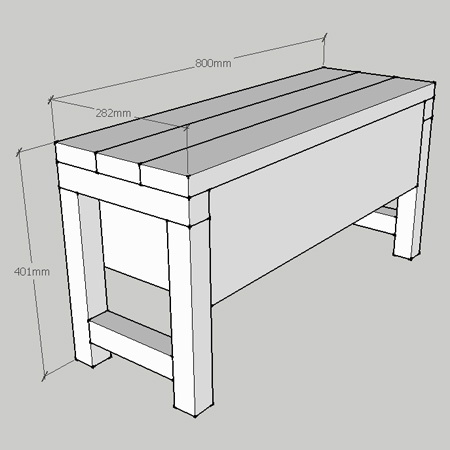
4 of 44 x 44 x 325mm pine - legs
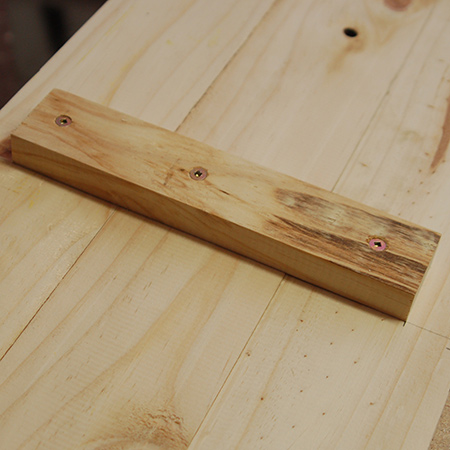
2 of 44 x 44 x 282mm pine - side top
2 of 44 x 44 x 194mm pine - side bottom
2 of 19 x 190 x 712mm lam pine - box front/back
2 of 19 x 190 x 244mm lam pine - box side
1 of 19 x 244 x 674mm lam pine - box base
3 of 32 x 94 x 800mm pine - lid slats
3 of 19 x 44 x 220mm pine - lid braces
2 of concealed hinges and 16mm screws
4 x 40mm screws [15]
4 x 60mm screws [ ]
Wood glue
TOOLS:
Drill / Driver plus assorted bits
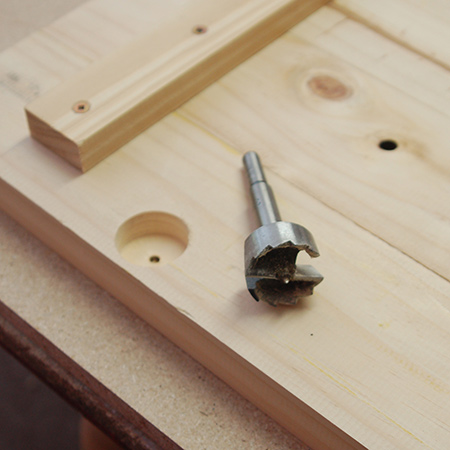
35mm Forstner bit
Orbital Sander
Clamps
Tape measure and pencil
FINISHING:
Rust-Oleum Ultimate Wood Stain and paintbrush
Buy everything you need for this project at Builders Warehouse.
HERE'S HOW:
Note: Drill 3mm countersunk pilot holes for all joins.
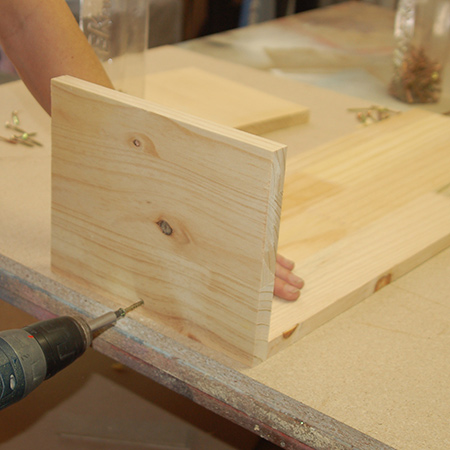
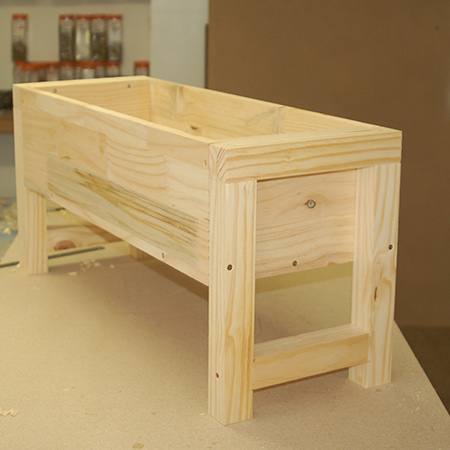
1. Assemble the pieces that make up the box using wood glue and 40mm screws.

2. Make the sides using wood glue and 60mm screws. Join the top rail onto the legs.
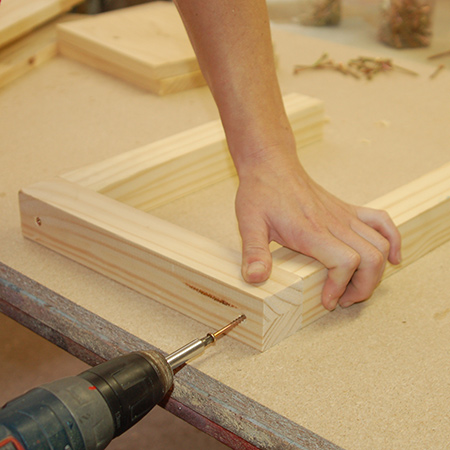
3. Measure and mark 50mm up the legs and mount the bottom rail with wood glue and 60mm screws.
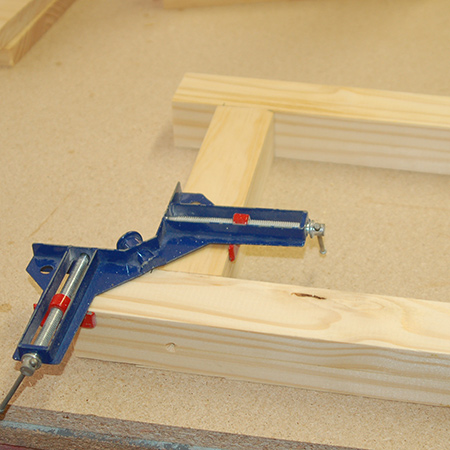
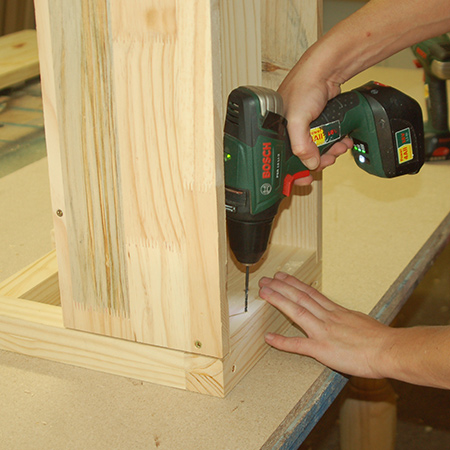
4. Secure the sides onto the ends of the box with wood glue and 60mm screws. Drill through the box so that screws are not visible from the outside.
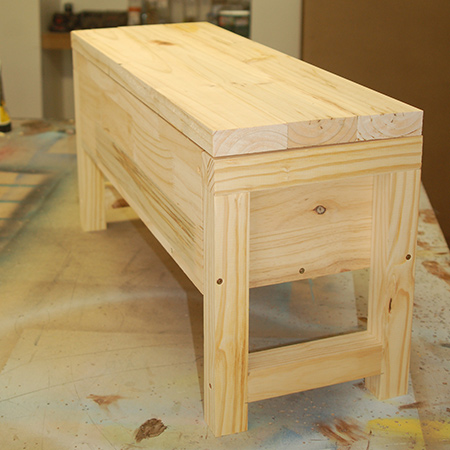
BELOW: Assembled bathroom storage bench without lid.
5. Apply glue to laminate the slats together for the lid. Clamp together and while clamped, add 3 braces with wood glue and 40mm screws.
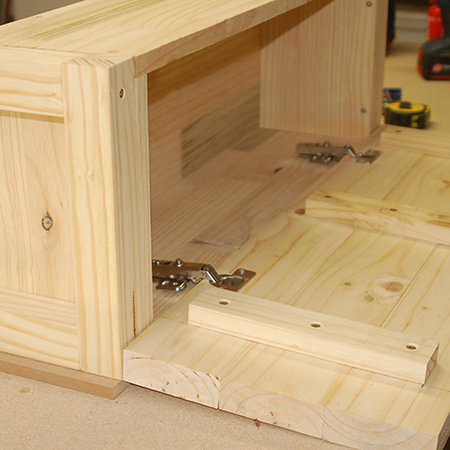
6. Use a 35mm Forstner bit to drill holes in the lid for the concealed hinges. Draw a line 3mm in from the back edge and drill 11mm deep.
7. Secure the hinges with 16mm screws.
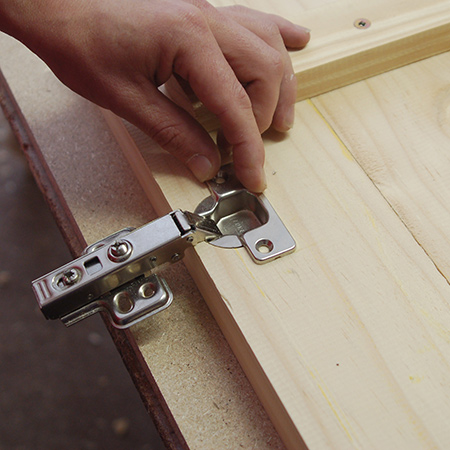
8. Attach the lid to the box with 16mm screws.
GOOD TO KNOW
Use scrap wood to raise the box to make it easier to fit the lid.
BELOW: DIY Pine bathroom storage bench with lid closed.
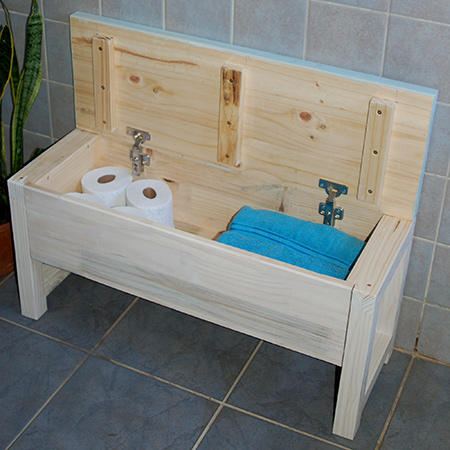
BELOW: Bathroom storage bench with lid open.

Finishing
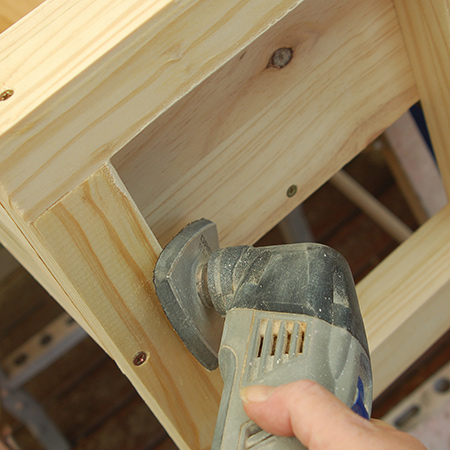
Use a sander to round off all the edges. I like to use my Dremel MultiMax for this - it gets into all tight corners.
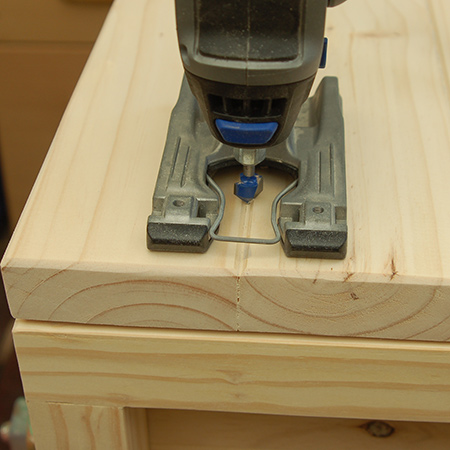
For added effect, I used my Dremel Trio (mini router) on the lid to put small 'V' grooves along the seams.
We applied one coat of Rust-Oleum Ultimate Wood Stain - Antique White - on the base of the bench and Rust-Oleum Ultimate Wood Stain - Beached Blue - on the lid. Results are achieved in one coat: Simply apply and let stain penetrate for 5 - 10 minutes before removing excess with a rag.
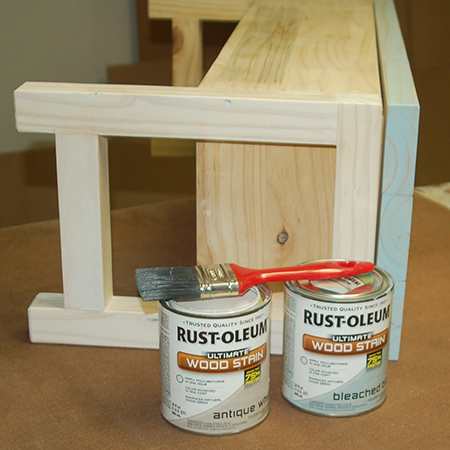
Rust-Oleum Ultimate Wood Stain is available in 17 tints and provides rich, even colour and a beautiful patina. You can use Rust-Oleum Ultimate Wood Stain to stain and seal indoor furniture.