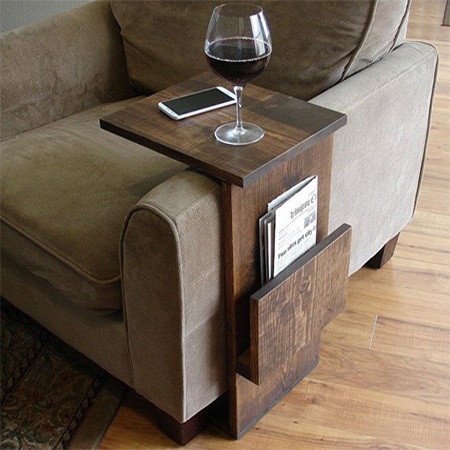
Armchair tray for drinks, books or magazines
After posting this armchair tray for drinks, books or magazines on facebook, readers requested that I post a step-by-step for this quick and easy project, so here it is...
pinterest.com/pin/501658845968075512/
YOU WILL NEED:
1800mm length of 305mm wide laminated pine shelving cut to:
1 of 350mm long - top
1 of 50mm long - shelf bottom
1 of 150mm long - shelf side
1 of height from floor to top of chair arm - side
Woodoc gel stain and antique wax OR Woodoc 10 (clear or tinted)
TOOLS:
Tork Craft biscuit joiner OR dowel centre and dowels OR wood glue
Quick clamps
Tape measure and pencil
You can buy all the supplies you need for this project at your local Builders Warehouse.
HERE'S HOW:
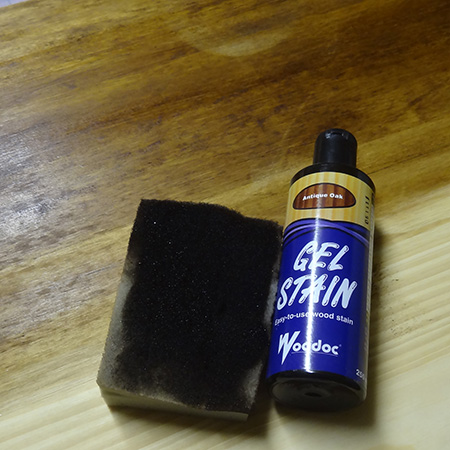
1. With all the pieces cut to size it's easier to apply wood stain or sealer to the sections before assembly. For this project I used Woodoc gel stain in traditional teak and applied Woodoc antique wax to protect. If you are applying sealer or varnish you need to allow drying time for each individual coat.
GOOD TO KNOW
If you don't have a biscuit joiner and prefer not to use dowels, you can assemble the armchair tray using wood glue and a few panel pins.
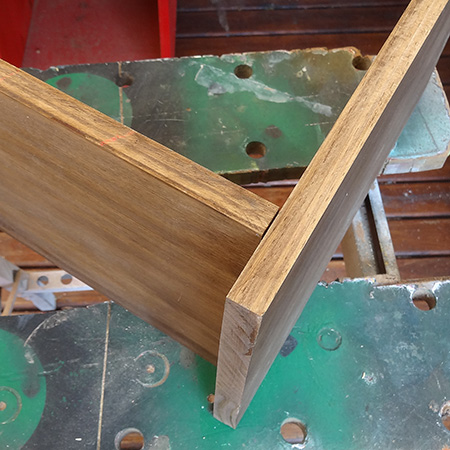
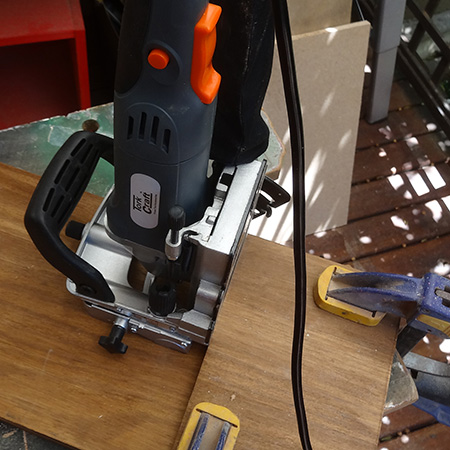
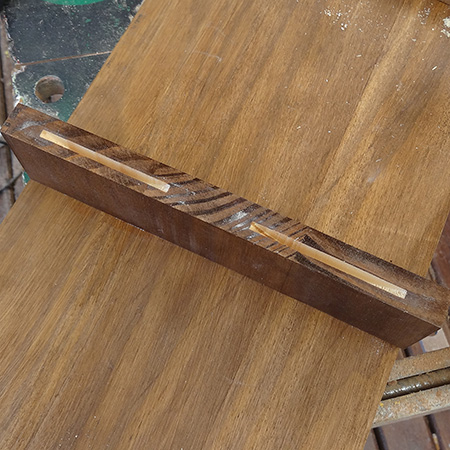
2. To mount the book or magazine shelf I used the shelf section as a guide for the height to mount the bottom of the shelf. I clamped the shelf onto the side to drill the slots for biscuits.
3. I also cut slots in both edges of the shelf bottom.

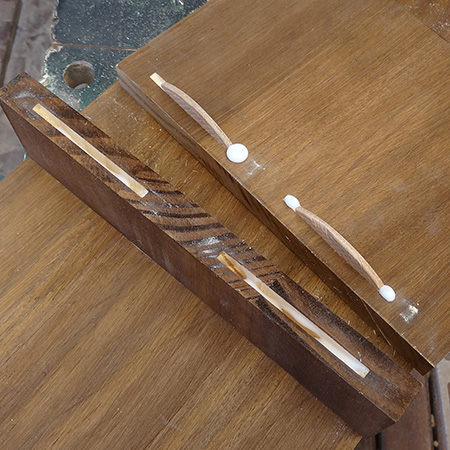
4. Wood glue was squeezed into the slots in the side section and shelf bottom and biscuits inserted before slotting the two pieces together.
5. Slots were cut at the bottom of the shelf side, glue applied to the slots and also the slots on the edge of the shelf bottom before inserting biscuits and placing the shelf side onto the shelf bottom.
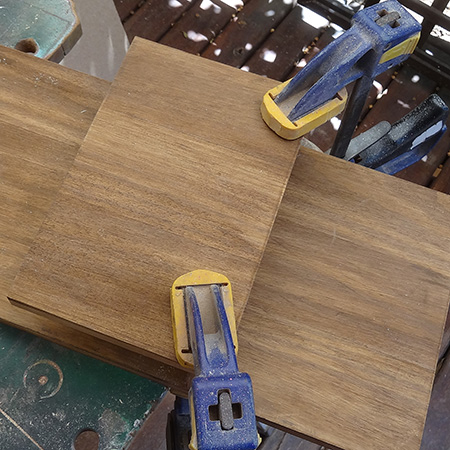
6. The completed shelf assembled was clamped overnight.
7. To attach the top of the tray corresponding slots were cut in the top of the side and underside of the top. Glue was squeezed into the slots, biscuits inserted and the pieces assembled. It is difficult to clamp this shape, so make sure to put it in a safe place until the glue has set.