Quick Project: DIY All-Purpose Portable Table
If you need some extra worktop space for the kitchen, for your sewing machine or even for a potting bench, this all-purpose table is a quick project you can assemble in a day.
21/05/2021
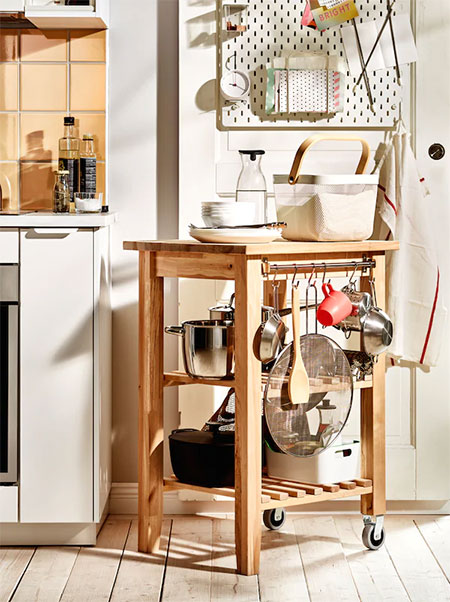
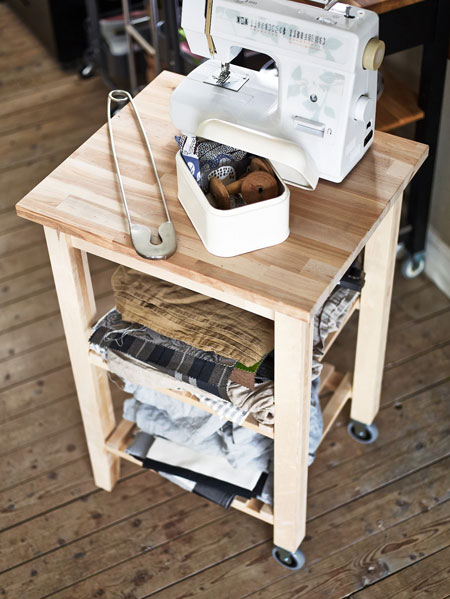
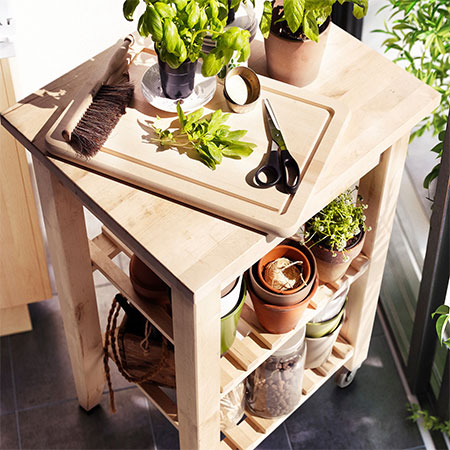
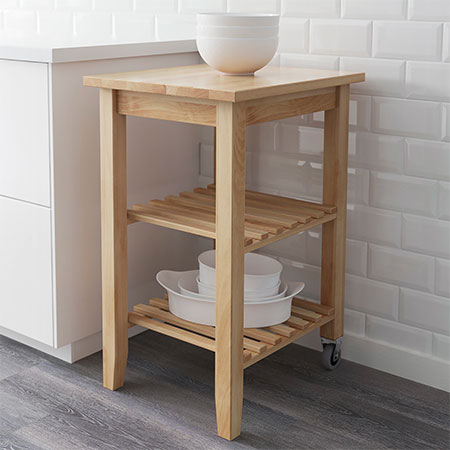
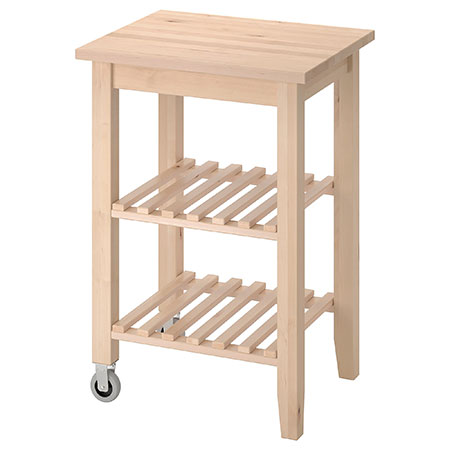
This all-purpose mobile table is perfect for a wide variety of uses where you need a sturdy tabletop. It's small enough not to take up a lot of space but study enough to serve as a handy worktop and storage for use in and around the home and hobbies and crafts.
The 50 cm x 60 cm top provides enough space to set up your sewing machine or craft and hobbies and the two shelves give you space to store essential supplies. If you do intend to use this as a tabletop for projects where you can sit down, adjust the height of the legs so that the height of the tabletop is just right for you. If you are not sure how to check the height measurement, measure the height from floor to tabletop of a desk or dining table.
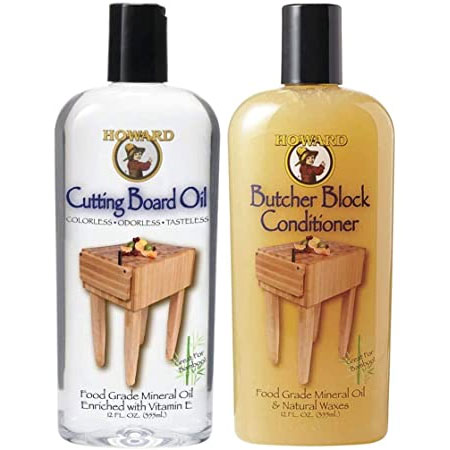
The all-purpose table is so easy to make, you might want to make another one - double-up on the length if you only want to make a single table. These tables are ideal if you need more countertop space in the kitchen, but do make sure to finish off the top with butcher block oil or conditioner so that the surface is food safe and can be used for chopping and cutting. And the natural anti-bacterial properties of wood make it excellent for this purpose.

Did we mention that this is an all-purpose table? With its castor wheels you can wheel the table anywhere you need it - indoors or outdoors. Just keep in mind that if you do decide to use it outdoors, you will need to apply an exterior sealer for protection.
Built to be sturdy and strong, this all-purpose table can be easily transported for use around the home.
YOU WILL NEED:
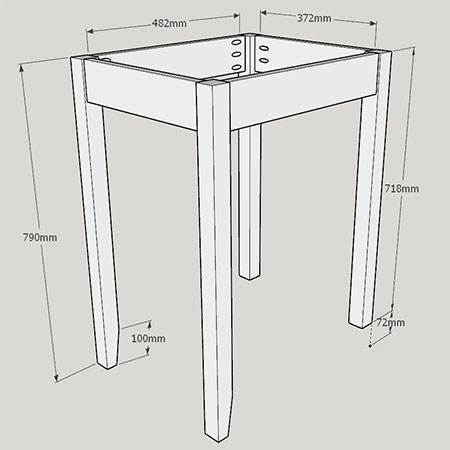
1 of 500 x 610mm laminated pine shelving - table top
2 of 21 x 94 x 482mm PAR pine - long apron
2 of 21 x 94 x 372mm PAR pine - short apron
2 of 44 x 44 x 790mm PAR pine- long legs
2 of 44 x 44 x 718mm PAR pine - short legs
4 of 22 x 22 x 482mm PAR pine - shelf supports
12 of 22 x 44 x 460mm PAR pine - shelf slats
32mm coarse-thread pocket-hole screws
16mm screws
8 of plastic or steel brackets plus screws
2 castor wheels, locking plus screws
Wood glue
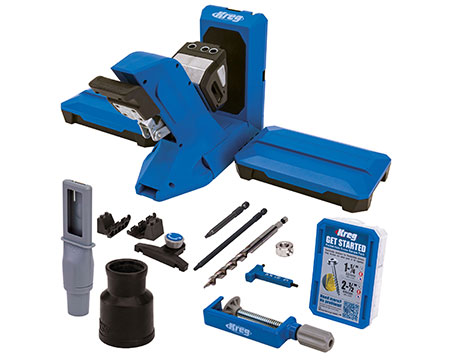
TOOLS:
Drill/Driver plus assorted bits
Kreg pocket-hole jig
Sander plus 120- and 240-grit sanding pads
Tape measure and pencil
Safety gear
HERE'S HOW:
Step 1
Set up your pocket-hole jig for 22mm thickness material and drill [3] pocket-holes at both ends of the Long Aprons and [2] pocket-holes at both ends of the Short Aprons. Use wood glue and 32mm pocket-hole screws to secure both the Long and Short Aprons to the Legs. Note: The aprons should be placed 5mm in from the front of the Legs.
Optional
To give the [2] Long Legs a bit of detail, you can use a mitre saw or jigsaw to cut away an angle at the bottom of the Legs.
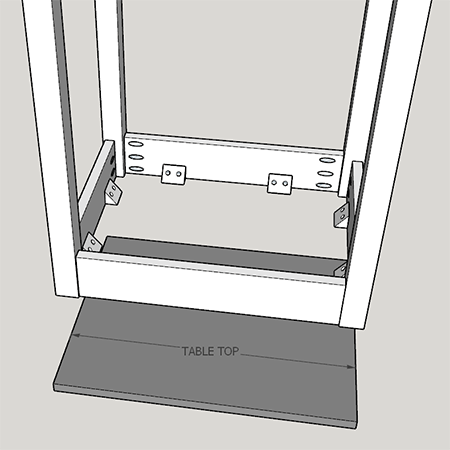
Step 2
Place the Table Top on a flat, level surface and position the Leg Assembly on top of this. There should be a 20mm gap around the outside of the Leg Assembly. Secure the Table Top to the Leg Assembly with brackets and 16mm screws
Step 3
To assemble the shelves, first, drill a pocket-hole at both ends of the 482mm Shelf Supports.

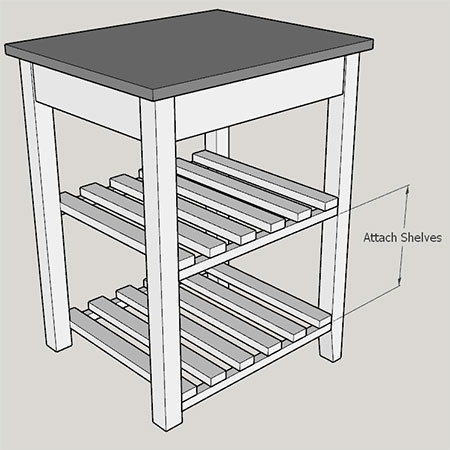
Step 4
Measure and mark the location for mounting the Shelves to ensure they are level on all sides. Use wood glue to secure the Shelf Slats equally distanced along the length of the Shelf Supports. Leave the glue to dry for a couple of hours before securing the assembled Shelves onto the Legs.
Step 5
To finish off the all-purpose table, secure the castor wheels to the base of the Short Legs, as shown below.
FINISHING
Sand the entire assembly with 120-grit sanding pad on any uneven edges and with 240-grit to provide a smooth finish. Wipe clean with a slightly damp cloth to remove all traces of dust before applying a tinted or clear sealer or varnish. If you are going to be using the All-Purpose Table in the kitchen for food preparation, apply Butcher Block Oil or Conditioner and continue to apply regularly.