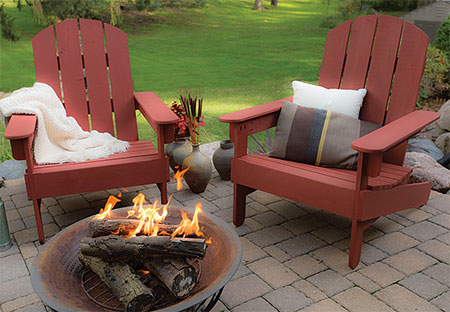
Make a set of Comfortable Adirondack Garden Chairs
Adirondack garden chairs are the most comfortable chairs to sit on in the garden and we show you how easy it is to make a set using a Kreg Pocket-Hole Jig.
10/05/2019
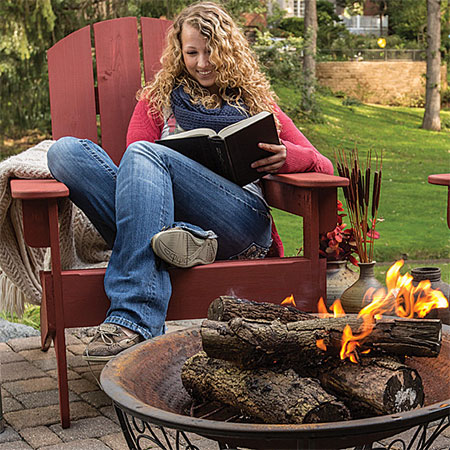
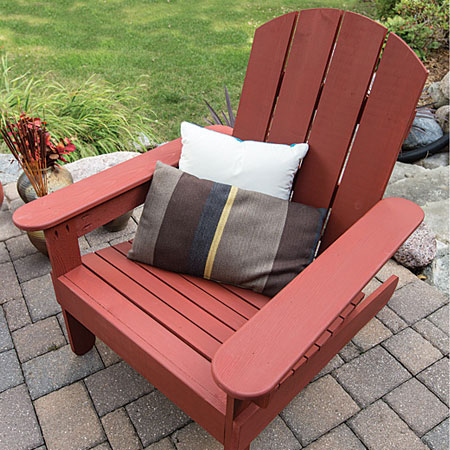
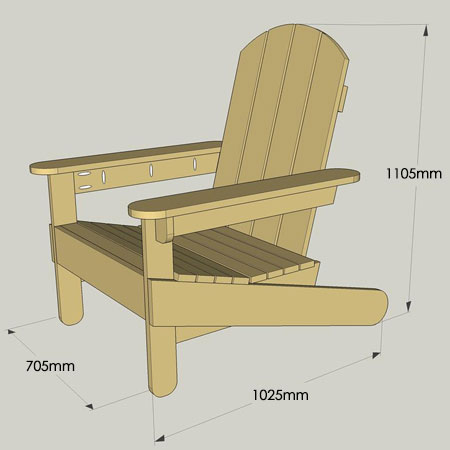
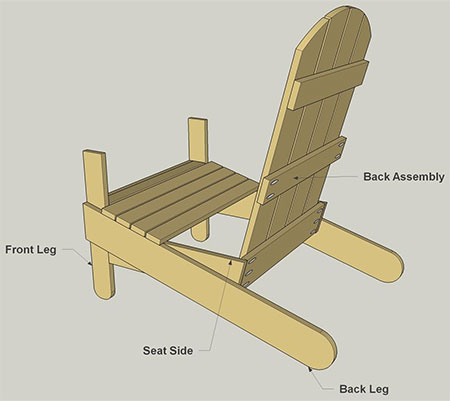
Adirondack garden chairs have a unique design; they have a curved back and set that make them super-comfortable to sit on. Adirondack chairs are also relatively easy to make and you can buy all the materials you need at any Builders Warehouse. The sizes of the PAR pine available is slightly different, so you will either need to trim the PAR pine to size or modify the dimensions to allow for our local sizes.
If you make the chairs using PAR pine and apply an exterior sealer on a regular basis, your Adirondack chairs will also be an affordable seating option for outdoors.
Once you have made your Adirondack chairs you need to apply a stain and/or sealer to protect them from our harsh climate. These chairs look great when stained in different colours and Rust-Oleum Ultimate Wood Stain has some fantastic colour options.
YOU WILL NEED:
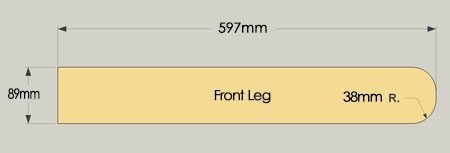
2 of 22 x 89 x 597mm PAR pine - Front Legs
2 of 22 x 140 x 1080mm PAR pine - Back Legs
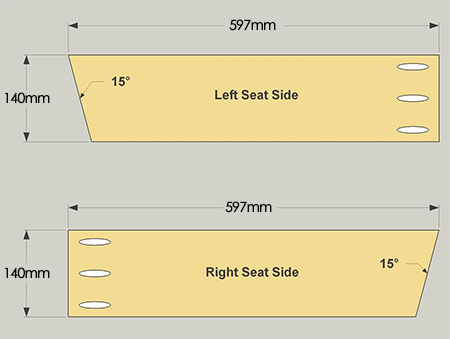
2 of 22 x 140 x 597mm PAR pine - Seat Sides
1 of 22 x 140 x 660mm PAR pine - Front Apron
1 of 22 x 64 x 660mm PAR pine - Front Seat Slat
8 of 22 x 64 x 749mm PAR pine - Seat Slats
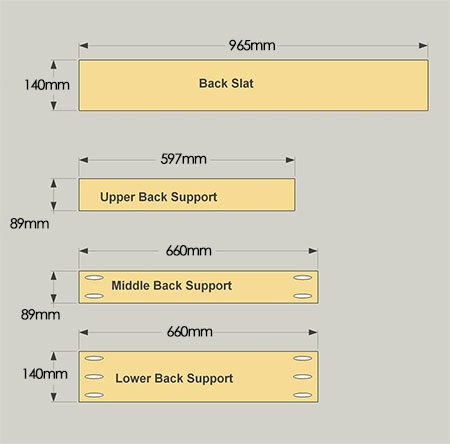
4 of 22 x 140 x 965mm PAR pine - Back Slats
1 of 22 x 89 x 597mm PAR pine - Upper Back Support
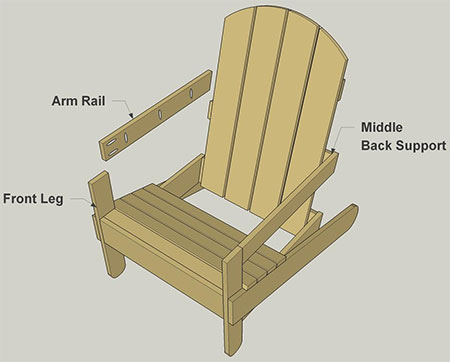
1 of 22 x 89 x 660mm PAR pine - Middle Back Support
1 of 22 x 140 x 660mm PAR pine - Lower Back Support
2 of 22 x 89 x 749mm PAR pine - Arm Rails
2 of 22 x 64 x 89mm PAR pine - Arm Braces
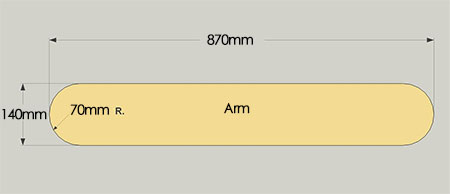
2 of 22 x 140 x 870mm PAR pine - Arms
32mm pocket-hole screws [110]
50mm nails [32]
Exterior wood glue
TOOLS:
Drill / Driver plus assorted bits
Kreg pocket-hole jig
Compass
Jigsaw
Clamps
Tape measure and pencil
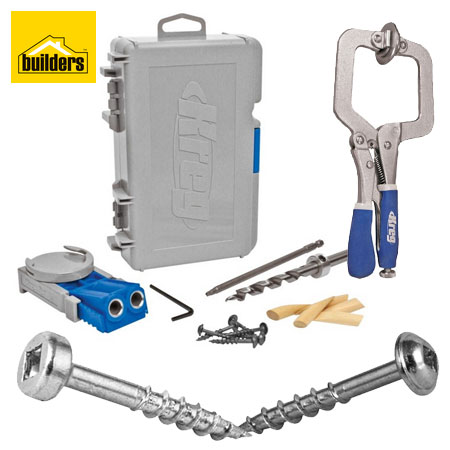
Buy a comprehensive selection of Kreg tools and accessories at Builders Warehouse
HERE'S HOW:
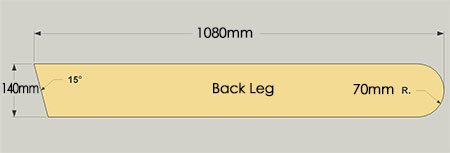
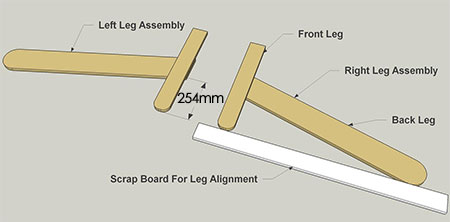
1. On both the Back Leg and Front Leg use a compass to draw the radium curves and cut out with a jigsaw. Sand the edges smooth.
GOOD TO KNOW: Have a piece of straight scrap board to use to align these sections.
2. Secure the Back Legs to the Front Legs. With the legs in position, secure with wood glue and screws through each Back Leg and into each Front Leg.
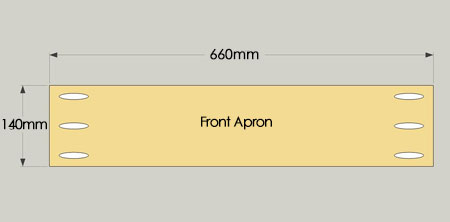
3. Drill pocket holes in the Front Apron, as shown below.
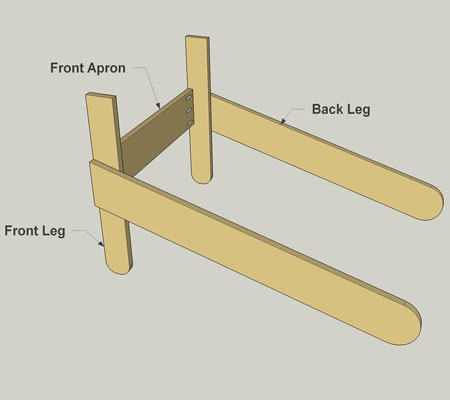
4. Fasten the Front Apron to one Leg Assembly using wood glue and screws.
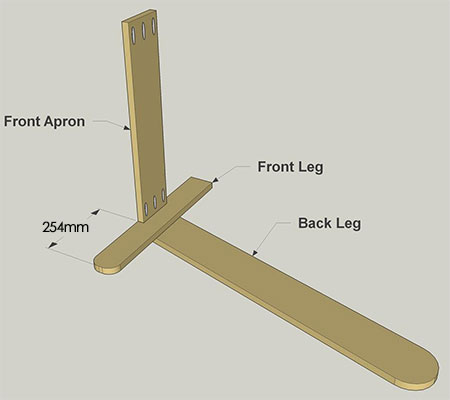
5. Repeat this process to secure the second Leg Assembly.
6. Drill pocket holes but only in the Front Seat Slat on underside, as shown below.
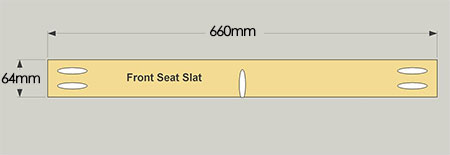
7. Fasten the Front Seat Slat to the Front Apron and the Front Legs with wood glue and screws - see below.
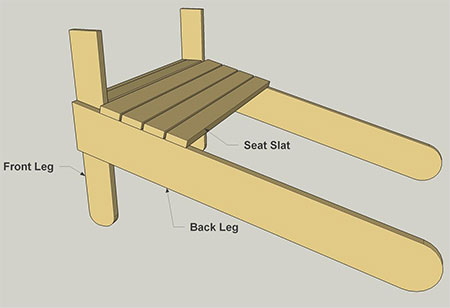
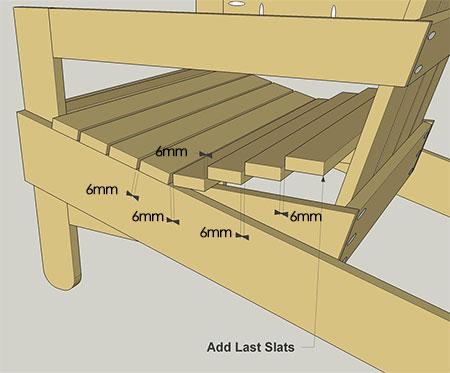
8. After adding the Front Seat Slat, you can add the first [4] Seat Slats. Place so one rests against the Front Leg - see diagram below. The other slats are spaced 6mm apart and are secured with nails.
9. On the [2] Seat Sides drill pocket-holes, as shown below.
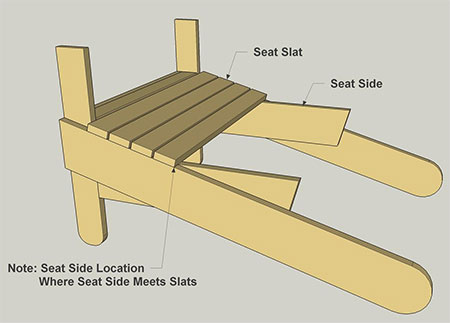
10. The position of each Seat Side is determined by placing the square end against the Front Leg, and then moving the Seat Side up until it touches the last one of the four Seat Slats that you already installed. Once in position, clamp while you secure to the Front Leg with screws. Now secure it to the Back Leg using screws.
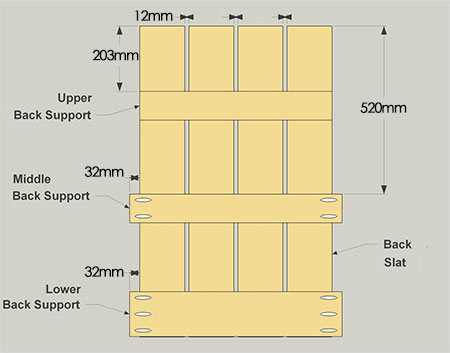
11. Drill pocket-holes in the Middle Back Support and Lower Back Support - see below.
12. Begin to assemble the Back Slats and the Back Supports with screws.
GOOD TO KNOW: Use [4] screws per Slat and Support location.
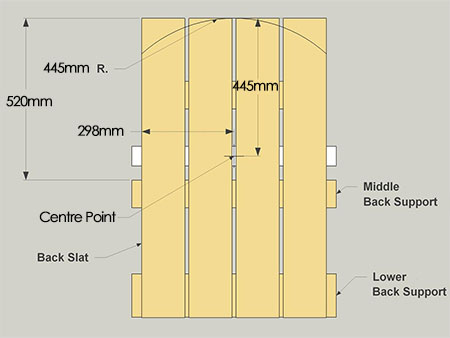
13. Clamp a piece of scrap board to the Back Assembly - as shown below - and set a nail at the centre. Use a string and pencil to mark the radius on the top end of the Back Slats. Cut out the curve with a jigsaw. Sand smooth.
14. Secure the Back Assembly to the seat sides with wood glue screws. Use a clamp to hold the Back Assembly firmly in place while you secure.
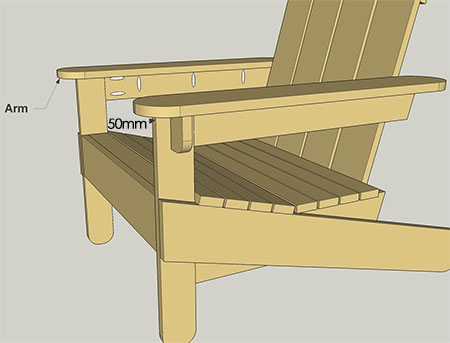
15. Drill pocket-holes as shown below.
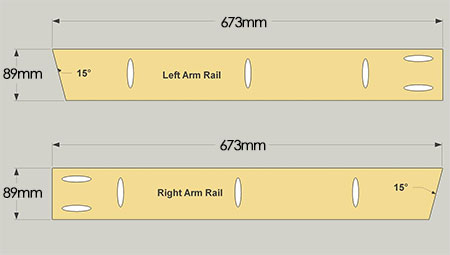
16. Fasten the Arm Rails to the Front Legs and the Middle Back Support with screws.
17. To attach the remaining [4] Seat Slats, space 6mm apart and nail them to the Seat Sides.
18. Use a jigsaw to cut the radius curve on both Arm Braces. Sand smooth and then drill a pocket hole in each Arm Brace to attach the Arm Braces to the Front Legs.
GOOD TO KNOW: Position the Braces and secure with screws through each Front Leg and into each Brace.

19. Draw and cut out the radius on each end of the Arms and sand smooth.
20. Fit both Arms as shown below and secure with screws. The Adirondack chair is now complete and ready for final sanding and stain and/or sealer.