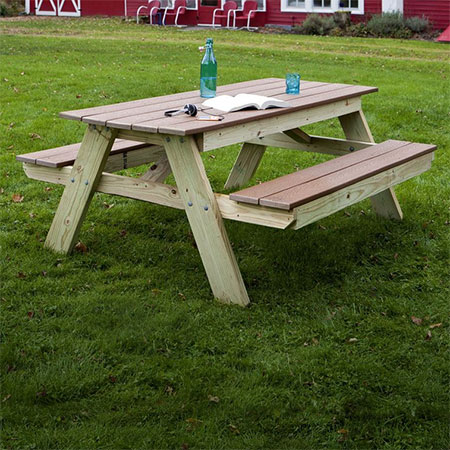
DIY 1-Piece Picnic Table and Benches
Many find ourselves with a bit more time on our hands, so why not make something like this 1-piece picnic table and benches - perfect for dining outdoors in the garden.
09/05/2020
popular mechanics
A dining table for use outdoors in the garden is a great addition for those who love to spend their free time outdoors. This 1-piece picnic table and benches will offer enough seating for the family or friends and it's an easy project that can be done in a weekend.
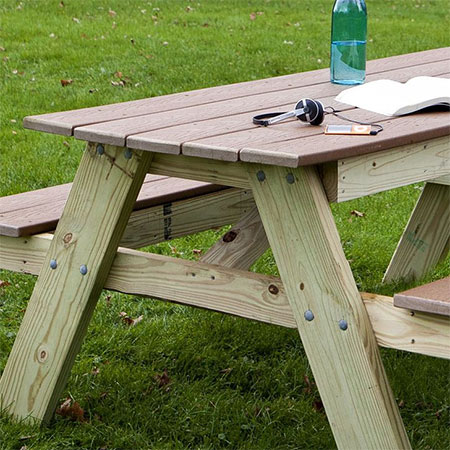
The base of the table and benches is made using PAR pine that you can buy at your local Builders Warehouse, while the table and bench seats are made using composite decking. You can substitute this with meranti or saligna for a durable surface that won't quickly degrade outdoors.
Summer might be over, but we are lucky enough to have beautiful weather throughout the year. If you need extra seating for outdoors in the garden, or like to entertain of a regular basis, this picnic table and benches is the perfect solution for entertaining. Fire up the braai and invite your friends around to catch up - after the lockdown of course!
Once you have completed the assembly, remember to apply an exterior-grade sealer to the entire project, and repeat this as and when required, to extend the lifespan of the set and prevent mould and fungus.
YOU WILL NEED:
See cutting list for materials below
75mm deck screws
10 x 100mm carriage bolts and washers
TOOLS:
Drill / Driver plus assorted bits
Mitre saw, table saw or jigsaw
10mm wrench (for carriage bolts)
Bar clamps or pipe clamps
Optional: Router and round-over bit
Tape measure and pencil
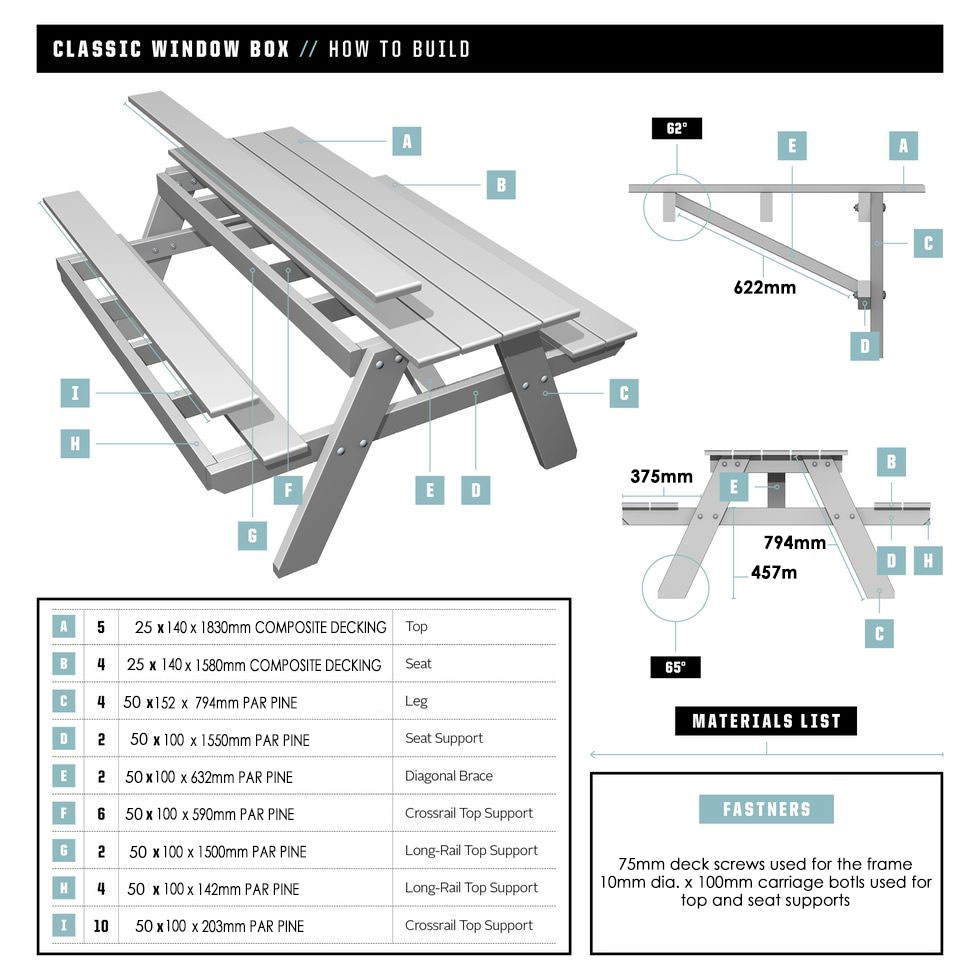
Cutting / Assembly Diagram
HERE'S HOW:
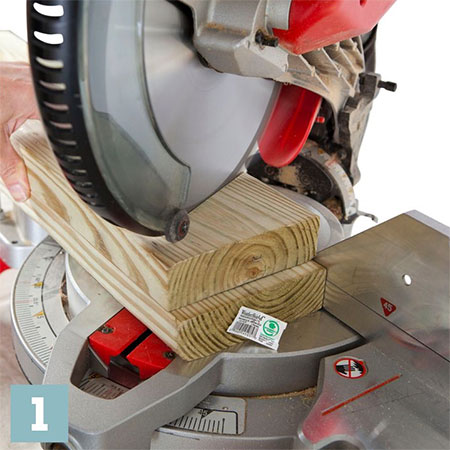
1. Use a mitre saw, table saw or jigsaw to cut all the required angles on the legs. You will see the angles required in the Cutting / Assembly Diagram above.
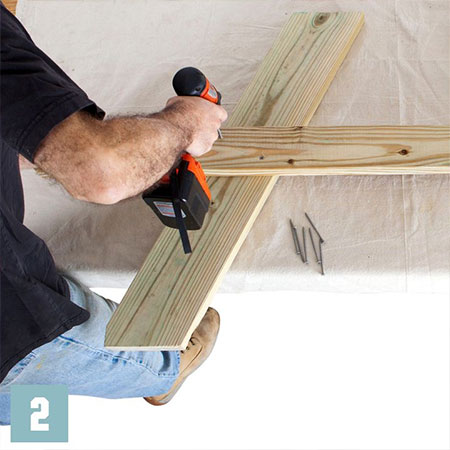
2. Place the legs on a flat, level surface and position the seat support over the leg to secure together with [2] screws. The top of the supports should be 457mm from the leg bottoms. Extend the ends of the supports by 375mm out from each leg.
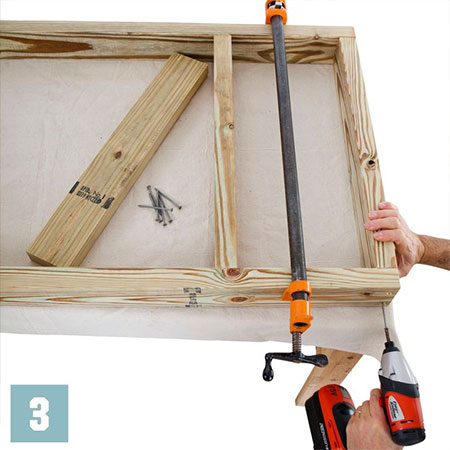
3. To assemble the top frame, have a bar or pipe clamp handy to hold the pieces firmly in position.
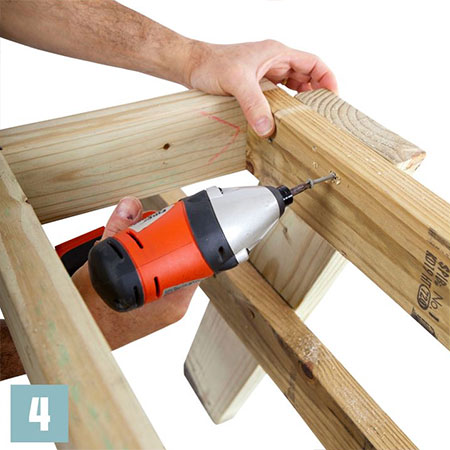
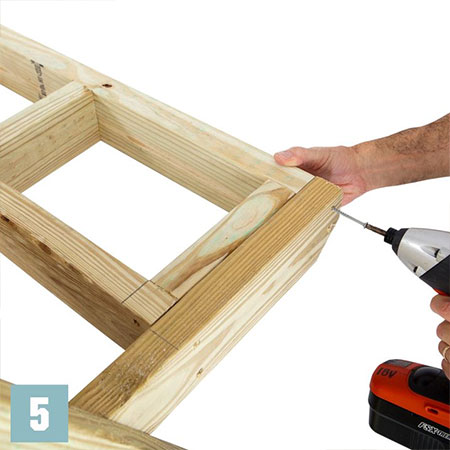
4. Secure the top frame to the legs. You might be a bit restricted for space here, so it's handy to have a cordless screwdriver to fit into the available space.
5. Now you can secure the seat frame to the seat support, making sure that the frame is flush with the seat support to ensure seat planks will seat evenly.
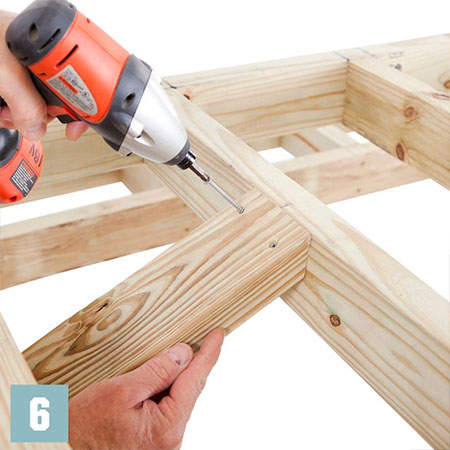
6. Attach the cross brace and the hard work is done.
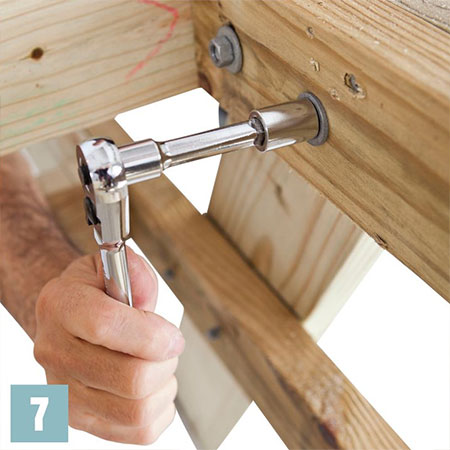
7. Use a 10mm wood bit to drill holes for the bolts and fit these before tightening up.
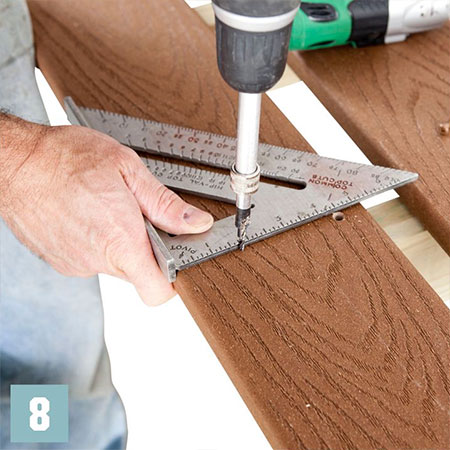
8. Pre-drill pilot holes in the composite decking planks. You can check the alignment with a square.
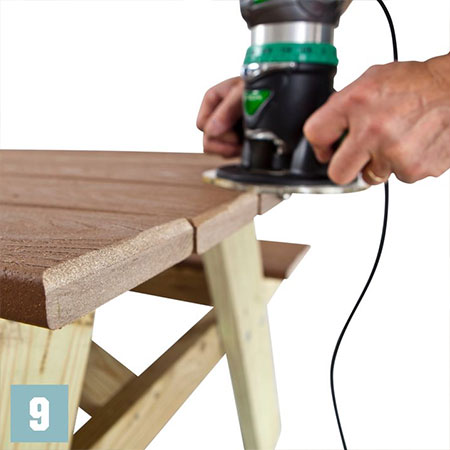
9. As an optional step, you can use a router to finish off the edges of the decking.