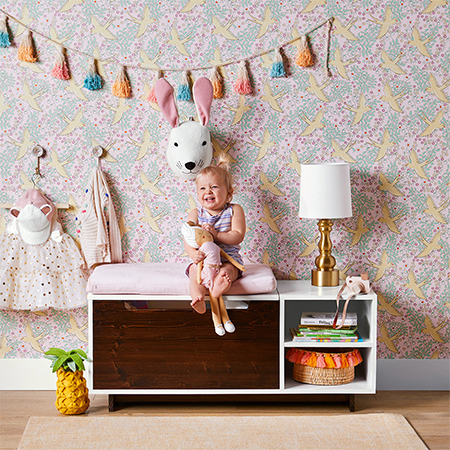
Build a Seat That is also a Toy Box
Children's bedrooms need seating and storage, and this DIY toy box serves both purposes.
30/01/2022
jason donelly - lacey howard / better homes and gardens
Dual-purpose furniture is the way to go if a room is short on space and this seating bench is also a toy box and is perfect for storing toys to keep a bedroom neat and tidy. The seat plus toy box is easy to make and you will find everything you need to make it at your nearest Builders store, plus you can have everything cut to size for quick assembly.
YOU WILL NEED:
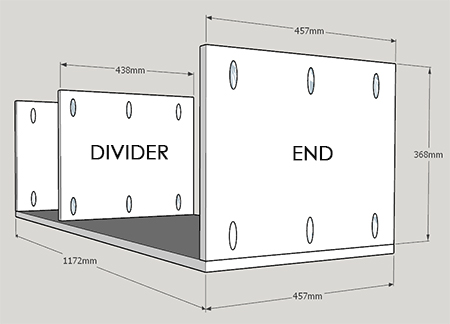
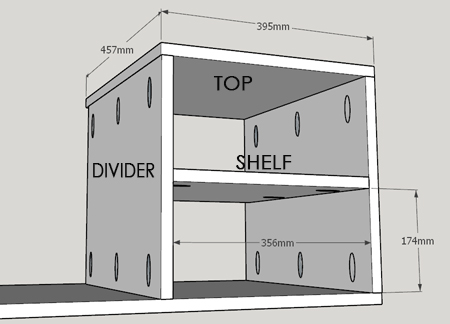
1 of 19 x 457 x 776mm plywood - Lid
1
of 19 x 457 x 395mm plywood - Cubby Top
1 of
19 x 457 x 1172mm plywood - Bottom
2 of
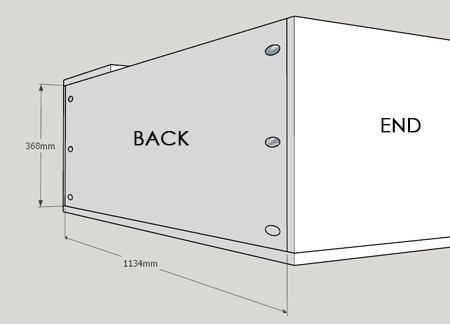
19 x 457 x 368mm plywood - Ends
1 of 19 x
438 x 368mm plywood - Divider
1 of 19 x
438 x 356mm plywood - Shelf
1 of 19 x
368 x 1134mm plywood - Back
1 of 25 x
419 x 38 plywood - Inside Cleat
1 of 19 x
368 x 756mm laminated pine shelving - Front
Panel
2 of 19 x 89 x 356mm laminated pine
shelving - Feet
2 of 19 x 64 x 978mm
laminated pine shelving - Apron
32mm coarse-thread screws
Pocket-hole plugs
Wood glue
Butt hinges, 2
Safety hinges, 2
Paint and supplies to finish
Treat your loved one this Valentine's Day and give them the gift of DIY.

TOOLS:
Drill plus assorted bits
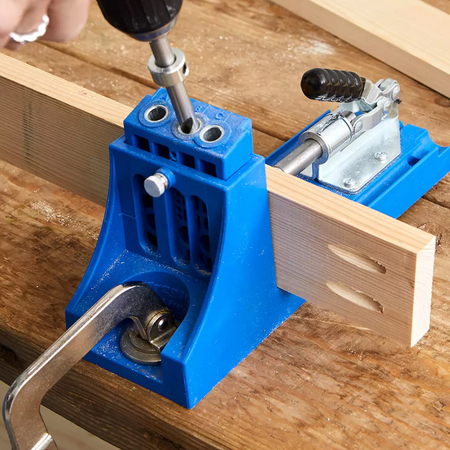
Kreg pocket-hole jig
Orbital sander plus assorted sanding pads
Jigsaw plus fine-toothed blade for cutting plywood
Wood chisel
Clamps
Tape measure and pencil
Safety gear
HERE'S HOW:
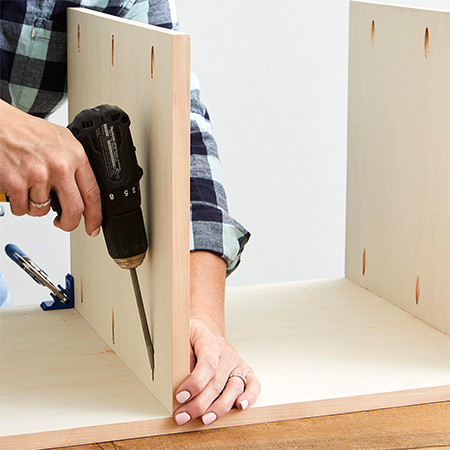
Step 1
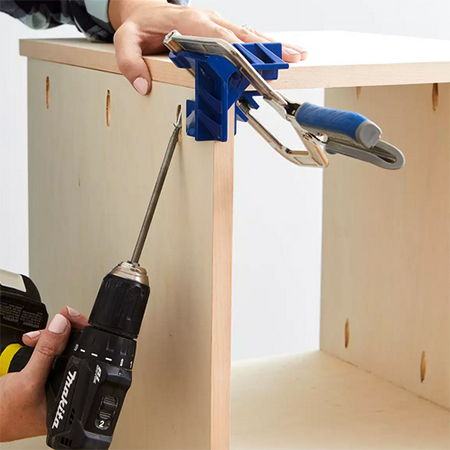
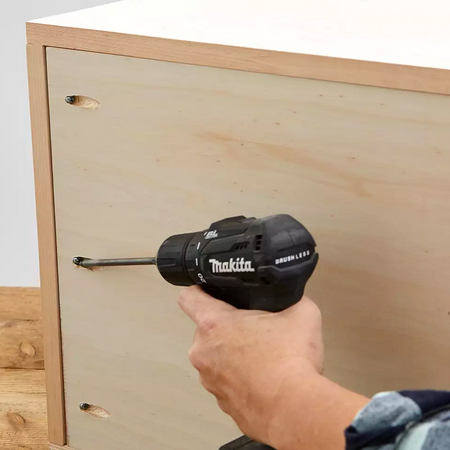
Drill [3] pocket-holes in the Ends and Divider, along the top and bottom. Place the Ends and Divider on the Bottom section and secure in place with wood glue and screws
GOOD TO KNOW: The Divider is slightly narrower than the Ends to allow for fitting the Back in place.
Step 2
Squeeze a bead of wood glue along the top edges of the Divider and End. Place the Cubby Top in position over the Divider and End and drive screws through the [3] pocket-holes in these pieces.
GOOD TO KNOW: Using clamps to hold the sections firmly in place gives you extra-strong joints.
Step 3
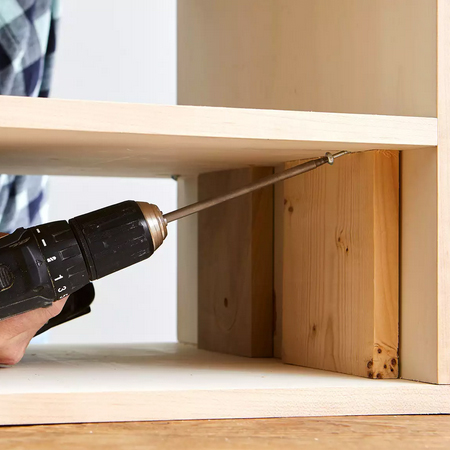
Drill [2] pocket-holes at both ends of the Shelf and use wood glue and screws to secure the shelf inside the cubby. Position the Shelf 174mm up from the bottom. You can adjust this if required.
GOOD TO KNOW: If you have scraps of wood, you can insert these to hold the shelf in place as you secure.
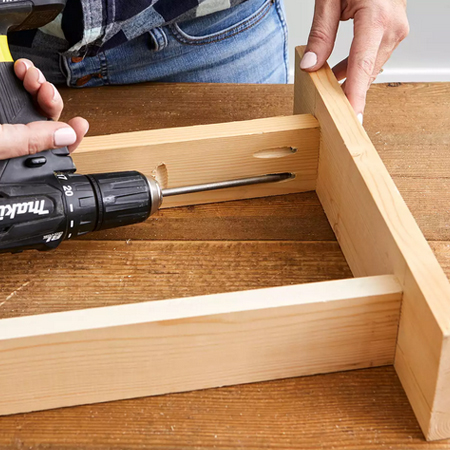
Step 4
On the Back drill [3] pocket-holes at either end. Use wood glue and screws to secure these onto the back of the frame, as shown below.
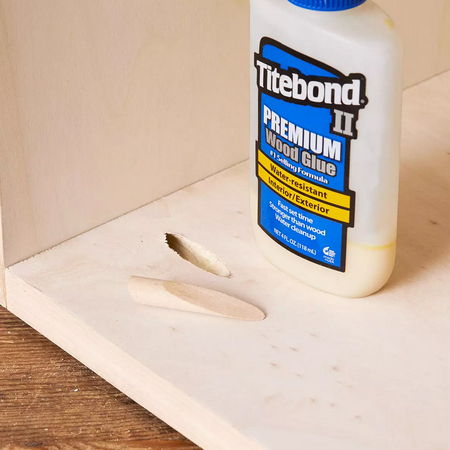
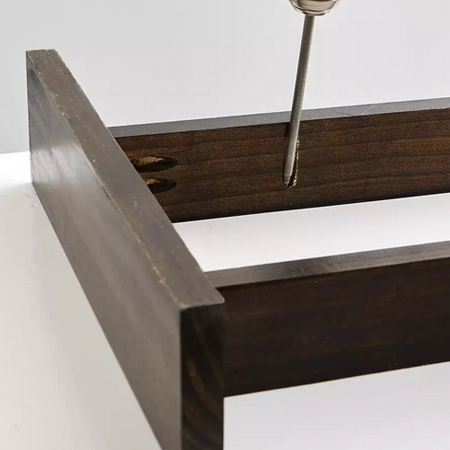
Step 5 - OPTIONAL
To cover up the drilled pocket-holes, use readymade plugs, or if you have a Kreg Plug Cutter, you can make your own plugs. Secure these into the holes with wood filler.
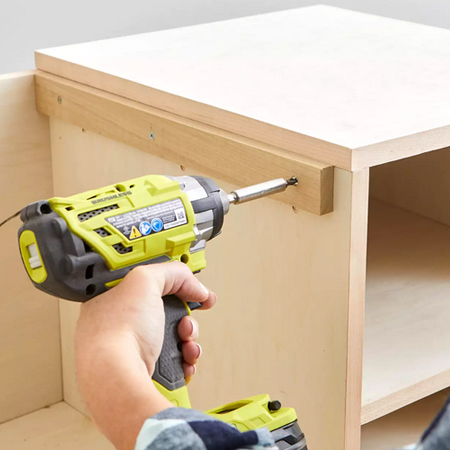
Step 6
Fit the Inside cleat to the side of the cubby so that it is flush with the top edge of the Divider. This will provide additional support to the top section of the toy box. DO use a countersink bit so that the screw heads are out of harm's way.
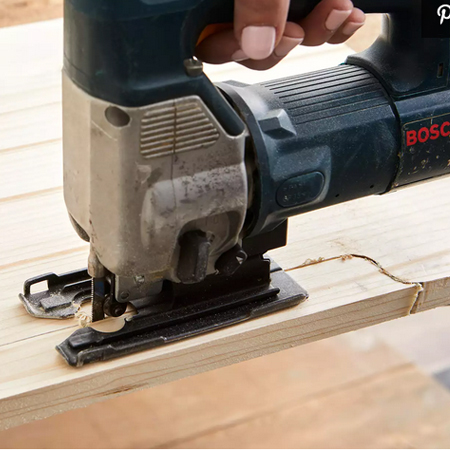
Step 7
Take the Front Panel and draw a shape as per the one shown below. Drill [3] pocket-holes along the sides of the panel for securing onto the End and Divider later. Before mounting this panel, you have time to stain or paint in your choice of finish.
GOOD TO KNOW: The opening in the Front Panel prevents little fingers from being trapped when opening or closing the toy box lid.
Step 8
The base is assembled using wood glue and screws. You will need to drill [2] pocket-holes at both ends of the Aprons and also [2] pocket-holes along the top edges of these pieces.
Step 9
Inset the Apron equally spaced along the Feet and secure in place with wood glue and screws.
Step 10
Stain or paint the base assembly (Aprons and Feet) before securing to the bottom of the toy box with wood glue and screws.
Step 11
Now it is time to secure the Front Panel using wood glue and screws, as can be seen below.

Step 12
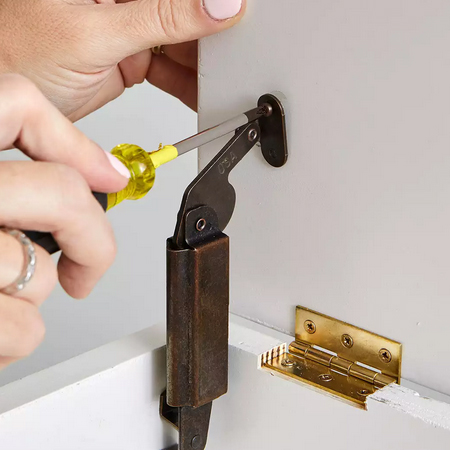
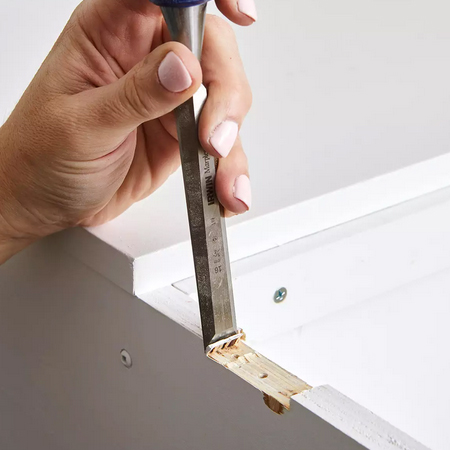
For recessed hinges that allow the top lid to stay flush, you can use a wood chisel to create a rebate for the hinges.
Step 13
Finish off by adding a hinge that will hold the lid up when open and not fall on little fingers. Builders stores have a selection of options for this.