Expert Advice on Fixing Leaks in a Tiled Roof
My roof is leaking but how do I fix this and what products should I use for a tiled roof?
17/06/2023
Just like the foundation protects the structure and integrity of a house, the roof protects a house from damage from above. Any damage to the roof structure can become an expensive repair project for the homeowner.
One of the most common failures when it comes to a roof is that the roof capping along the line of a roof can become loose and allow rainwater to gain access into the home and causing expensive damage but other causes for a leaking roof such as cracks or deteriorating roof flashing. The best time to tackle any roof repairs that need to be undertaken, or perform routine maintenance, is in the dry season when the chance of rain is minimal. The last thing you want to happen is a sudden downpour while you are working on the roof.
We consulted waterproofing experts, Sika South Africa, to provide us with essential information on what you can do if your roof has a leak.
First off, any suspected damage should be attended to as quickly as possible, which is why regular inspections of a roof need to be done. If you are going to be doing this yourself, which you can do, make sure that you have all the supplies required as well as the tools you will need to do the job and ensure your own safety by using a stepladder and harness.
YOU WILL NEED:
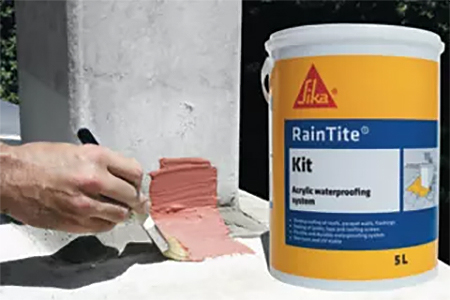
Sika RainTite Kit and Membrane (incl with 5 litre product)
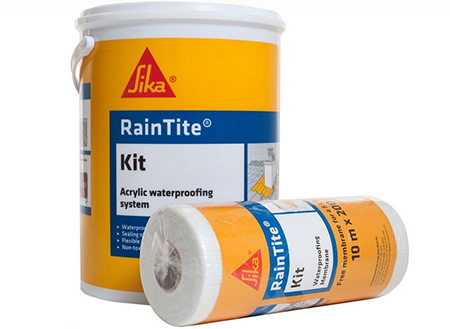
Find the Sika Rain Tite Kit and Membrane at your nearest Builders store or shop online at builders.co.za.
TOOLS:
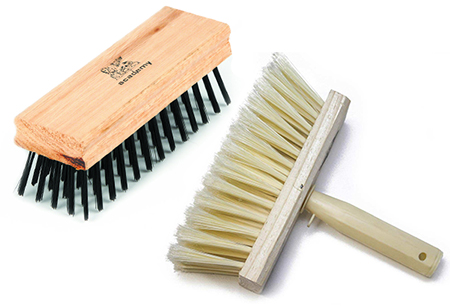
Academy Wire brush Block brush
Whitewashing brush
Wide paintbrush or paint roller
Mechanical mixer with paddle**
**You can use a 500W or higher drill with paint stirrer
Scissors
Gloves
Dust Mask
Stepladder and safety harness
Dress appropriately with arms and legs covered. Wear footwear with rubber soles to prevent slipping whilst working on a roof.
HERE'S HOW:
This roof repair project should only be undertaken when dry weather is reported as the repaired section needs to be protected until dry.
Step 1
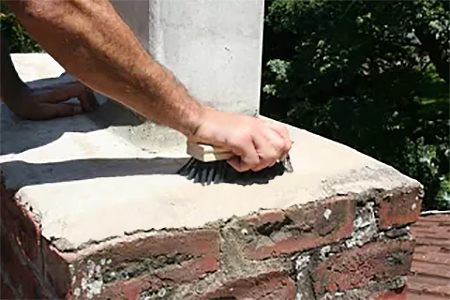
Before application of Sika Rain Tite, make sure that all the surfaces where the repair takes place are clean, sound, and dry. Use a wire block brush to remove any loose debris and materials from the surrounding area and brush clean with a whitewashing brush. Any metal surfaces must be free of rust and you can pre-treat these with red etch primer prior to the application of the RainTite kit and membrane.
Where repairs need to be done prior to tackling the repair, use an appropriate Sika product that can be found at Builders or visit zaf.sika.com for the full list of products available.
Step 2
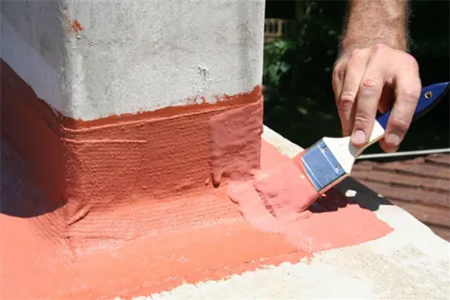
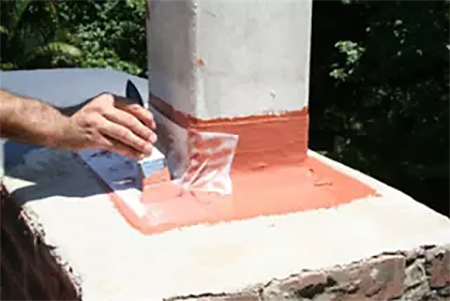
When you apply the first coat of the Sika RainTite Kit ensure that you apply a liberal base coat of the waterproofing compound using either a paintbrush or paint roller and make sure that the entire affected area is well coated with product.
Step 3
Working while the waterproofing compound is still wet, cut off a piece of the membrane and embed this into the waterproofing compound using your fingers to smooth out air pockets and wrinkles. You need to make sure that where the membrane overlaps other sections it does so by a minimum of 50mm.
Step 4
Now it is time to apply Sika RainTite waterproofing compound over the top of the membrane and this should be applied immediately after embedding the membrane so that the base coat is still wet and the membrane becomes saturated on both sides. Apply a final coat of waterproofing compound once the previous coat is dry to touch.