
How To Give Furniture An Ombré Paint Effect
It might not be as trendy as it once was, but using an ombré paint effect is still a great alternative for painting furniture if you want to add colour.
08/06/2021
furniturechoice.co.uk
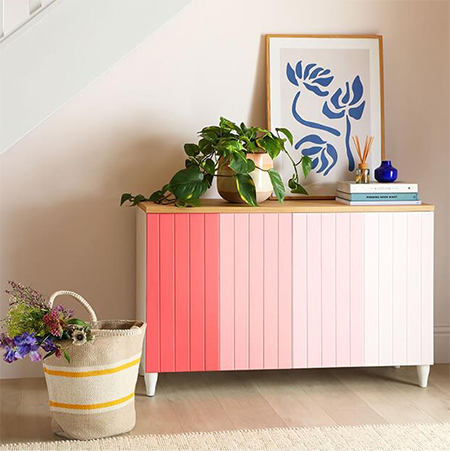
While using the ombré paint technique is not as trendy as it was a year or so back, it is still a great way to transform a plain piece of furniture into an eye-catching statement piece. I think this ombré sideboard would look great in a little girl's bedroom or even your own bedroom if you paint it in colours that complement the room decor.
WHAT IS AN OMBRÉ PAINT EFFECT?
An ombré paint effect is a way to use a single, dark colour and transition across a piece of furniture to a lighter colour. It is a great way of bringing dramatic effect to furniture pieces and is a fairly easy process that gives plain furniture eye-catching detail. Use an ombré paint effect if you want to create a statement piece for display for as a focal point in a room.
If you want to replicate the ombre sideboard shown above, you are going to need a few supplies and materials.
YOU WILL NEED:
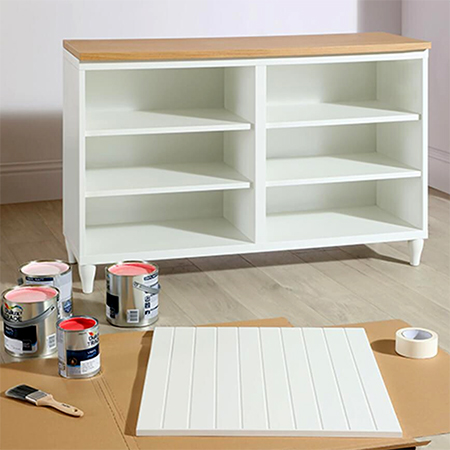
A suitable piece of furniture
Acrylic base coat in white
Acrylic paint in 4 shades* taken from the same paint swatch card
*Alternatively, you can buy a darker shade and mix it with white paint to achieve the effect
Paintbrushes
Painter's tape, wide
Dropcloth or large piece of cardboard
HERE'S HOW:
Preparation
Remove all the doors and hardware.
Step 1
If the furniture is not already painted and you want a contrasting effect, sand with 120-grit sandpaper and then paint the piece white. Apply 2 to 3 coats for complete coverage and allow drying time between coats.
Step 2
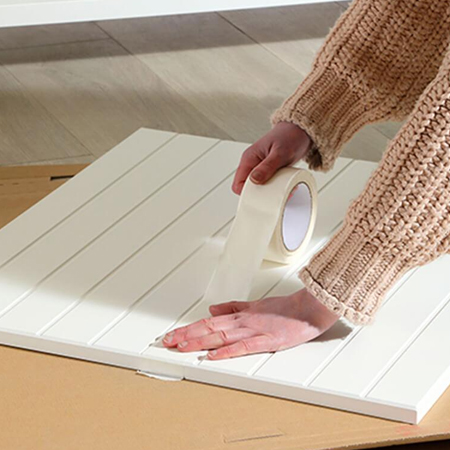
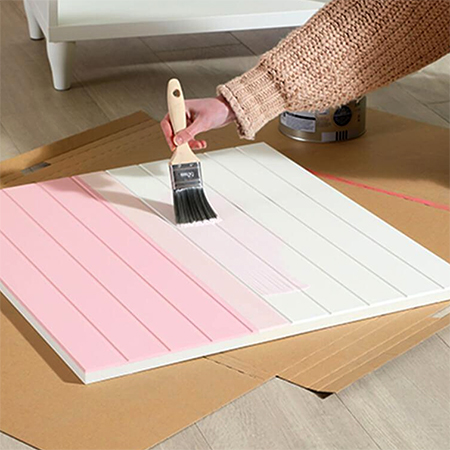
Place all the doors on a flat surface to mark out four equal sections across the span of all the doors using painter's tape. Before the next step, you need to assign four colours going from dark to light for the masked-off sections. If you are using a darker shade and adding white, you still need to assign a hue to each section. Also, apply painter's tape around the edges of the door if you are not painting this as well.
Step 3
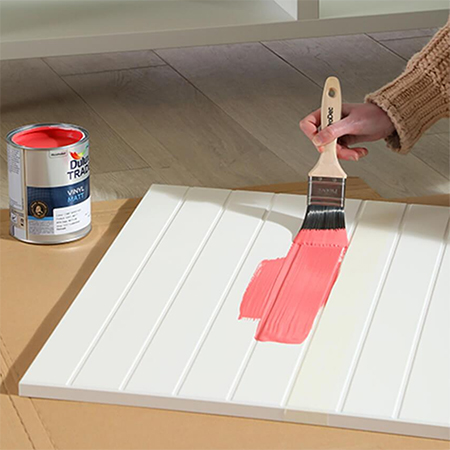
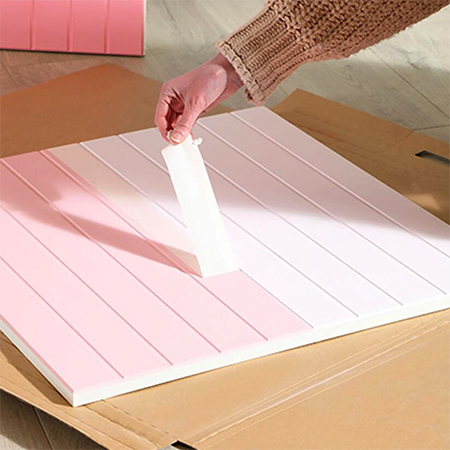
Starting with the first masked-off section, apply the darker hue and let this dry. When completely dry you can remove the painter's tape for the first section that is now painted.
Step 4
Repeat the painting process using lighter and lighter colours until you reach the end of the masked-off areas. Remove the painter's tape and leave it to dry.
Step 5
With all the painter's tape removed you can now re-attach the hardware and fit the doors back onto the cabinet frame.
GOOD TO KNOW:
If you prefer to blend or fade the colours into each other for a smoother ombré effect, add Scumble Glaze to the paint to extend the drying time and allow you to use your paintbrush to blend the two hues into each other.