
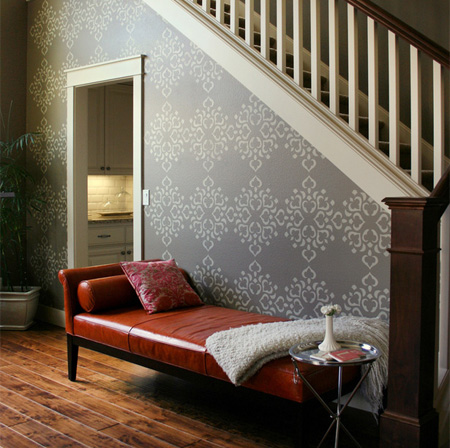
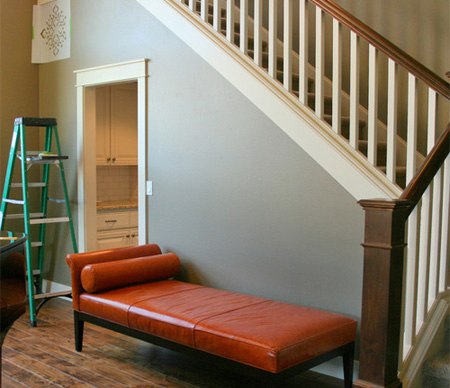
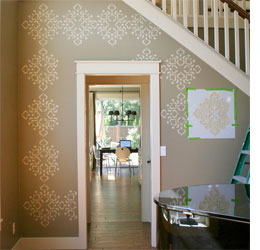
Create a feature wall with stencils
Introduce a dramatic focal wall into a living room by stenciling a wall with a creative pattern.
YOU WILL NEED:
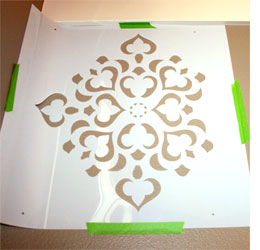
Stencil - you can easily make your own design (see bottom of page)
Stencil brush
Masking tape
Tape measure and pencil
Prominent Paints Premium Matt - base colour
Prominent Paints Premium Sheen - accent colour
Roll of paper towels
Spirit level
HERE'S HOW:
1. Prepare the work area
Place a drop cloth down to protect floors and use masking tape around trim and fittings.
2. Apply base colour
Start off by painting the wall in the base colour using a paint roller and brush for around the edges. Allow this coat to dry completely.
3. Determine starting point
Determine design layout and position stencil on the wall at starting point. It is best to start in a corner - in this case we started at the top left hand side of the wall. Attach the stencil using a few strips of masking tape.
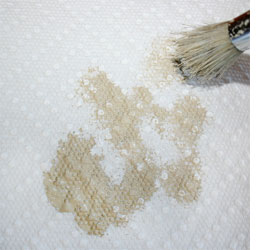
4. Paint stencil design
Paint the design onto the wall with a stencil brush using dry brush method. This is done by dipping the tips of the bristles in to the paint and then removing excess paint by dabbing the brush on a paper towel. Too much paint and you will end up with soggy edges on the wall - rather have a brush that is too dry than too wet.
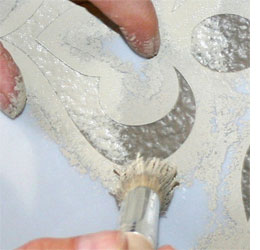
5. Apply the accent paint colour using a stippling method, which is dabbing the brush lightly against stencil openings. Apply pressure with your fingertips to stencil around openings while stippling to ensure sharp paint lines. Don't worry if the paint is too light, it will darken as it dries.
DIY Tip:
Too much pressure at this point will lead to paint seeping under stencil.

6. If you have a bought stencil with registration marks, move stencil by lining up stencil registration points to continue design. If you are using a made stencil, visually aligh the stencil to repeat the design. Tape stencil in place and repeat painting process. Tip: Use a level to check stencil tile placement to ensure design is painted evenly.
Continue painting stencil design, mark registration points and move stencil across and down wall until desired area is covered with design.
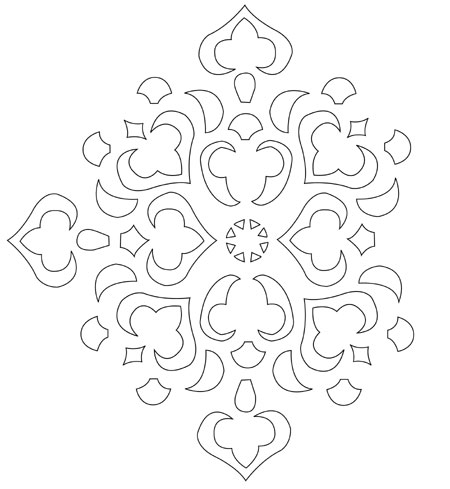
Print out and enlarge this design for your stencil or click here to download the PDF.
via isobella and max rooms