
How to Paint Tongue and Groove Pine Panelling
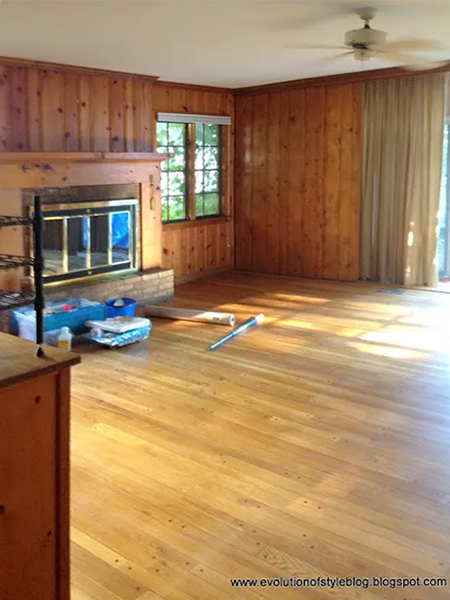
While pine tongue and groove panelling was fashionable in the seventies, now it's an eyesore in many homes - a legacy of what not to put on walls.
evolutionofstyleblog.com
OK, it might look very nice in a log home, country cottage or such, but tongue and groove panelling makes a room feel dark and claustrophic - so let's lighten it up!

evolutionofstyleblog.com
Painting over tongue and groove pine panelling is not a difficult project, and with the right supplies, you can easily tackle this over a weekend for an average size room. Once you have done the preparation, the rest is easy, and it makes a big difference to the look and feel of a room.
YOU WILL NEED:
Wood filler
120- and 240-git sandpaper
Orbital sander
Quality paint brushes
Long foam rollers
Paint tray
Drop cloths
Masking tape
Wood Primer
Plascon Double Velvet
HERE'S HOW:
Step 1
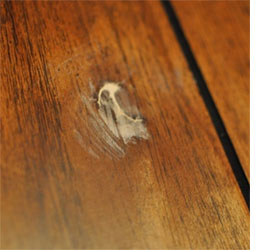
Preparation is the most important part of this project. If you don't spend time or skip out the correct preparation you will end up with a poor result. Wash the panelling with Sugar Soap and rinse well. Once dry it's time to fill in any holes in the wood with wood filler. Leave this to dry.
Step 2
Sand all the panelling with 120- and then 240-grit sandpaper. A Bosch orbital sander makes light work of this task, plus it has an integral micro filter that cuts down on dust. However, open windows and don a face mask while you sand - who knows what's previously been applied to the panelling. Wipe clean with a slightly damp cloth to remove all traces of dust.
Step 3
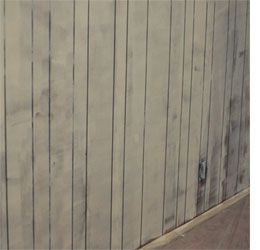
Use a thin paint brush to apply primer to all the grooves in the panelling. As you apply with the paint brush, hold a foam roller in your other hand so that you can go over the brushed areas as you work. This ensures a nice smooth finish. Now you can use a foam roller to apply paint over the panelling.
Try to keep a consistently smooth finish and go over excess paint or ridges to even out. You will definitely need to apply two coats of Plascon Double Velvet, and may need to apply a third coat depending upon how dark the panelling is. Be sure to allow drying time before applying each new coat.
DIY Tips:
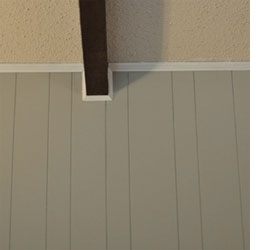
Be sure to use masking tape to protect any edges that are not going to be painted. Adding a thin trim at the ceiling adds a finishing touch, especially when painted in a brilliant, pure white.