
Have Fun Spray Painting Your Rooms
If you need to spray paint rooms and are a beginner, these tips will help you avoid making mistakes and creating a mess of it.
11/10/2019
Do you remember the story of Tom Sawyer painting the fence as a punishment for prior mischief and how he got his friends to do the job for him? Well, I am sure that if Tom had a spray paint machine, the job would hardly qualify as a punishment and I doubt if he would have offered his friends a chance at it.
Spray painting your rooms can be fun, provided you know how to do it. However, if you need to spray paint your rooms and are a beginner, these tips will help you avoid making mistakes and creating a mess of it. You could always get a professional to do the job, but then it wouldn’t be fun, would it?
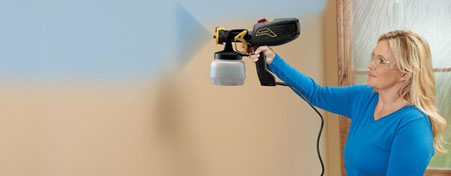
Different Sprayers and Their Use
Compressed Air – While the compressed air sprayer is the most popular type used by people, running the sprayer causes disturbance due to the loud noise created by its mechanics. The sprayer works by pumping highly compressed air through a hose into the spray can. It takes a bit of practice to get used to handling it, otherwise, you can end up wasting a lot of paint.
Airless Sprayer – Similar to the compressed air sprayer but without the air component. While the nozzle can be adjusted to control the quantity and flow of paint, it requires consistent hand motion to ensure even paint coverage.
HVLP sprayer – HVLP stands for high-volume low-pressure and this sprayer has been gaining in popularity. Unlike the other two, it is easier to control when painting. However, the coverage is not as good, and hence, it is used for detailing and finishing jobs.
So which sprayer should you go for? When it comes to spray painting projects, Brett Patterson from Able Sales (https://www.ablesales.com.au/) says that you could use any air compressor. Eventually, it will boil down to your specific requirements, expertise with the sprayer, and budget.
Before You Start Painting
You may be eager to get on with the painting; however, there are a few things that need to be taken care of before you start the sprayer.
Remove the furniture – The first step before you start painting is to remove all the furniture out of the room. You could cover the furniture, however, that could cramp you for space to move around freely. Cover anything that is nailed or fixed either on the walls or the floor. This will ensure that there are no paint splashes and spots on the furniture.
Electrical sockets – Paint getting into power sockets can cause further damage, other than blocking the socket itself. Apply sticky tape over the socket or cover the entire panel with plastic secured with sticky tape.
Don’t forget the floor – Unless you plan to paint the floor in the same color, it is advisable to cover the floor with a plastic sheet.
Get a ladder – However tempting it may be,
using the spray like a gun is a bad idea.
Shooting pain to the ceiling or opposite wall
will make a mess of the job, not to mention the
floor as well. Get yourself a ladder or rig up a
scaffolding to do a good job.
Cover your
eyes, nose, and mouth – Paint fumes are toxic
and it is always a good idea to get a pair of
eyeglasses and a respirator.
Painting With a Sprayer
Now that you have prepped up the room for painting, it is time to start the job itself. Here are some tips that will help.
Practice before you start – Paint sprayer nozzles can be adjusted to control the quantity of paint, however, you also need to control the spray pattern to avoid wastage and create a fine finish. Remember, for the coverage set the sprayer to maximum pressure and at its lowest for precision painting. It would be a good idea to practice on a disposable piece of cardboard to get the pattern right before you start with the walls.
Ensure even coverage – The best way to ensure even coverage of paint is to maintain a consistent distance between the wall and the sprayer. Move the sprayer with consistent speed and keep it at a perpendicular angle.
Avoid wasting material – Always remember to first move the sprayer and then pull the trigger. This will ensure that you do not end up wasting too much paint at the same spot.
Painting the corners – To avoid wasting
material, aim the nozzle at the corner and then
move the sprayer to the adjacent wall in a
single stroke. Again, fold cardboard and
practice before you start with the corner.
Light up the area – It is very easy to miss out
on a few spots if the area is not brightly lit.
Using a work light to illuminate the areas being
painted will ensure that there are no unpainted
spots.
Check the weather – While the weather outside will not affect the painting inside in a large way, yet if it has/or is raining, the humidity will affect the paint and cause bubbling once it dries. It would be a better idea to put off the painting job as long as you have humid weather.
After the painting is done
Be patient – You have done a good job and are eager to see the finished look. However, be patient and wait for the paint to dry before you start removing tapes covering the trim. Doing so early will spoil the edges as the wet paint might spread.
Clean up – Clean up all paint spots after you
finish. Clean the sprayer properly, following
the instructions from the manufacturers. Before
you start cleaning the sprayer, make sure that
the power cord is removed from the socket. Flush
out any leftover paint keeping the pressure at
its lowest. Remember to clean the filter before
you store away the sprayer.
Have fun spray
painting – Enjoy spray painting your rooms
following the tips given above. You will soon
find yourself handling the job like a
professional. Painting with sprayers is very
efficient and quick and I am sure that painting
the rooms will not seem like punishment anymore.