
How to Disguise Disaster Walls
I have stayed in quite a few houses that have walls that are plastered badly, and this article looks at how you can use a sponge paint effect to disguise disaster walls.
17/02/2020
https://pinterest.com - 182114378670696031/
If your walls are looking a bit rough, perhaps a badly applied plaster finish, or maybe you have filled too many nail holes, but whatever the reason, the paint technique below is an easy way to disguise these disaster walls.
The method of using a sea sponge to decorate walls has been around for a long time. The sponge painting technique can be used to decorate a plain wall using two or more colours, but you can also use this paint technique to disguise walls with lots of flaws - or badly finished plaster.
Before you start painting the walls in your home, you may want to practice a bit on some scrap board. Try using two different paint colours until you are happy with the desired effect and then you can transfer this onto walls in your home.
Sponge Paint to Disguise Faults
Want to disguise an ugly wall or two? Grab your painting equipment and find out how easy it is to do sponge painting on any wall in a home.
YOU WILL NEED:
Acrylic paint, preferably low-sheen or matt, in *two or more colours
Paint trays for how many colours you will use
Sea or synthetic sea sponge
Plenty of rags
Painter's tape
Newspaper
TOOLS:
Paintbrushes in assorted sizes
Paint roller
Drop cloths to protect floors
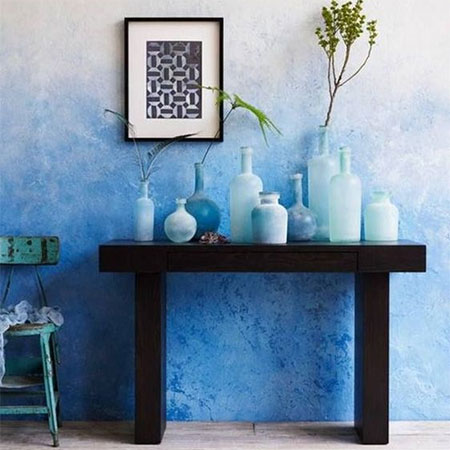
GOOD TO KNOW: *For maximum depth, only choose your accent colours from the same paint swatch - using lighter or darker hues. This is particularly important if you want a gradient shading or ombre paint effect as shown in the main image above or the one below.

HERE'S HOW:
1. Before you start painting, clear as much furniture out of the room as possible and put down drop cloths. Also use painter's tape to protect any fittings or fixtures that cannot be removed, as well as window and door frames and skirtings.
2. Do any repairs to walls, patching holes, filling cracks, etc., so that these have time to dry and be sanded before you begin.
3. If the wall/s was previously painted in a dark paint colour, apply a light primer colour over the top of this with a paint roller and paintbrushes and leave to dry. You don't want a dark colour showing through that may spoil the finished effect.
4. To start on the walls, first apply your base coat colour with a paintbrush around trim, windows, doors and any taped off fittings and fixtures. Now you can paint the entire wall with the base coat colour and a paint roller.
5. Pour some of the accent colour into a paint tray. It is far better to decant your paint into a tray so that you can keep the paint tin closed and prevent the paint from thickening or drying out.
GOOD TO KNOW: Have some newspaper handy so that you can dab off excess paint.
https://pinterest.com - 835136324630600528/
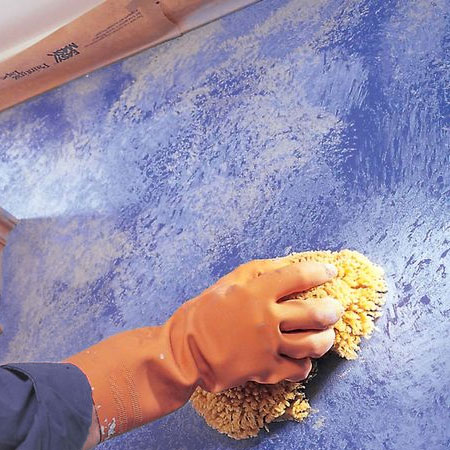
6. Wet the sea sponge so that it is slightly damp and then dip this into the accent paint colour. Dab off any excess on the newspaper and then directly apply to the wall. Lightly dab the wall with the sea sponge in a random pattern, overlapping to fill in any large gaps. Work in small sections at a time, dabbing and blotting as you move over the wall, dipping the sponge into the paint tray as and when required.
GOOD TO KNOW: As you work, take the time to step back and view your work to make sure it is looking how you want it to look. If not, fix this while the paint is still wet.
7. Continue dabbing paint onto the wall until the entire wall or section is covered. If you are adding more than one accent colour, make sure the sponged areas contain random layers of the paint colours you are using.