Change the look of a chest of drawers
In this project you will see how easy it is to totally change the look of a chest of drawers using paint and hardware.
11/07/2018
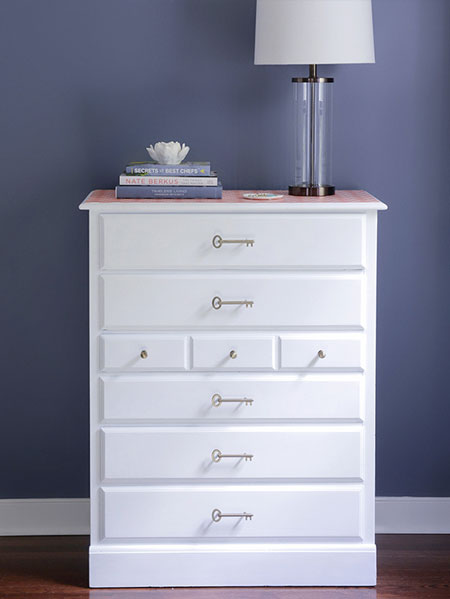
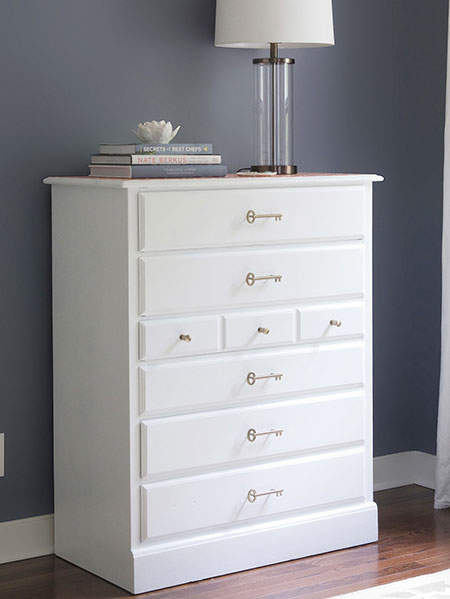
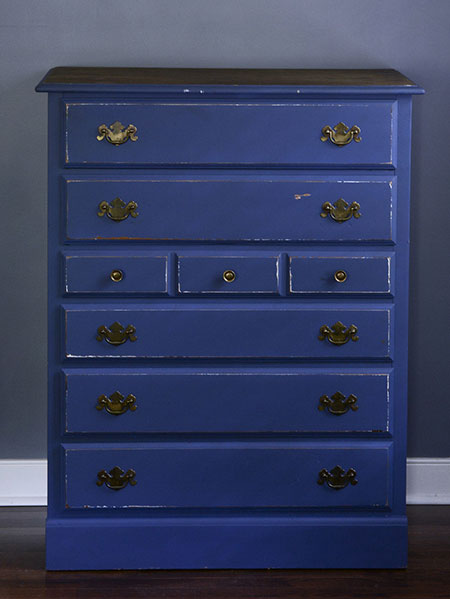
It's easy to transform any piece of furniture with paint and new hardware, and for even more visual appearance you can use a stencil to add an interesting or colourful pattern to your painted piece, like the colourful stencilled top on this chest of drawers.
Changing the hardware on an old piece of furniture instantly gives it a fresh, new look, so pop in to your nearest Builders store to shop the extensive range of affordable handles and knobs to transform furniture for your home.
Perhaps you have previously painted a chest of drawers to fit in with your decor, but now want to give your living spaces a new look. It's easy to paint over previously painted furniture to makeover pieces to fit in. Once painted, you can fit new handles or knobs to give your painted piece even more style.

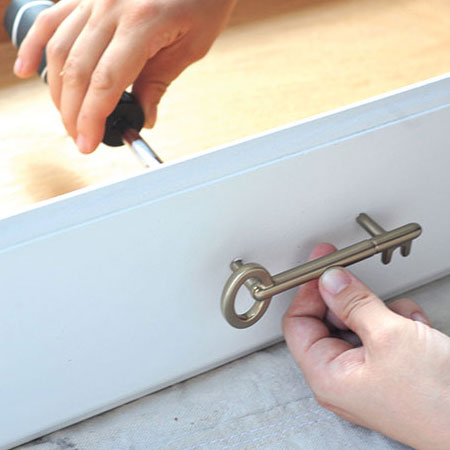
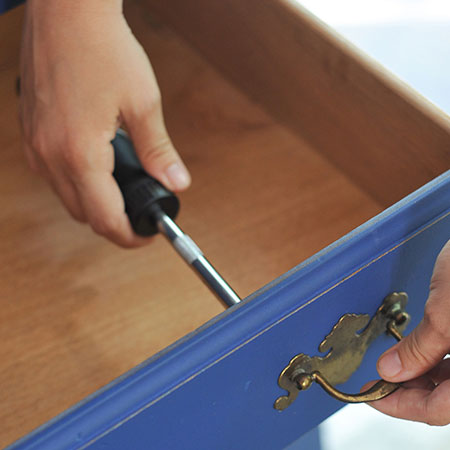
Start by removing all the existing hardware. Put this aside if you plan to use again, or select new hardware that ties the finished piece to your existing decor.
GOOD TO KNOW: If you are removing handles with two holes and want to fit knobs that only require a single hole, use Alcolin QuikWood to fill the holes and sand smooth before painting.
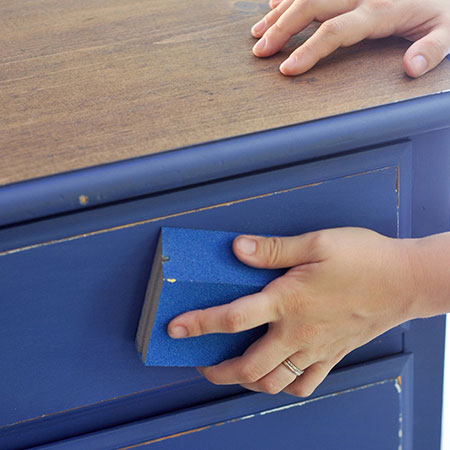
Use 120-grit sandpaper or a medium sanding block to prepare the previously painted surface for painting. If the piece was previously painted with oil-based enamel paint you need to de-gloss to remove all the glossy finish. This is essential for a proper bond between the old and new paint.
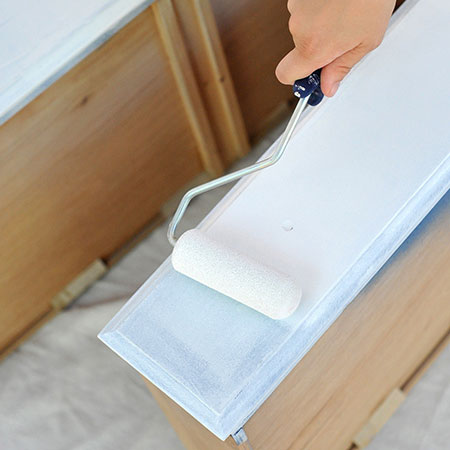
The next step is to use a foam roller and paintbrush to apply a primer. However, many paint products no longer require a primer and incorporate a primer, such as the Fired Earth range of Made By Me paints. This type of product saves you time and money, so select the paint product you need if you want to cut down on time spent painting.
GOOD TO KNOW: You want the primer or first coat to be as even as possible. Any drips or runs needs to be wiped away - or sand even with 240-grit sandpaper or fine sanding sponge once the paint has dried.
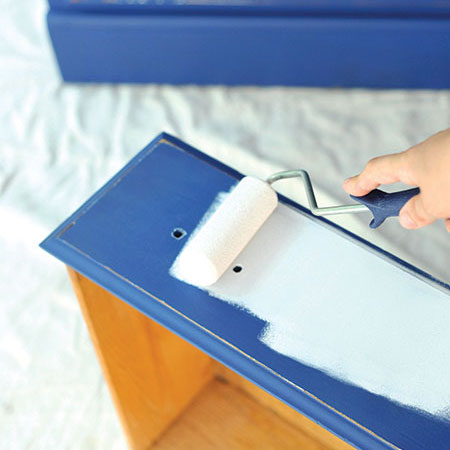
Apply the paint coats with a combination foam paint roller and paintbrush. Use the brusch for around the edges, detail or embellisment and then go over this with the roller. You shouldn't need more than two coats of paint for an even coverage, but do remember to let each coat dry thoroughly before applying a further coat.
Once dry you can add any additional detail, like the stencil design on this chest of drawers. Use painter's tape to cover the edge or any areas not to be painted and then place the stencil at the front corner edge before applying paint with a paint roller. Move the stencil over the surface until finished, carefully avoiding any wet paint as you work.
GOOD TO KNOW: Never apply the paint too thick when using a stencil, as it will bleed underneath. A light coat is all that is needed, or two coats for a darker effect. Have some newspaper handy to roll off excess paint from the paint roller.
Lift a corner of the stencil to carefully remove. Place on a piece of newspaper and use a kitchen towel to dab away any paint before using again.

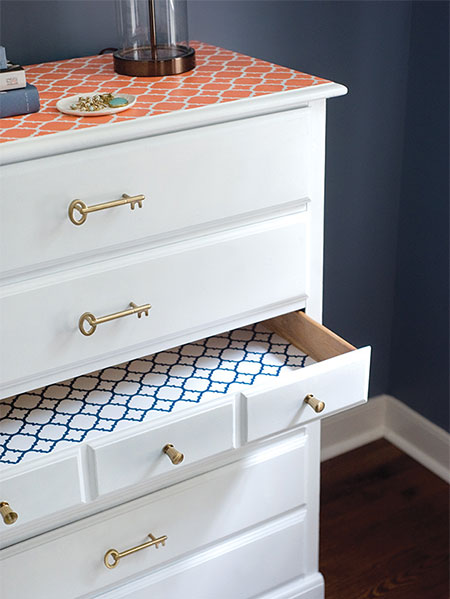
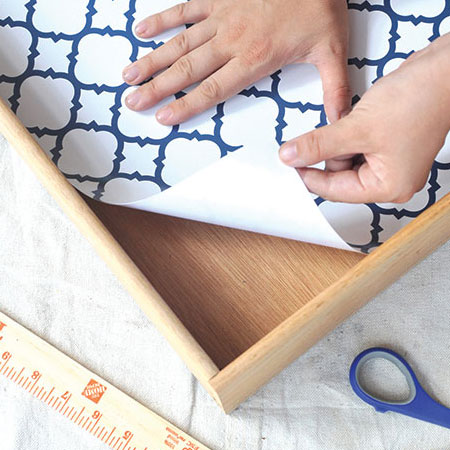
You can add even more to your chest of drawers by laying wrapping paper, wallpaper or self-adhesive Contact paper inside the drawers. Cut to size beforehand and work from one corner - smoothing out any air bubbles as you line the drawers.
Now all that's left to do is to add your choice of hardware. The right handles or knobs makes a statement to your chest of drawers, so select a style to complement your finish and room decor.