3 Hour Paint Makeover with Bosch PFS 2000 Spray System
Using a Bosch PFS spray system is an easy and professional way to give old or secondhand furniture a brand new look - in under 3 hours.
01/12/2018
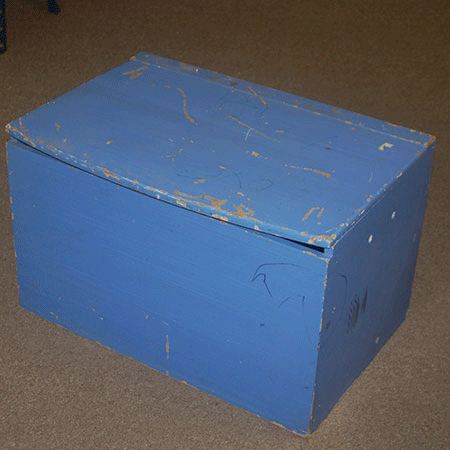
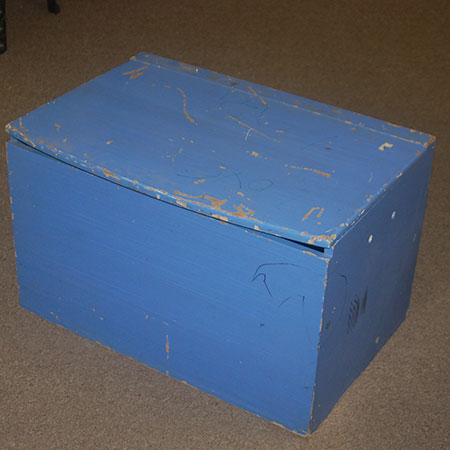
A friend of my son's asked us if we would give his child's toy box a makeover, and I thought this would be an ideal opportunity to show you how easy it is to use a Bosch PFS 2000 spray system to give any pieces of furniture a quick and easy makeover.
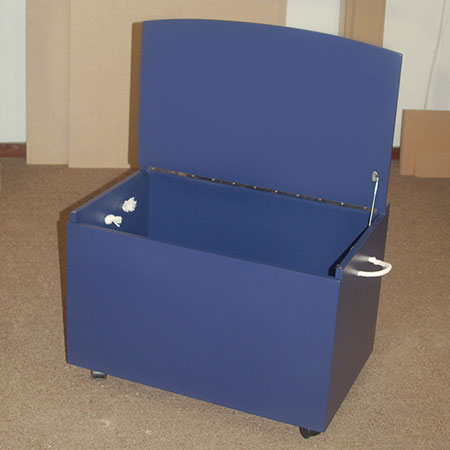
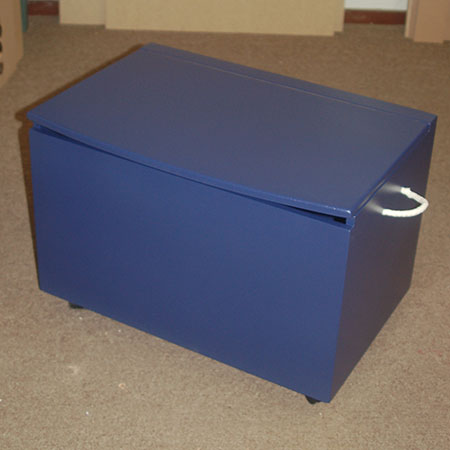
The toy box was a bit dinged up and badly scratched, but it was still in good condition overall. The castor wheels needed replacing but with a couple of coats of paint we managed to get the toy box looking as good as new - in under 3 hours.
Granted, it was a very hot day and the paint dried extremely fast, but despite that, using the Bosch PFS spray system makes paint a breeze and it gives a very professional finish to your paint projects.
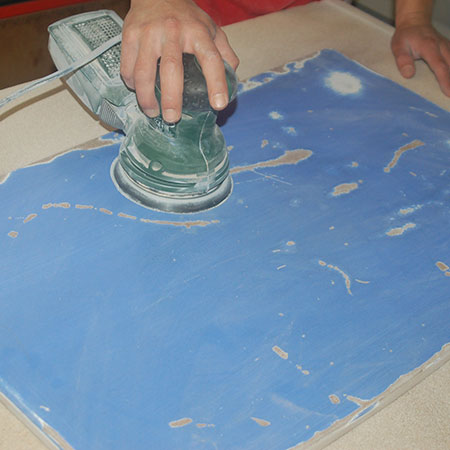
1. The first step was to do some intensive sanding on the outside and inside of the box. The top and edges of the box were badly scratched and it was necessary to sand almost back to the board underneath the old paint. After sanding, any remaining gouges were filled in with a bit of wood filler and then sanded smooth.
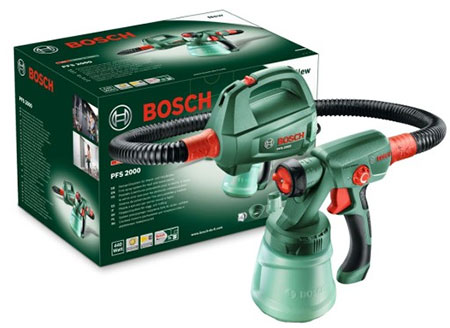
The Bosch PFS 2000 is my preferred spray gun of choice, despite being the lowest and cheapest model in the PFS range. Retailing at around R1200 at Builders Warehouse - depending on your location - the Bosch PFS 2000 does exactly what I need it to do, so I don't see why I should spend more on a fancier model.
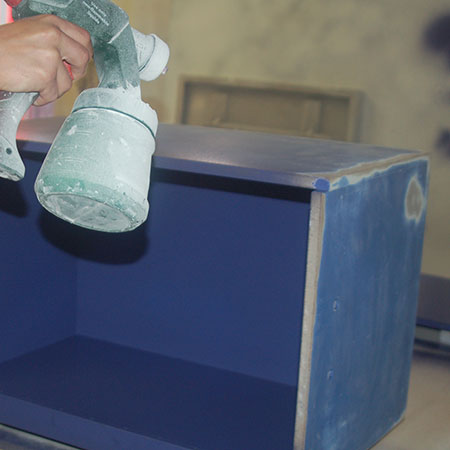
2. Using Plascon Polvin tinted to a navy blue, the paint pot was filled to 3/4 full with paint and then water added and mixed well. It is important to water down the paint a bit to prevent the spray gun from spitting, which will give you an uneven paint finish.
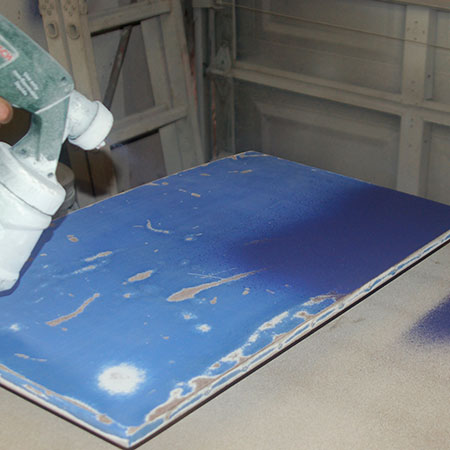
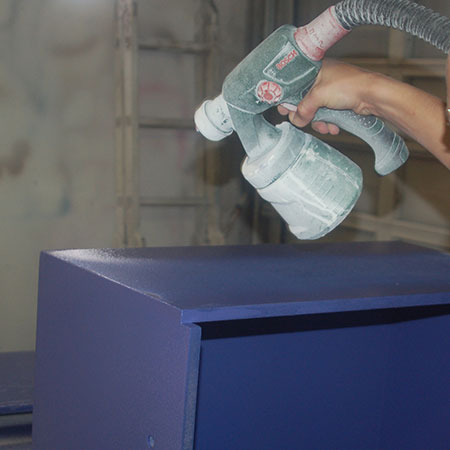
3. Set the spray nozzle on the lowest setting for the first coat. You don't want to apply to much paint for this coat, just enough to cover the surface.
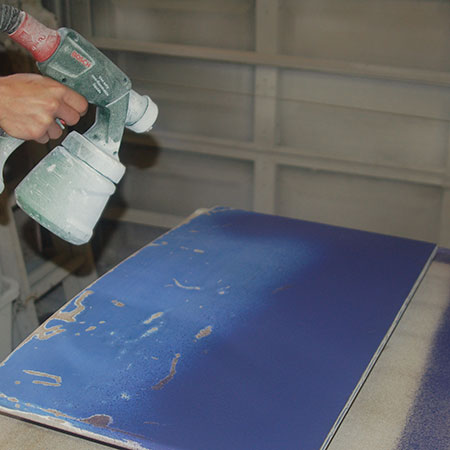
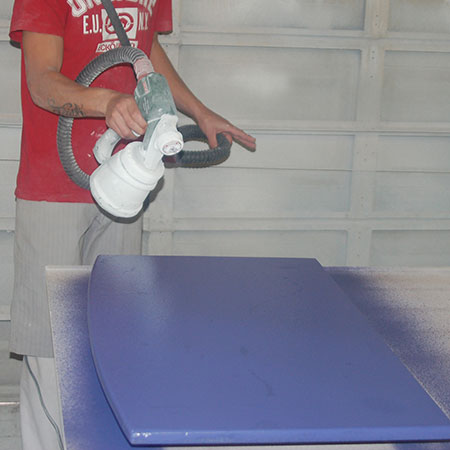
4. Working with slow side-to-side movements and slightly overlapping the strokes, full coverage for the top of the toy box lid is achieved quickly.
GOOD TO KNOW: Place the lid on a couple of blocks of wood to elevate it and make it easier to spray around the edges.
5. Once the lid is sprayed it's time to move over to the box. This was placed on its side (on a couple of blocks) to make it easier to spray inside and around 3 sides in one go.
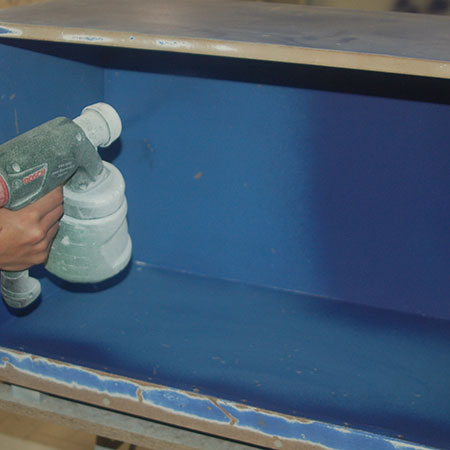
GOOD TO KNOW: Hold the spray gun about 30cm away from the surface of the box and angle to reach into the corners.
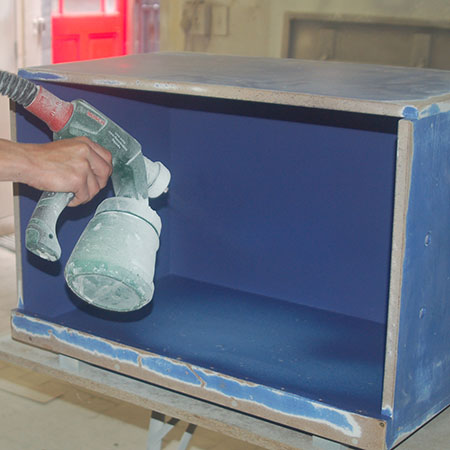
6. Now you can spray the outside of the box, covering all three sides and also spraying around the top edges.
7. Finish spraying these sides and then let the paint dry before repeating the process with a second coat.
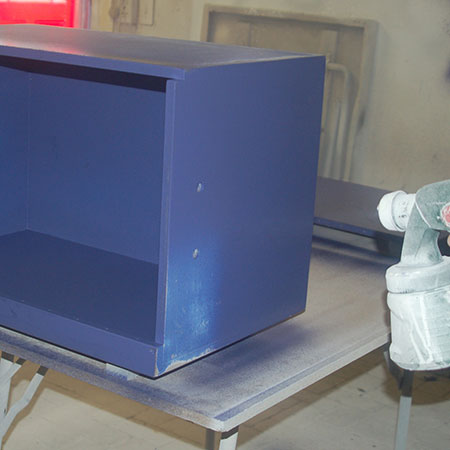
8. Let the paint dry thoroughly before flipping the box and lid to paint the remaining surfaces.
GOOD TO KNOW: We used Plascon Polvin to paint the boxes in navy blue and then applied Prominent Paints WoodPro clear acrylic sealer to protect the painted finish.
We use Plascon Polvin for all our paint projects because this paint has a matt finish that can easily be sanded once the paint is dry. Other paints aren't as easy to sand.
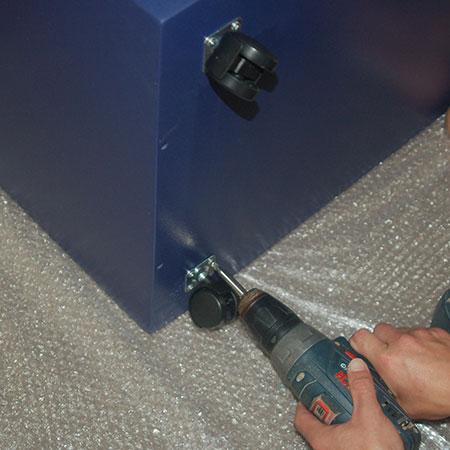
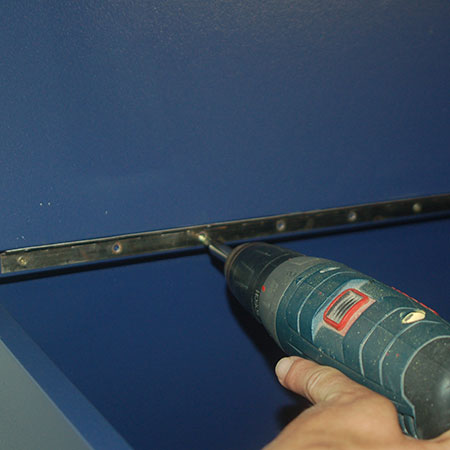
9. After painting, new castor wheels were fitted to the base of the toy box and the lid hinge was re-attached.