
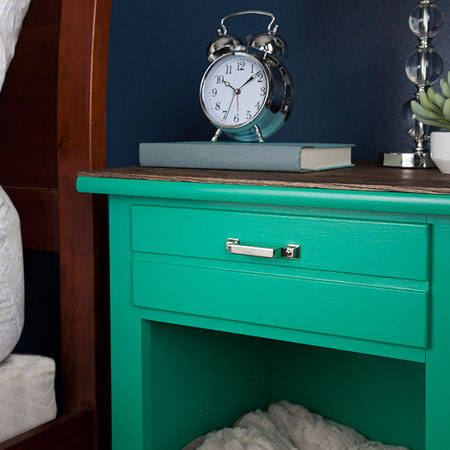
Turn an old or unused Cabinet into a Bed for Fred!
If you prefer that your dog - or cat- sleeps in their own bed, convert an old cabinet or cupboard into a bedside cabinet that's also a bed for your pet.
07/02/2019

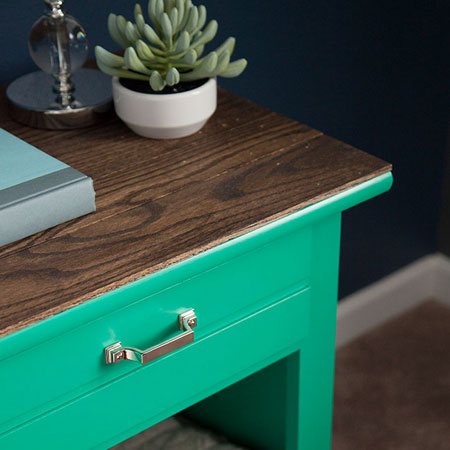
In this project, you will see how easy it is to make a comfortable bed for your pet. This upcycled bedside cabinet - or you can recycle an old cupboard - makes the perfect bed for Fred, and you can make this for your small dog or cat. The cabinet is prepped and painted in a bold colour and some stained planks add to the top for a brand new look.
Follow the steps below to turn any small cupboard or cabinet into a pet bed, choose your own bright colours for the makeover, and finish off with some stunning cabinet hardware.
YOU WILL NEED:
Old cupboard or cabinet
Pine tongue and groove boards
New hardware
120-grit sandpaper
Wood glue
Wood filler
Acrylic paint in your choice of colour
Wood stain, sealer or varnish
Paintbrushes
TOOLS:
Drill / Driver plus assorted bits
Screwdriver
Pneumatic brad nailer or hammer and panel pins
Jigsaw, mitre saw or table saw
Tape measure and pencil
HERE'S HOW:
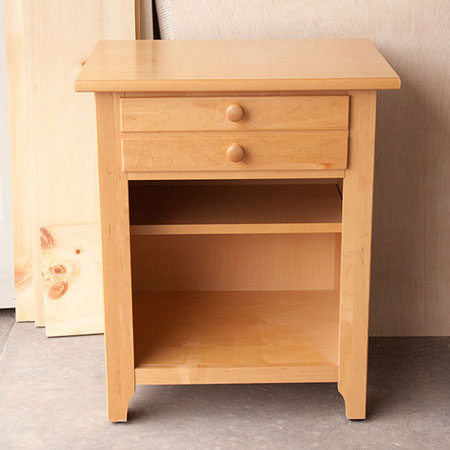
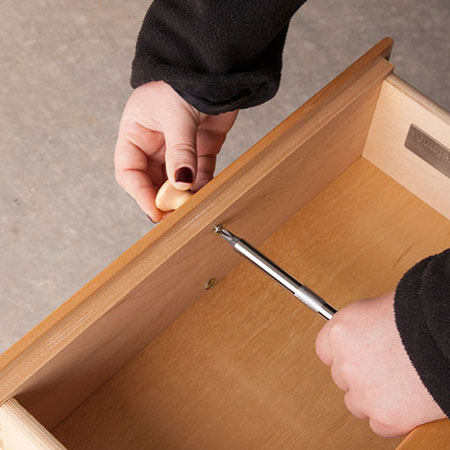
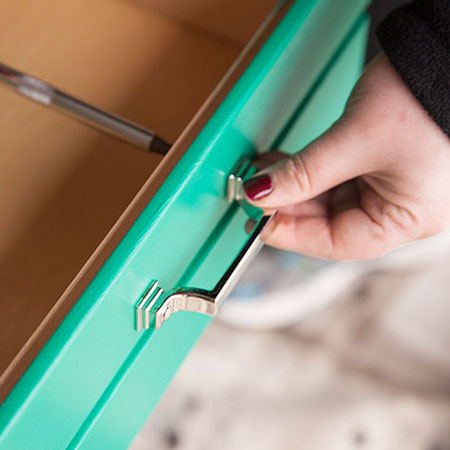
1. Prep the cabinet by first removing all the hardware. Put this aside in a safe place if you plan to use again, but it's always nice to add new hardware to give your finished piece a brand new look. Gelmar and Builders have a great selection of affordable handles and knobs for you to choose from. If you don't have a suitable cabinet, shop around at secondhand stores to see if you can find a bargain piece that just needs a little TLC.
GOOD TO KNOW: Make sure that the cupboard or cabinet will be large enough for your pet to get comfortable. You can always remove a shelf or two if you need to make extra space.
2. Take the time to properly prep the surfaces for painting. If you are using chalk paint you only need to give a light sanding with 120-grit sandpaper to prep the cabinet. If you are using acrylic paint or water-based enamel you will need to sand back as much as possible to remove all the glossy finish. This will provide a better surface for the new paint to adhere to - and will give a long lasting finish.
GOOD TO KNOW: When sanding wood furniture always sand in the direction of the grain.

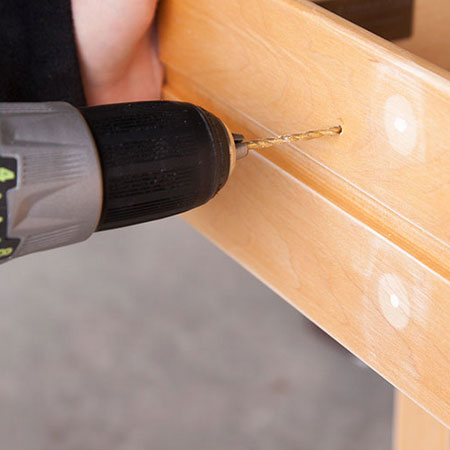
3. If you are going to be adding new hardware and the existing holes are in the wrong place, use a bit of wood filler to patch up the holes. Let the wood filler dry before sanding smooth and then drill properly placed holes for your new hardware to be fitted.
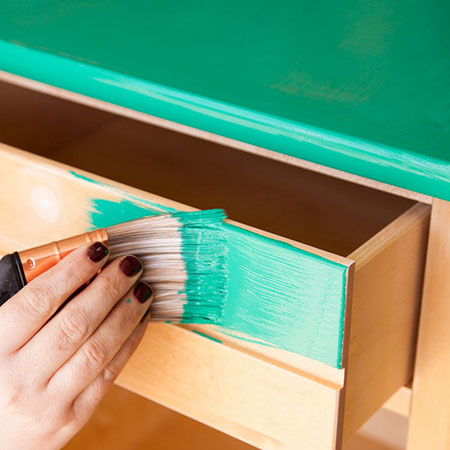
4. Use a quality paint brush to apply even coats of paint to the surfaces. Don't apply the paint too thickly or you will end up with runs. For larger surface areas, run over these with a foam roller. Allow each coat to dry according to the manufacturer's instructions before applying the next coat.
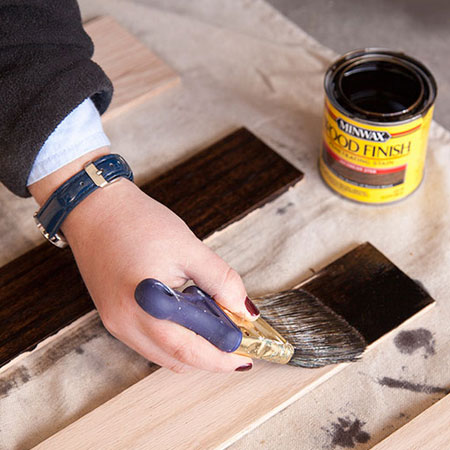
5. Cut the tongue and groove boards to length to fit on top of the cabinet. Sand these nice and smooth before applying your choice of wood stain and sealer. For indoors you can use a sealer or varnish to offer a protective finish for the top of the cabinet.
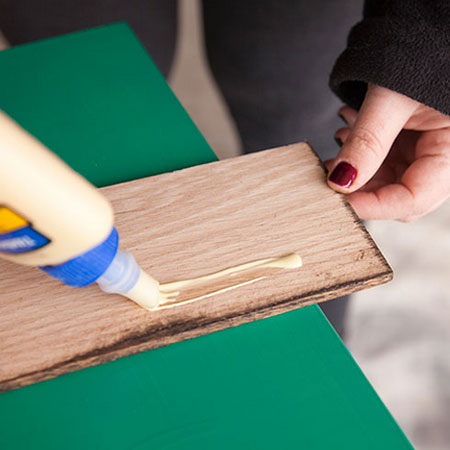
5. Apply wood glue to the back of all the tongue and groove slats.
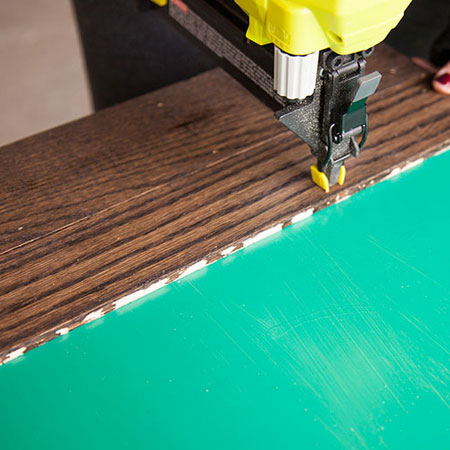
6. Secure the stained slats onto the top of the cabinet using either a pneumatic brad nailer or hammer and panel pins. Make sure the edges are flush all the way around.
Finishing
Make sure the cabinet is thoroughly dry before attaching your new hardware.
Now your beloved pet has a comfortable place to sleep that won't take up any valuable floor space and that also doubles as a bedside table.
liberty hardware