Make a Decorative Pelmet for your Windows
When dressing windows, especially where you don't want to see the curtain rail or blind hanging mechanism, a decorative pelmet is an easy way to add that finishing touch.
23/10/2021
family handyman
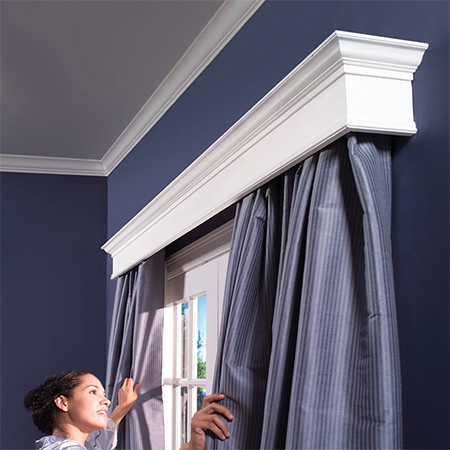
Any type of window treatment needs a finishing touch unless you also splurged on an attractive curtain rail to top off the window. Not only does a pelmet provide the perfect topping for window treatments, but it also hides the ugly hardware out of sight, and this window pelmet also provides a very decorative addition for windows in a traditional home setting.
Looking at the decorative pelmet, at first glance it might look expensive and hard to make, but that's where you would be wrong. This decorative pelmet is a basic front and sides with built-up layers of moulding and trim - most of which you can find at your local Builders. There are all types of moulding and trim products, from soft or hard polystyrene or polyurethane to SupaWood and pine or meranti. All these materials are easy to work with and are reasonably inexpensive, especially when compared to having something custom made to hide window hardware.
With so many moulding and trim options to choose from, you can decide which will work best with your room or home decor. There are basic trim pieces without much detail and there is elegant architectural crown moulding that would look fantastic in a formal room.
YOU WILL NEED:
12 x 94mm PAR pine - whatever length you need plus the sides** - pelmet front and sides
PAR pine to close off the top - cut to fit
22 x 44mm PAR pine for mounting the frame onto the wall
Wood glue
Wood filler
Acrylic sealant and caulking gun
Combi Drill plus assorted bits***
Mitre saw or mitre box and saw
Air nailer or hammer and panel pins
Corner braces and screws
Wall plugs and screws for wall mounting
4 x 50mm cut screws
120-grit and 240-grit sandpaper
Spirit level
Tape measure and pencil
Safety gear
Paint and tools to finish
GOOD TO KNOW:
**PAR pine is available in lengths of 1.8 metres, 2.4 metres, 3 metres and just over 4 metres, so you can purchase the length that best works for the width of your window or windows.
***A Combi Drill allows for drilling into concrete and masonry (brick). If you don't have a cordless combi drill, use a corded drill of minimum 550W
If you own a router, investing in a decent set of router bits will give you the freedom to make your own moulding and trim to add to this decorative pelmet. Priced from around R720 for a set of 12 assorted bits.

HERE'S HOW:
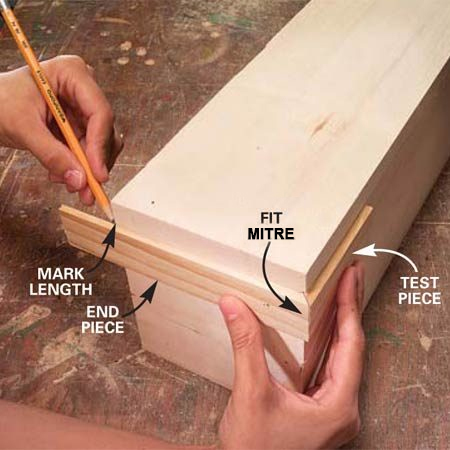
1. Measure up
Before you can start shopping for the materials you need, you are going to have to measure the window in order to have everything cut to size. Alternatively, you can buy longer lengths if you are cutting your own pieces. PAR pine is the most affordable material for the decorative pelmet, but if you have some 12mm or 16mm SupaWood lying around, you could also use this, keeping in mind that it will be a heavier design.

2. Make the Frame
The frame that provides the shape and support for all the moulding and trim is nothing but a basic frame. Secure the sides onto the front and reinforce the corners with steel corner or angle braces screwed in place. Lastly, secure the top section in place. The easiest way of making the frame is using an air nailer or hammer and panel pins. Any nail holes or screws can be covered up with wood filler and sanded smooth.
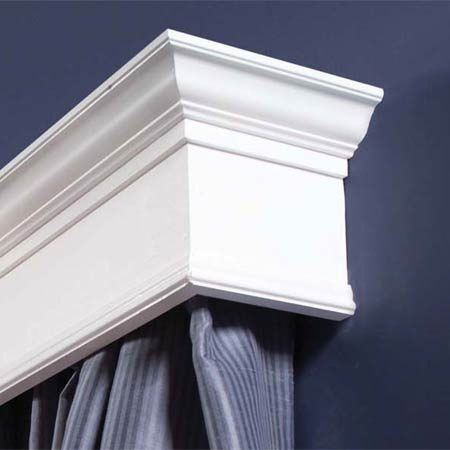
3. Build up the Layers
The goal of this project is to build up layers or moulding and trim to the stage that it looks like a complete piece. To ensure that, don't try to go over the top with crazy designs, simple is best and will achieve a more aesthetic design. Go online and enter 'mouldings' into the search bar and you will find plenty of online suppliers and their offerings. Now all you need to do is to find the designs that work best for your decorative pelmet.
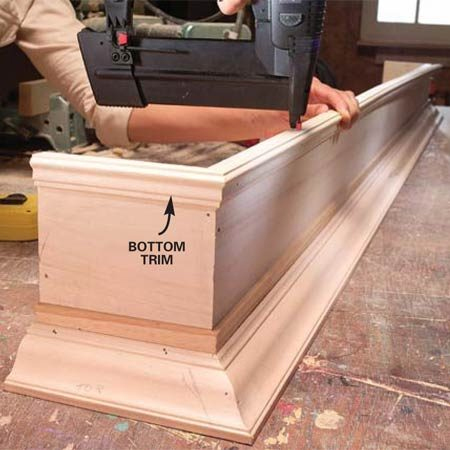
The next steps are easy enough, you continue to add layers of moulding and trim and secure these onto the frame with wood glue and nails until you are happy with the finished result.
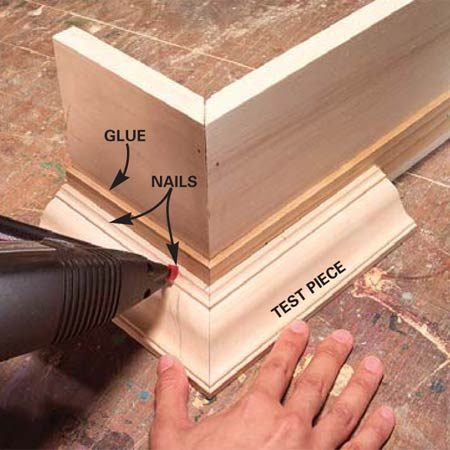
For a balanced design, don't forget to add a decorative strip along the bottom edge of the frame. The top angled piece is optional but does add more traditional flair to the decorative pelmet.
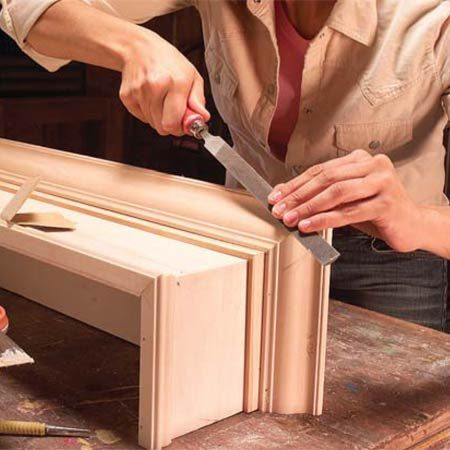
4. Smoothing and Sanding
At this stage in the process, you get to fill any gaps, remove rough edges and sand smooth in preparation for painting. Use acrylic sealer and apply to gaps with a caulking gun. Smooth out with your finger or wipe away any excess with a slightly damp cloth. Wipe down to remove all traces of dust.
5. Finishing the Frame
To paint the frame, use acrylic paint or water-based enamel paint in your choice of colour. Don't apply the paint too thick or it will spoil the finish, it is better to apply two or 3 lighter coats of paint.

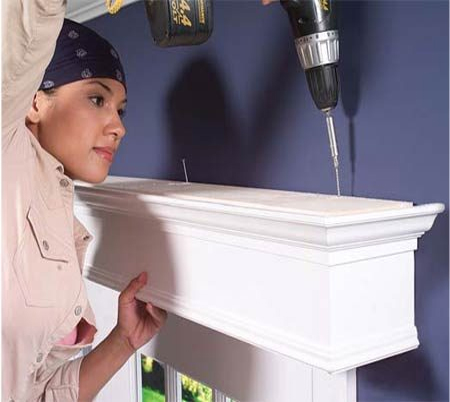
6. Mounting above the Window
To complete the installation, mark and drill to mount the ledger onto the wall using wall plugs and screws. Use a spirit level to ensure the ledger is straight and level.
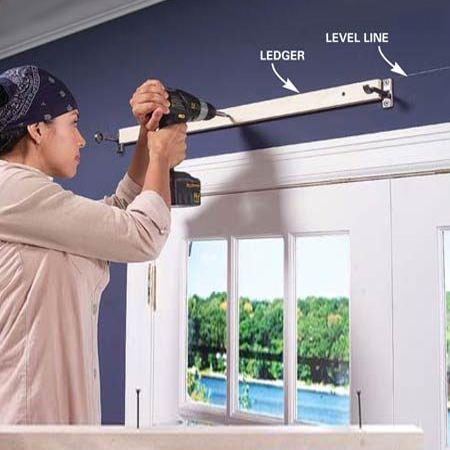
Once the ledger is in place, you can position the frame over this and secure the frame to the ledger by driving 4 x 50mm cut screws through the top and into the ledger underneath. DO predrill and countersink before driving in the screws to prevent splitting the wood.