Wooden Pendant Light
Use plywood to make this industrial-style wooden pendant light. The natural finish adds industrial charm that is perfect for lighting up a living room, dining room or bedroom.
08/11/2017
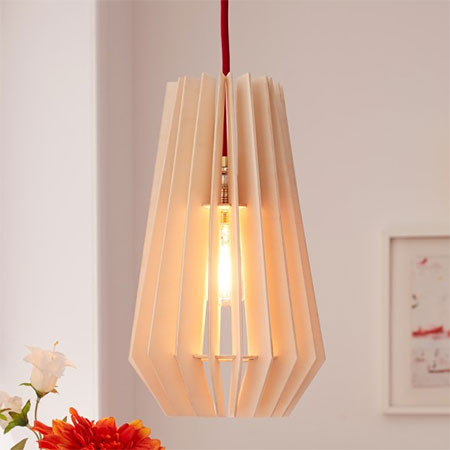
Made using 3mm plywood, this wooden light will give your home a trendy 'loft' vibe - and it won't cost a fortune to make.
YOU WILL NEED:
1 of 100 x 100cm piece of plywood, 3mm thick
Wood glue
Lampholder plus electrical cable
LED lamp
TOOLS:
Jigsaw
Optional: PPKS 16 hand-held circular saw
Sander
Compass
Ruler and pencil
HERE'S HOW:

1. Print out the template. On the design you will see that the lamp narrows towards the top and is wider towards the bottom. Use a compass to mark the first ring for the top part of the lamp - with an outer dia. of 10cm and an inner dia. matching the lampholder (here 4cm) - and a second ring (outer dia. 14cm, inner dia. 8cm) on the plywood panel.
2. Use scissors to cut the sections from the template and transfer it onto the plywood panel. You will need a total of 20 strips for the outside of the lamp.
3. Use your jigsaw to cut out the rings and louvres. If you have a Bosch PSK 16, this is ideal for cutting out the louvres for around the outside of the lamp. The [2] small slots in each louvre enable it to be attached around the rings later on – creating the round shape of the lamp.
GOOD TO KNOW: Clamp your plywood firmly to ensure that you work safely.
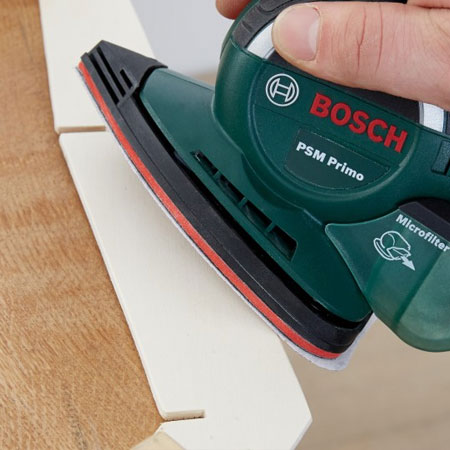
4. Sand all the cut pieces to smooth. It's easier to sand if you fasten the small pieces to a workbench.
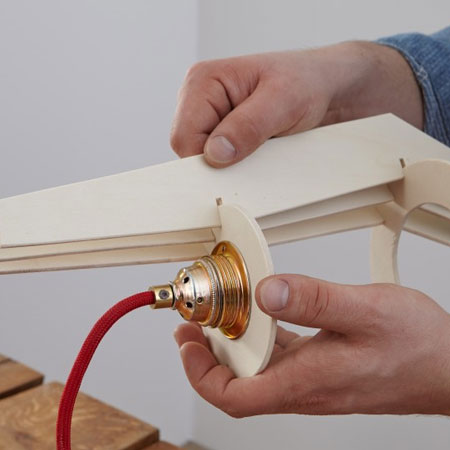
5. Wire up the lampholder and then connect this to the upper ring. Use an LED lamp as the light source, as this type of lamp does not get very hot, which means it's safe to use with wood.
GOOD TO KNOW: Have the electrical connections checked by an expert before operating the lamp for the first time.