Make a capiz chandelier with wax paper
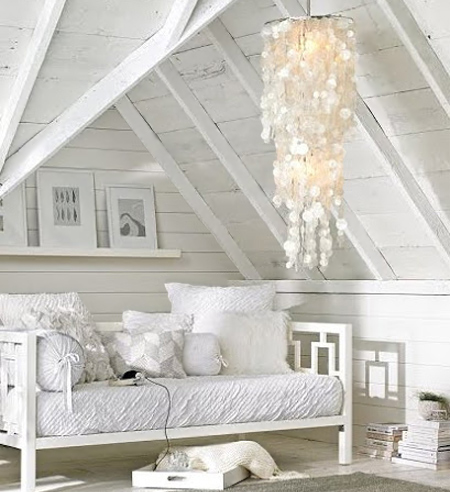
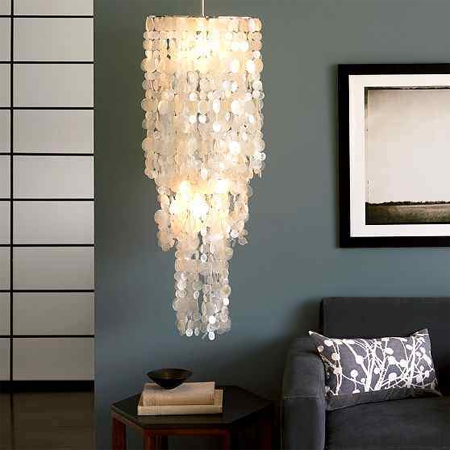
Natural capiz shells are hard to come by and expensive when made into lamp shades or chandeliers. But you can easily replicate the look of capiz shells using ordinary wax paper. In this project we show you how to make your own capiz shell chandelier - small or large.
Just to give you an idea of how expensive a natural capiz chandelier is, the above capiz chandelier from West Elm retails at around R1750. You can make your own affordable capiz chandelier for around R100.
YOU WILL NEED:
Wire frame
Parchment paper (can be found at craft and baking supply stores)
Roll of wax paper
Circular punch
Iron and ironing board
Sewing machine and matching thread
scissors
HERE'S HOW:
freshly-picked.com
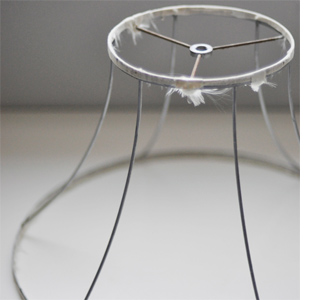
1. To make the frame for your capiz chandelier you can upcycle an old lampshade by removing the fabric, or have a look around for a wire frame - wire hanging baskets make great lampshade frames. Spray the frame with Rust-Oleum 2X spray paint in white before you start.
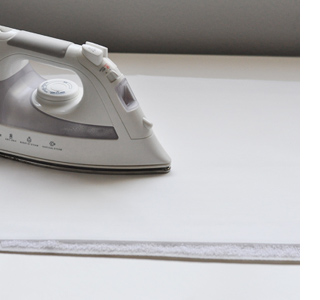
2. Place 3 sheets of wax paper between two sheets of parchment paper. The parchment paper prevents the wax from getting onto your iron and ironing board. Iron on warm setting for about one minute.
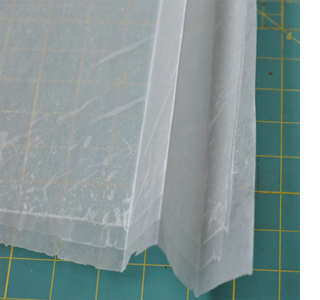
3. The warm iron melts the wax and gives it a more translucent finish. Peel off the two sheets of parchment and then fold the paper accordion-style - as shown left. The folds should be as wide as the circular punch you have and make it easier to cut out more than one circle at a time.
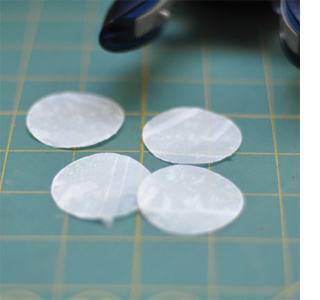
4. Now you can cut out the circular pieces of wax paper to make your capiz chandelier. You're going to need lots and lots, depending on the size of the chandelier you want to make.
lisaroy.ca
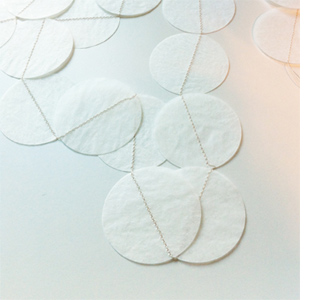
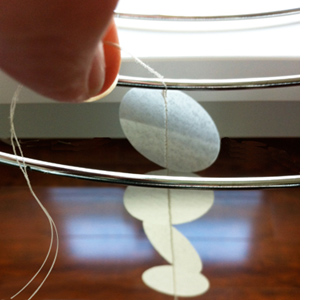
5. After cutting out plenty of wax paper circles, take these to your sewing machine and join the circles together with a running stitch. Leave a long length of thread at the beginning for fastening onto the frame. Make varying lengths of strips, again depending on the style of chandelier you want to make.
GOOD TO KNOW
It's easy to work if you hang the frame from a light fitting with string. Make it so that you can raise and lower as you work to see how it hangs.
You will find it easier to make up a batch and start fastening these onto the frame as you work, so it doesn't get confusing. You'll also better be able to see how the design is taking shape and how many more rows and strips you will need.

lisaroy.ca