How to Make a Dandelion Triptych (3-piece artwork)
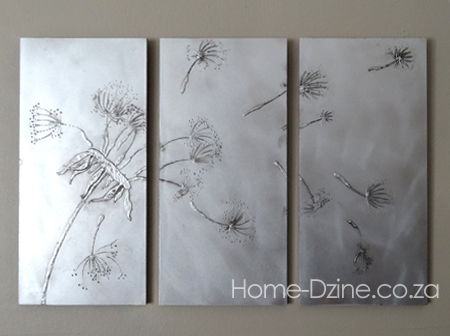
My dandelion art is on SupaWood and uses relief paint, which is then covered with Rust-Oleum Universal metallic - titanium silver spray paint. I love it...!
09/2023
I have been wanting to make a dandelion triptych for ages and a recent experiment using relief paint and aluminium foil to make a picture frame got me to thinking about the perfect idea. My dandelion art is on SupaWood and uses relief paint, which is then covered with Rust-Oleum Universal metallic - titanium silver spray paint. I love it...!
Before I go on, I'm sure that many of you are thinking... what is a triptych? Well, a triptych is a work of art that is divided into three sections, or three panels
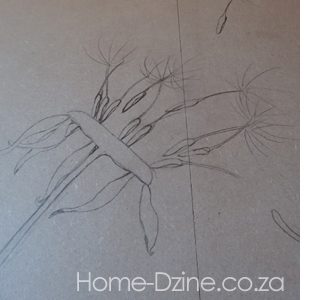
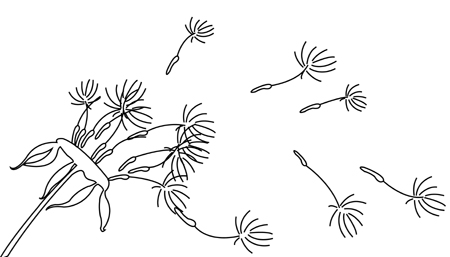
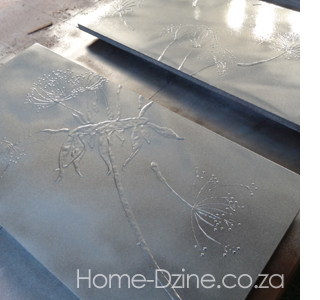
I started off by roughly sketching my design onto the SupaWood with a pencil. It really was a rough sketch at the beginning and I erased here and there until happy with the final result. I have included the design below for anyone who wants to make their own dandelion art triptych. All panels are placed together when you sketch, so that the drawing flows across all the panels.

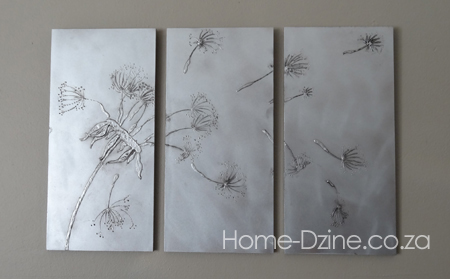
To create the raised or relief design I used up some paint samples that were sent to me. It's a thickish paint that you squeeze out, but you can substitute with a thick glue or anything that won't fall down flat and dry hard, such as silicone or acrylic sealer.
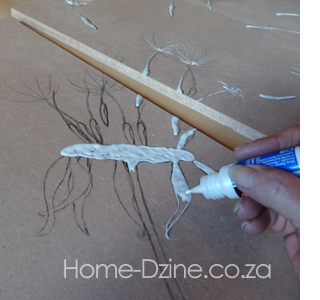
What's nice about adding this relief is that you don't have to worry about it being perfect. Any defects in the finish only add to the effect - as you can see in the final result.
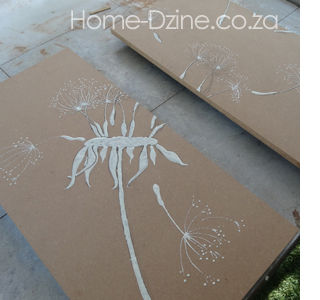
After letting the paint dry hard, I then took the panels outdoor to spray them. Don't spray if the raised design is still soft or you will spoil the effect.
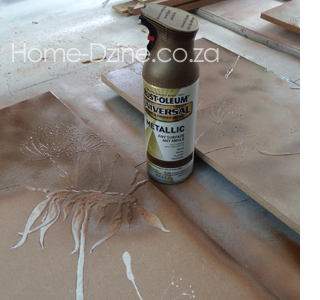
Although I originally spray the panels with Rust-Oleum Universal metallic - aged copper, you can see that I changed the colour. I did this because the wall where the panels will be mounted is already a fairly dark colour and the panels just didn't stand out enough.
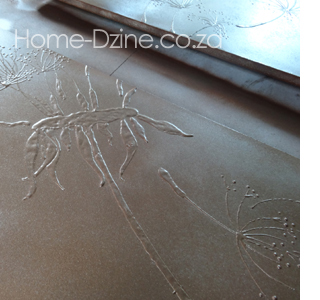
Here is what the spray painted panel looks like after two coats. That's why I love Rust-Oleum spray paint... you don't need to apply coat, after coat, after coat of spray paint to get a fantastic finish.
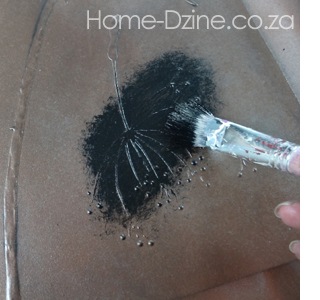
To achieve the aged effect was fairly easy and you can apply as little or as much effect as you want. Use an old paintbrush and thick acrylic craft paint (preferably black) and paint over the areas to be aged. You need to get the brush into all the little dips for best effect.
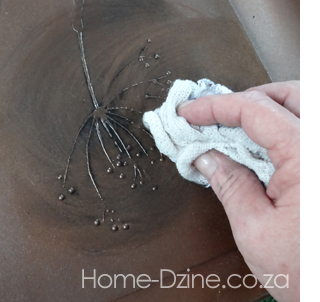
Working quickly before the paint dries, wipe over the surface with a dry cloth, not wet, not damp but dry.
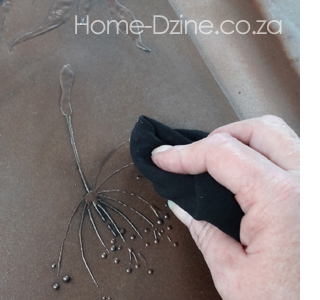
Now you use a lightly damp cloth to gently wipe away the excess paint, only leaving behind paint to add that aged effect. If you find there's not enough, repeat the process until you are happy with the result.
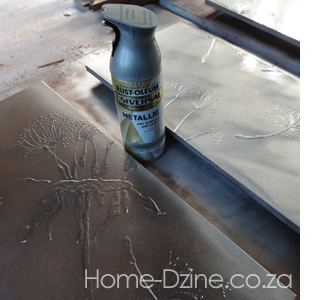
Having placed the panels against the wall I realised a colour change was necessary, and this is where I sprayed the panels with Rust-Oleum Universal metallic in titanium silver. A trick to use with this metallic paint... move the can around so that you spray at different angles for a more metallic sheet effect.
Above are the panels after spraying. I repeated the complete painting process with black craft paint once again to get the aged effect.
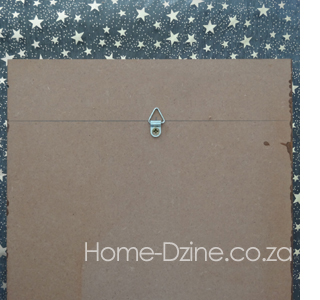
To mount the panels onto my wall I used a ruler and pencil to draw a line 40cm from the top of each panel. I then screwed in a hanger. Make sure the screws you use are too long or you will end up with holes in the front !
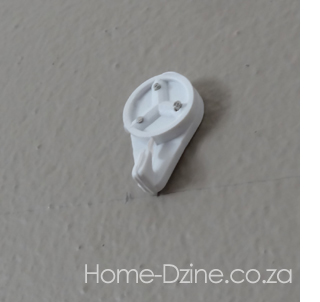
Although it's difficult to see, I used a spirit level and steel ruler to draw a feint pencil line on the wall at the height for mounting the panels. On this mark I hammered in a picture hook for the centre panel. With this one in place I then worked out the distancing for the panels on either side. I like using these hooks because they only leave small holes that can easily be filled in (hint, hint to anyone out there renting!).