Quick Project: Make Tie-Dye Art for a Gallery Wall
Using the tie-dye or Shibori method, it's so easy to make your own interesting art for a wall gallery.
29/12/2020
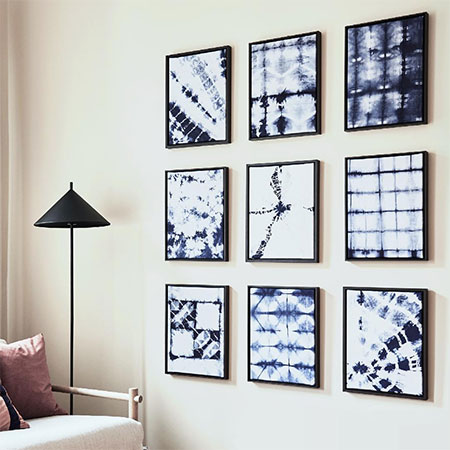
The tie-dye or Shibori method of dying fabrics has been used for many different reasons, from clothes to fabrics, and now you can use this same method for making an interesting collection of art to add to a wall gallery. With assorted patterns and designs, these easy-to-achieve patterns can be hung on a wall for an instant and eye-catching feature. Plus, you can choose your own dye or food colouring colours to tie in with your home decor.
YOU WILL NEED:
Fabric - cotton or linen is best - or repurpose an old bed sheet
Blue fabric dye - or use food colouring as an alternative
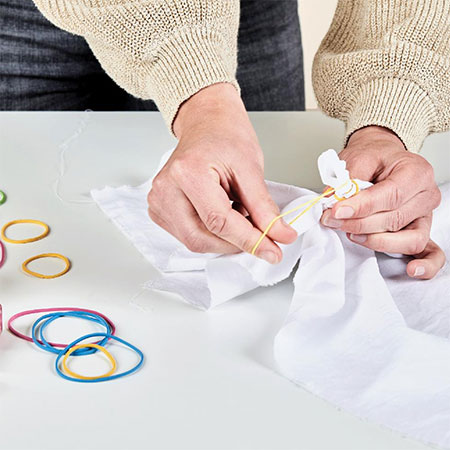
Rubber bands or string
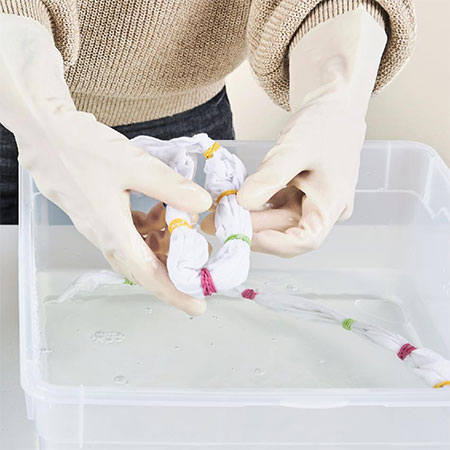
2 Large plastic or glass containers
Thick card or cardboard
Picture frames, ready-made or make your own
TOOLS:
Cordless screwdriver or manual screwdriver
Sharp scissors
Hammer
Tape measure and pencil
Safety gear
HERE'S HOW:
1. Work out the size of the fabric to cut to fit into the frames. When cutting, make sure to allow extra to fold over the back of the card or cardboard insert that will go into the frame.
2. Have an idea of the tie-dye or shibori patterns you want to create for your picture frames - you will find plenty on the web - and tie or use rubber bands to wrap the cut fabric to create unusual and interesting patterns
GOOD TO KNOW: While traditional Shibori uses a specific dye for the dyeing process, you can easily replicate this with fabric dye or food colouring. If you are using food colouring, you may need to do a few test pieces to determine the correct concentration of food colouring and water to achieve the perfect effect.
3. Fill one container with clean water and the other with water and dye (or food colouring). Place your tied fabric in the plastic container of clean water and leave to soak for [1] hour.
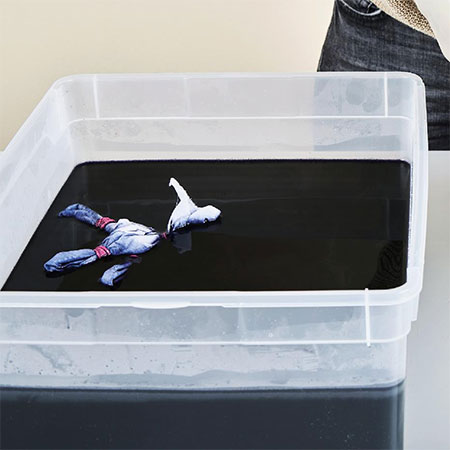
4. After soaking in the clean water, place the fabric into the dye water and leave for a further hour. After that, wring out and rinse the dyed fabric and leave them to dry. Iron if necessary.
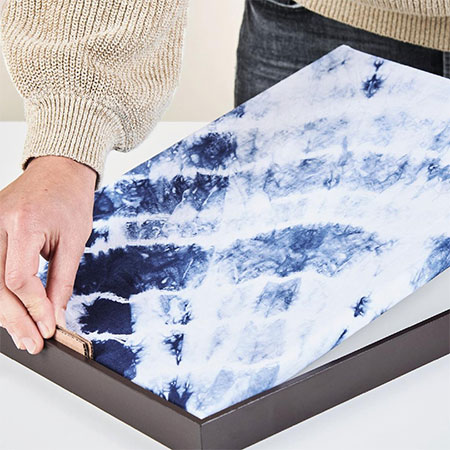
5. Cut the card or cardboard to fit into the frame for a snug fit and wrap the dyed fabric onto this. Make sure there are no creases on the front of the fabric. If required, use tape to secure the fabric to the back of the card or cardboard or use pieces of cardboard to make gap fillers, as shown below.
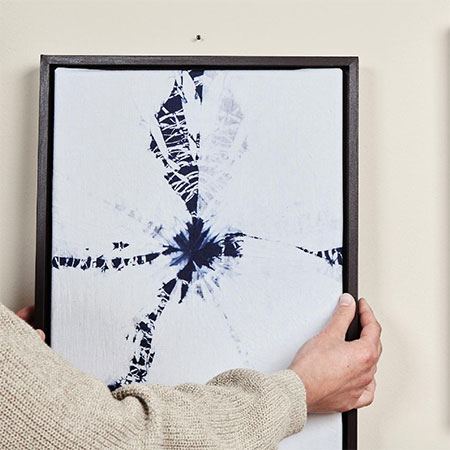
Your new tie-dye art is ready to hang on the wall.
DO MORE DIY WITH BOSCH
Lightweight design and ergonomic shape combined with power ensure you always have the right amount of comfort while tackling DIY projects in and around the home. The 20 torque settings allow you to set up for all types of screws and materials while the 2-speed gearbox provides extra "oomph" when you need it. That's the Bosch UniversalDrill 18.