
How To Stretch and Frame your own Canvas Art
I might be a DIY enthusiast and an avid decorator, but deep at heart, I have always loved creating my own paintings, as well as stretching and framing my canvas for artworks.
15/03/2022
As someone who has come to be known as a bit of a DIY addict, I have always stayed close to my art. Having studied art at an intermediate level, for me, there is nothing like making your own personal artworks, and that includes saving a bundle by stretching and framing my canvas and frames for art.
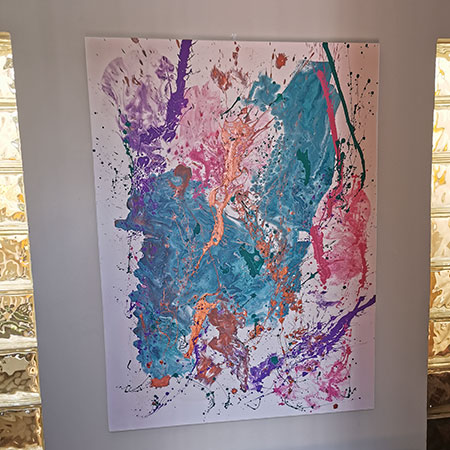
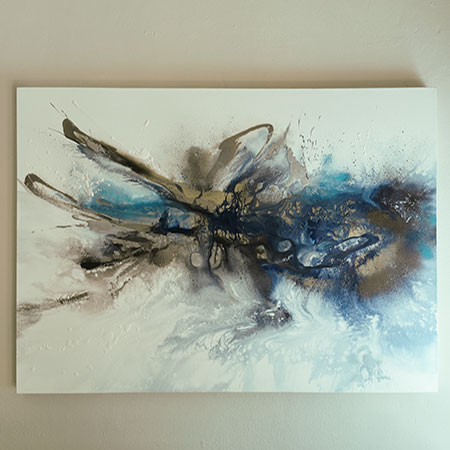
Creating your personal artworks can be an expensive hobby. Not only do you need to buy the paint and tools you need to create your masterpieces but you also need to buy canvas and timber to stretch and frame canvas for your pieces. You can always go for personalized canvas prints, but if you are more of a DIY-er, it makes a lot of sense to try making your own wall art. Buying ready-made stretched canvas is horrendously expensive, so it makes a lot of sense to me to look at affordable alternatives.
The secret to making your own inexpensive framed canvas... using a canvas drop cloth that costs around R560 for a 6-metre length. These canvas drop cloths are big enough to let you create lots and lots of canvas artwork at the cost of buying a single pre-packed canvas and frame.
Making the timber framework for the canvas is also reasonably affordable if you use PAR pine (22 x 44mm) that you can buy at any Builders store. I normally have this pine in stock for various DIY projects that I make.
How to make your timber frames for canvas
You will be surprised at how easy it is to make your frames for canvas art. I have included my instructions below, as well as a few handy tips, and you will find videos at the bottom of this page that take you step-by-step through the process of making the frames and stretching the canvas onto the frames. Keep in mind that the videos below give you great visuals of the process, but I found them somewhat lacking in important details, and which I have included a few in my instructions.
HERE'S HOW:
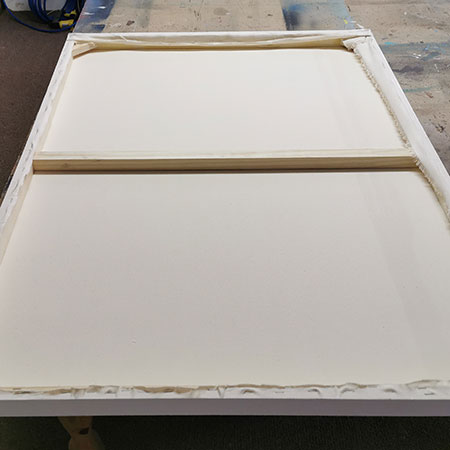
1. Making the frame
The frame for the canvas can be made to any size you want. I make my frames using 22 x 44mm PAR pine with butt joints at the corners that are screwed together. Nothing fancy, it just needs to be a sturdy frame, made perfectly square and strong enough to hold the canvas. Depending on the size, you will need to add more supports within the outer frame the larger you make the frame.
Add reinforcing to the frame with wood corners glued and screwed into position.
GOOD TO KNOW: If you use PAR pine for the frame, DO make sure to select straight lengths without any bows or twists.
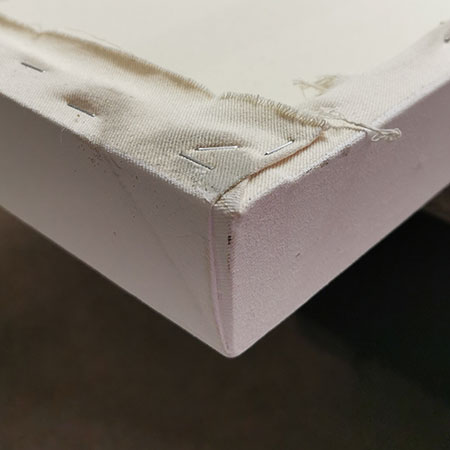
2. Stretching the canvas
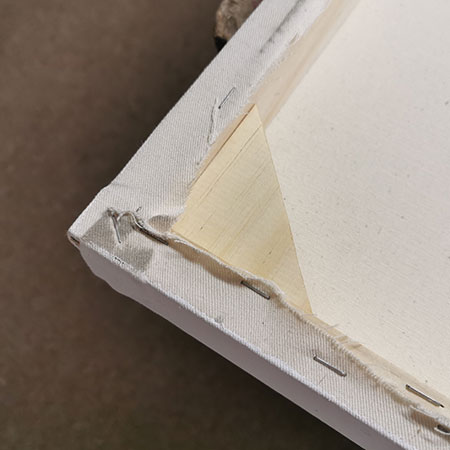
When you are using a canvas drop cloth for the canvas, it's the same process as if you were using normal artist's canvas. Cut the canvas material large enough to fit the frame and be folded over for attaching to the back.
I found it beneficial to secure the canvas to the wood frame as I do for my upholstery projects. Starting at one side, fold over and staple the fabric to the back of the frame - starting in the centre and working out towards the corners, but leaving the corners for now. Now go to the opposite side and pull the fabric taut in the centre before securing with staples. Then again, work from the centre to the corners but leave the corners until last. Repeat this process for the other two sides.
GOOD TO KNOW: The canvas on the front of the frame should be as taut as a drum. You should be able to tap it and it bounces tightly. Any looser than that and you should start again.
When you get round to the corners you need to neatly fold under and fold over like you would in upholstery. This can be found on one of the videos below, and this process makes very neat and tidy corners.
3. Applying Gesso to the canvas
Now here's something I picked up along the way. Gesso is very expensive and you use quite a bit when prepping a canvas. I discovered that Rust-Oleum Chalked ultra matte paint - in Linen White - works just as well - at a fraction of the cost. Simply prime the canvas with 2 coats of Chalked paint, leave to dry and then sand smooth with 180-grit sandpaper. It works like a dream. I also found a recipe online for making your own gesso.
Watch the videos below for more information on making the frames and stretching the canvas onto the frame.