Coiled rope pendant shade
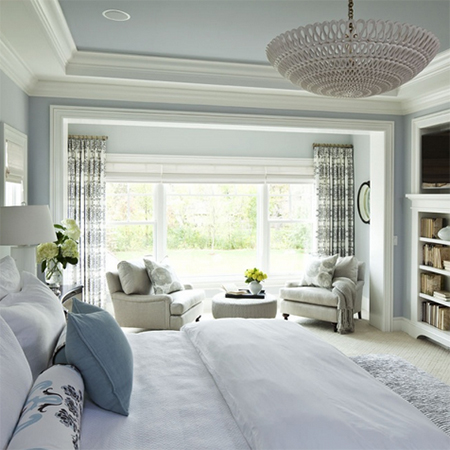
The inspiration for this coiled rope light shade came from a home designed by Martha O'hara Interiors.
oharainteriors.com
Taking her cues from the pendant lamp featured in the main bedroom, sara m dorsey, one of my favourite bloggers, created her own version of the beautiful design of the pendant lamp - and one that cost hardly anything to make!
sarahmdorseydesigns.blogspot.com
YOU WILL NEED:
Large roll of cotton rope (3 metres)
Ponal wood glue
2 Large artist's paintbrushes
Vaseline
Pine skirting and 2 strips of pine moulding to make the frame
Beach ball or balloon, or try the optional method
Optional: Glass or transparent acrylic bowl
or lamp shade
Plenty of newspaper
Large bowl
Gloves
HERE'S HOW:
Sara mentioned in her post that she didn't find the rope stiffened enough to hold the shape as she would have like. I have added a few modifications to the design based on a couple of previous projects that I have done, and offered a few other options that you might want to consider.
Make up a frame using pine skirting and moulding. Allow a 50mm wide trough for creating the coiled rope for the lamp shade. Coat the bottom and sides of the trough with vaseline.
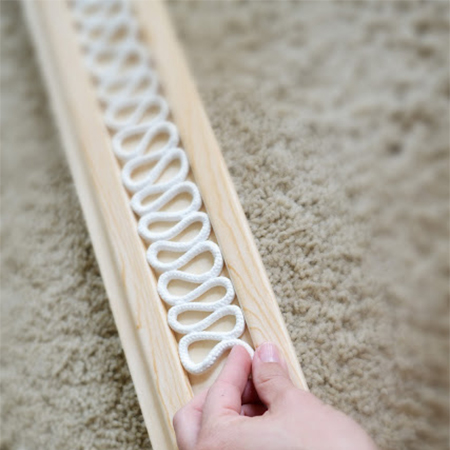
Firstly, rather than use ModPodge to coat the rope to create the shape, use Ponal wood glue mixed with water to make it runnier and easier to use. Submerge the rope in a large bowl filled with the glue mixture before removing in small sections and coiling into the trough in your pine moulding.
GOOD TO KNOW
Cover your workspace with newspaper and wear gloves. As you
remove the rope from the bowl, run if through your fingers to remove
excess glue.
Sara's method was to only do small sections at a time, but I would suggest that if you are using a length of skirting, fill the entire length with coiled glue-coated rope and let this dry overnight before repeating the process to extend the length. That way you can complete longer lengths faster. Clean out and re-apply vaseline for each length.
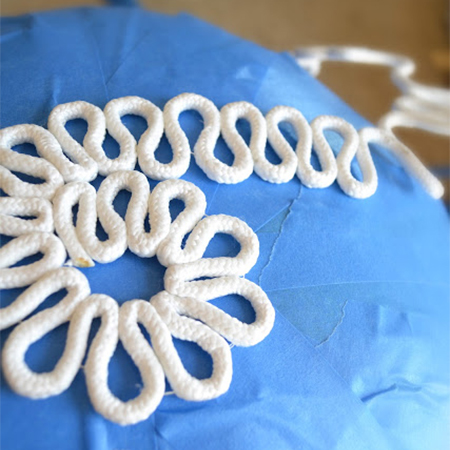
When starting to coil the glue-coated rope in the trough, make the coils very close together at one end to allow for the small circle needed to start off your rope shade. Although not shown here, coat your beach ball or balloon with Bostik double-sided sellotape so that it holds the coiled rope in place as you start to mould the shape.
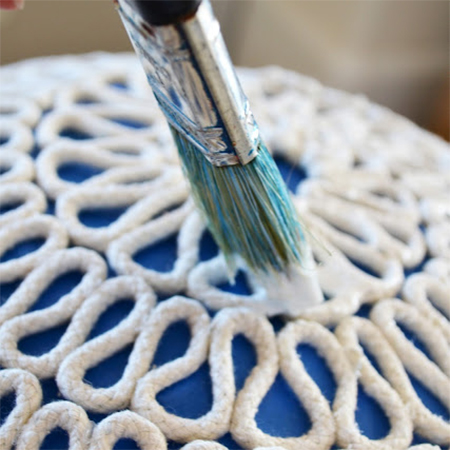
Our masking tape is not tacky enough to hold the coils as you work, and Bostik double-sided tape is clear and will be easier to peel off the back once the glue has dried hard. Use a paintbrush to apply more watered down Ponal wood glue.
Don't apply too much or it will end up filling in the gaps, which you want to prevent. And use a small paintbrush - an artist's paintbrush with stiff bristles - to apply the glue mixture. Allow each coat to dry before applying the next coat, and apply a total of 4 coats of glue mixture. Use a clean paintbrush to wipe away any excess glue that settles between the coiled rope.
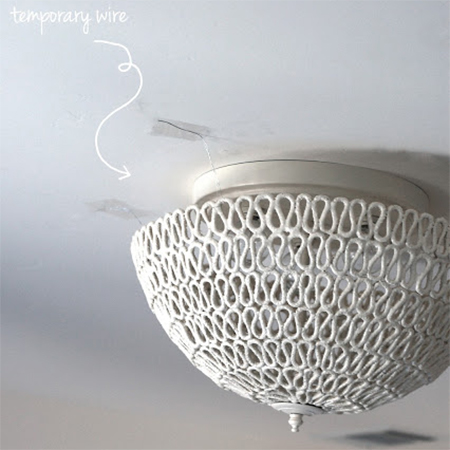
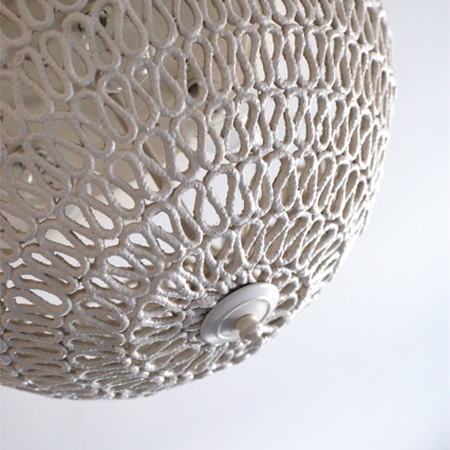
The coiled rope shade was attached to a modified light fitting. A threaded rod was added to the centre and a decorative nut and washer taken from a bargain buy lamp to hold the assembly together.
Sara did mention in her post that wire needed to be used to support the lamp, but if you use Ponal wood glue rather than ModPodge and, since exterior ModPodge is not available locally, you will find that the Ponal glue sets hard and your shade should not need any extra support to hold it stiff.