
Make a Decorative Lightbox for any Room!
Making a lightbox has become a fun DIY way to add a decorative light to any room in a home, and you can add a design, word or inspirational quote on the front of the lightbox to lift your spirits every day.
25/10/2020
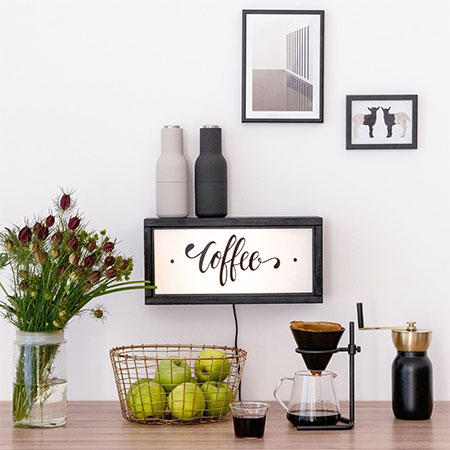
Making a lightbox is a basic DIY project that you can do to add a decorative light to any room in a home. It's perfect for a coffee bar or drinks bar, or as a night light in a kiddies bedroom, and for other rooms as well. The front is a piece of Perspex onto which you can apply a design, wording or an inspirational quote that is lit up when you switch on the light.
YOU WILL NEED:
2 of 19 x 140 x 400mm pine
2 of 19 x 140 x 150mm pine
2 of 10 x 10 x 364mm pine
2 of 10 x 10 x 140mm pine
2 of 5 x 10 x 364mm pine
1 of 3 x 150 x 364mm plywood, hardboard or Masonite
1 of 3 x 150 x 364mm Perspex or acrylic sheet
Lamp fitting plus 16mm screws
6 x 30mm pine dowels
Wood glue
Paint to finish
TOOLS:
Cordless screwdriver or drill / driver plus assorted bits
Jigsaw plus clean-cut blade
Multi or orbital sander plus 120- and 240-grit sanding pads
Clamps
Hammer
Tape measure and pencil
HERE'S HOW:
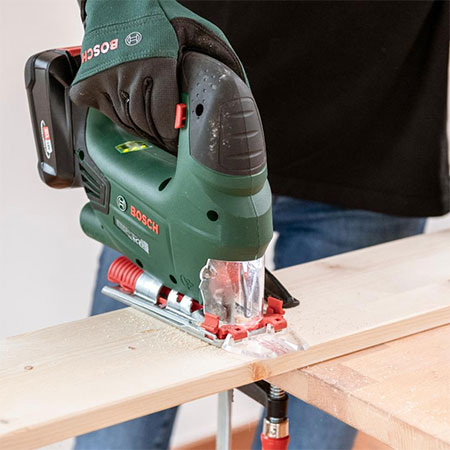
1. Start off by measuring up and cutting the pieces you need to make the frame for the lightbox, if you haven't already had these cut to size. The frame for the lightbox consists of [2] sides and [2] longer pieces for the top and bottom of the box.
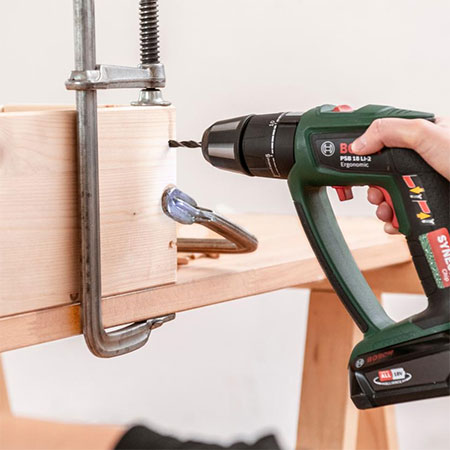
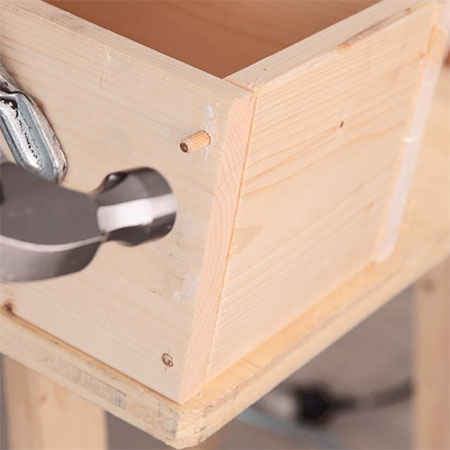
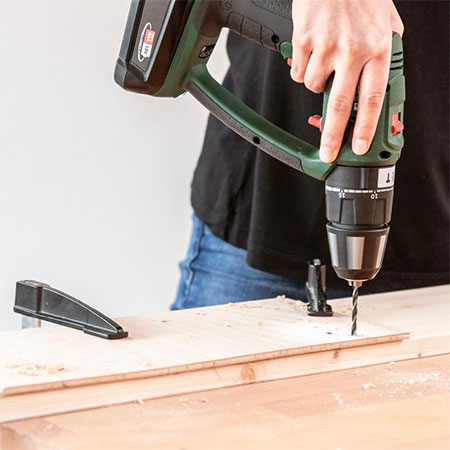
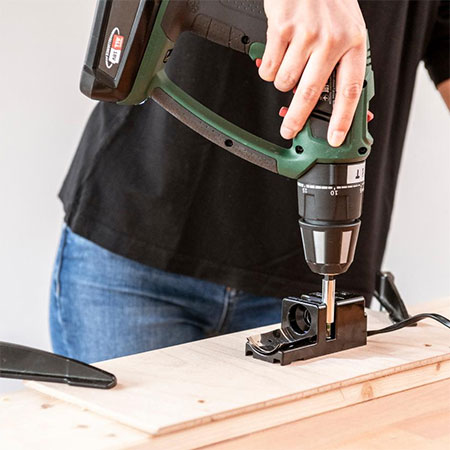
2. Have some clamps handy to help you hold the sections together as you drill [2] 6mm diameter holes at each corner for the 6mm dowels that will be used to hold the lightbox frame together. If you prefer, you can substitute the 6mm dowels with 5mm screws.
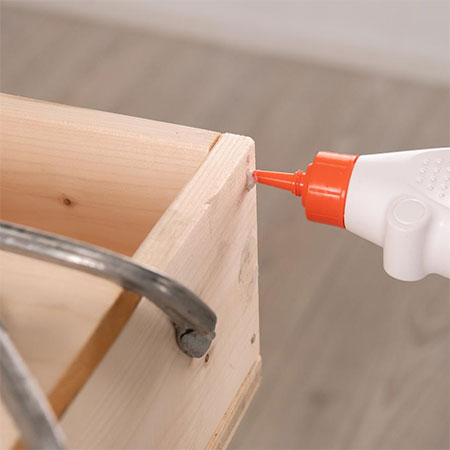
3. Place a bead of wood glue in each of the drilled holes. Not too much glue - you don't want this to make a mess everywhere.
4. Fill each drilled hole with a pine dowel, as shown below. Gently tap this into the holes with a hammer or mallet. Once all the dowels are in, use a damp cloth to wipe away any excess wood glue that oozes out of the holes.
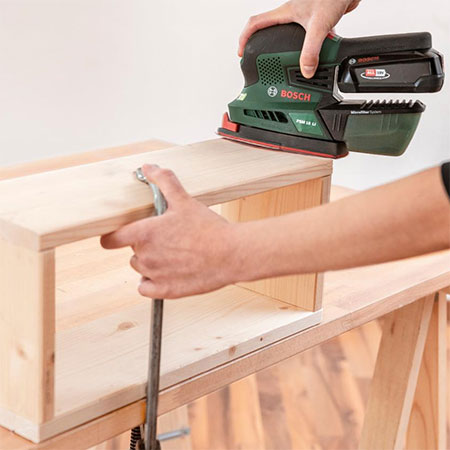
5. Use your sander and 120-grit sanding pads to smooth over the dowels. You can also lightly sand the frame with 240-grit sanding pads in preparation for painting later on.
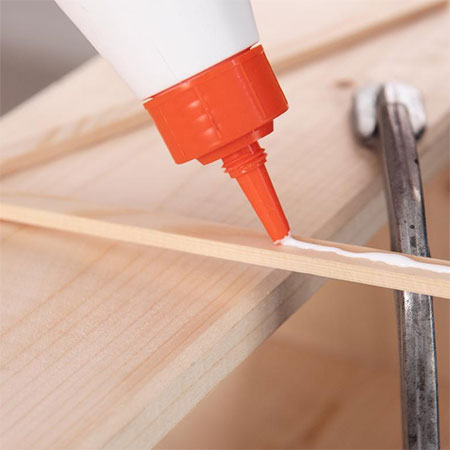
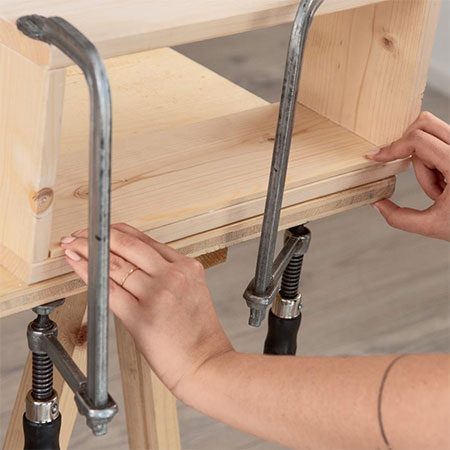
6. Now it's time to add the square pine pieces on the inside of the box frame. Check the measurements and trim the side, top and bottom pieces to fit and then glue in place. You can use clamps to hold these secure until the glue sets.
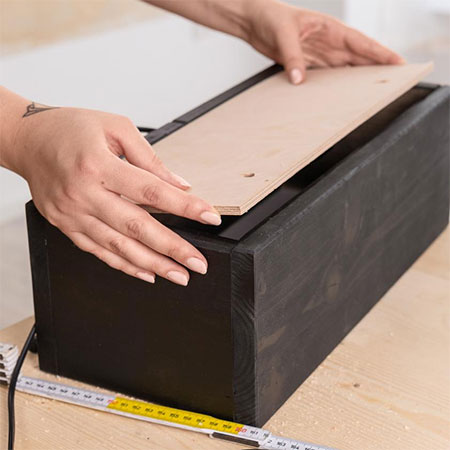
7. The back panel of the lightbox is screwed onto the back of the box frame. Mark the location and pre-drill holes, about 50mm in from the edges.
8. Secure the lamphousing onto the front of the back section using 16mm screws. Position the lampholder in the centre of the back section.
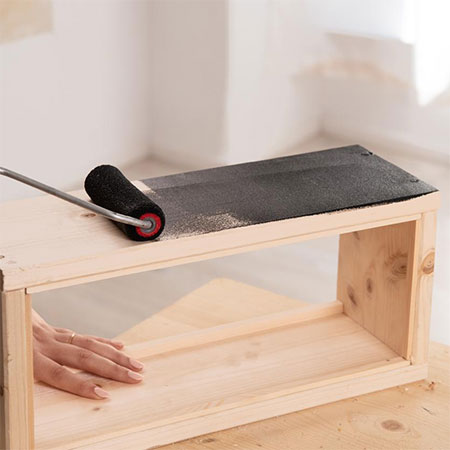
9. In this step you can paint the lightbox in your choice of paint colour. You don't have to paint it, you can quite easily leave as is or apply a wood stain and varnish.
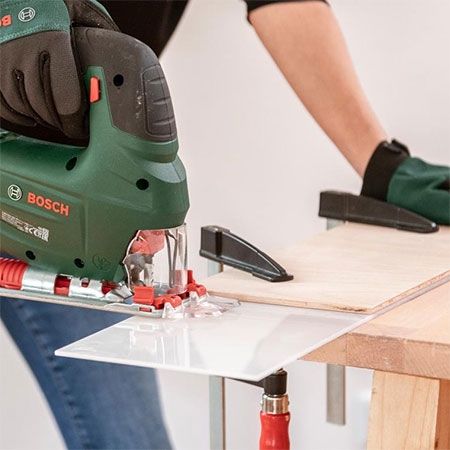
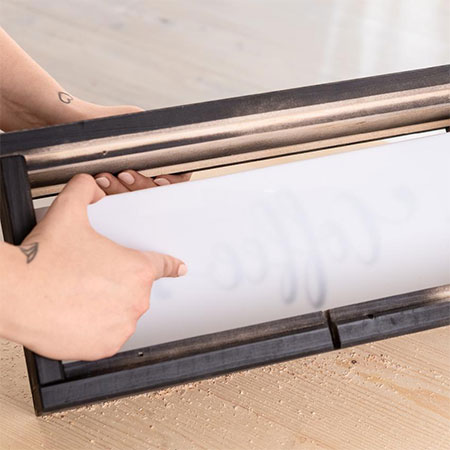
10. To install the Perspex or acrylic panel at the front, cut the panel to size so that it fits snugly inside the frame. At this stage, you can apply a design or wording onto the front panel using paint, stencil or stickers.
11. The front panel isn't fastened in place, so that you can change the design or wording later on. If you prefer to fix permanently in position, apply double-sided tape to the inside of the wood frame and press the panel firmly onto this.
12. To finish off the lightbox, place the back panel in position and screw to secure. And you're done!
all about diy