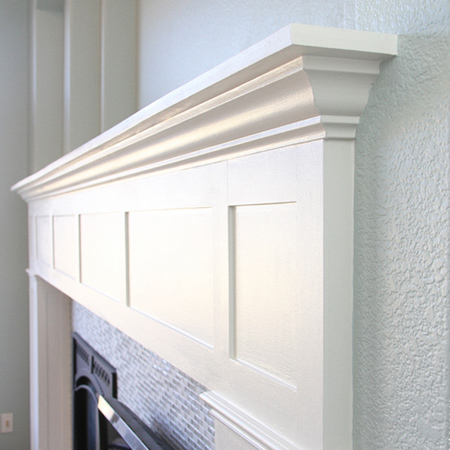
Build a fireplace surround with mantel shelf
PG Bison SupaWood, PAR pine and extruded polystyrene moulding are all that you need to make an attractive fireplace surround and mantel shelf for a home.
You will find all the tools and materials you need at your local Builders Warehouse.
makeit-loveit.com
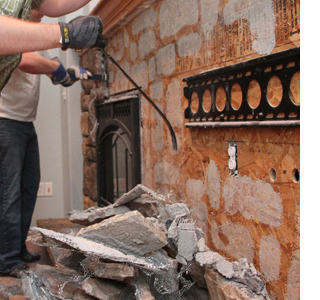
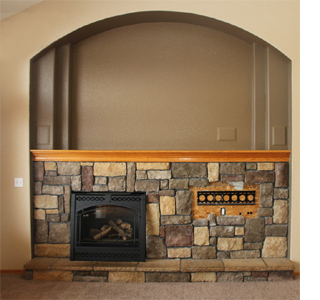
When ashley deconstructed her original fireplace surround, rock cladding mounting to a backing board was the first step in getting everything ready for the new fireplace surround and mantel shelf. Obviously, not having to complete this step will make the project easier and less of a mess.
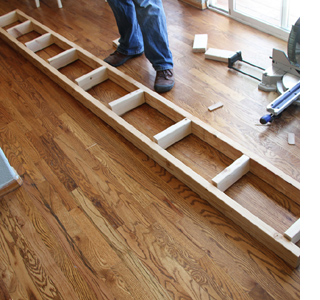
With the old surround removed, a framework of PAR pine was constructed around the fireplace, and it is this framework that will hold all the pieces in place. Normally, 20 x 100mm PAR pine will be more than wide enough to construct the framework, and all sections can be screwed together.
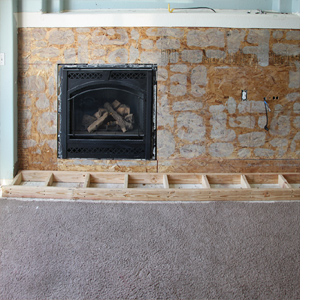
Here you can see the start of the framework. It is easier to start the process from the bottom up, and the first piece to go in is the hearth section of the fireplace surround. Secure this by fastening to the wall with wall nylon plugs and screws.
After placing the bottom section, you can start building up the sides and working towards the top of the fireplace surround. A basic framework of PAR pine timber is lightweight and easy to work with and you can build individual framework sections to fit into any space. The side pieces are also fastened to the wall with nylon wall plugs and screws.
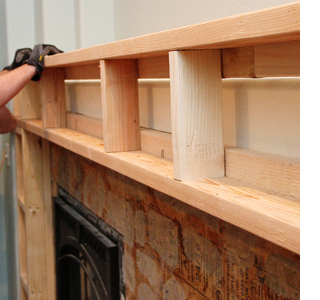
Continue adding framework up the sides and then along the top of the fireplace surround for the all-important mantel shelf.
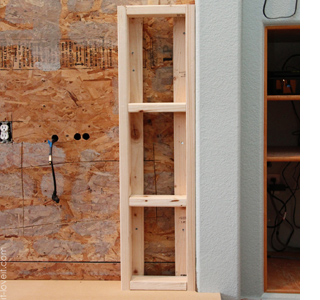
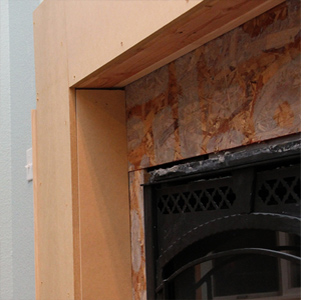
After installation of all the framework necessary to build the basic structure, it's time to start cladding with supawood. 12mm PG Bison supawood offers the best finish for a surface that is to be painted and you can use No More Nails adhesive and panel pins to secure the panels over the framework.
A pneumatic nailer obviously cuts down on the amount of work and you can usually hire one for the day. Alternatively, No More Nails adhesive and panel pins hammered it at a slight angle is just as good, just not as quick!
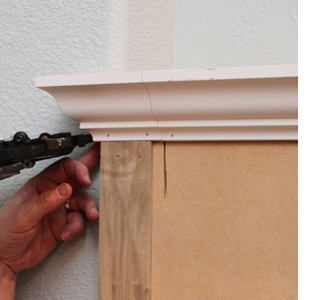
With the frame in place you are ready to start adding moulding and trim. 10mm-thick PAR pine has been added on top of the supawood board to add detail, while extruded polystyrene moulding is added to the top for the mantel shelf.
Again, these can be glued and nailed in place.
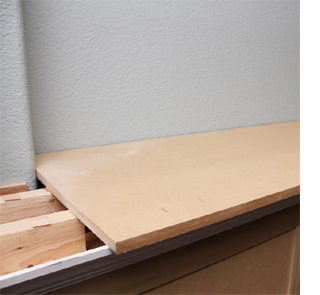
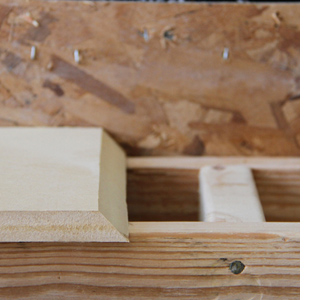
To build up the mantel shelf so that a panel can be mounted onto the top for finishing, blocks of pine have been cut to size and placed along the length of the shelf area. Use a spirit level to ensure straight and level. These can be glued in place with No More Nails adhesive.

Here you can see the detail added to create the effect of columns down either side of the fireplace surround. These strips have mitred corners for perfect fitting and can be glued in place with No More Nails adhesive.
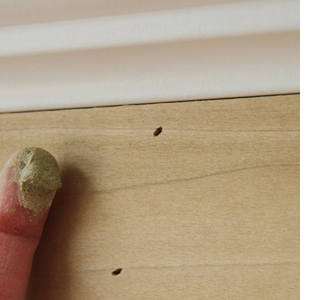
Fill in any holes with a small amount of wood filler. Let this dry before sanding smooth with 240-grit sandpaper.

To finish off and fill any unsightly gaps, use painter's acrylic around the inside frame edges and around the outside edges. Painter's acrylic allows you to easily paint over the top and fills any gaps. It's easier to apply with a caulking gun, so you will need a cartridge.
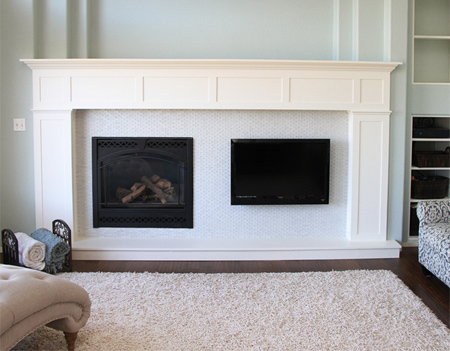
Now all that's left is sanding and painting. Sand all the edges with 240-grit sandpaper until nice and smooth. Removing the fluffy edge leaves a more professional finish - so don't skip this. Wipe down with a cloth lightly dampened with mineral turpentine to remove all traces of dust, and get out the vacuum cleaner to suck up dust from the surrounding areas. You don't want dust spoiling the paint job! You can paint with a variety of paint products, depending on the finish that you want. Choose from matt, satin, sheen or gloss.
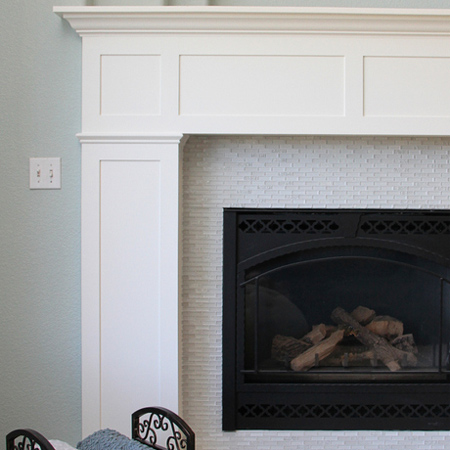
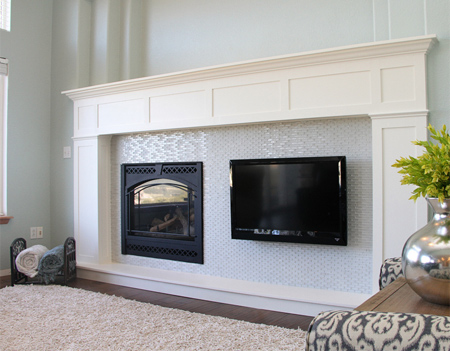
The back of the fireplace is finished off with a beautiful glass tile mosaic.