Washing machine drum lamp
If you enjoy being creative with items that normally get thrown out, you'll love this lamp made using the drum from a washing machine.
17/10/2017

instructables.com
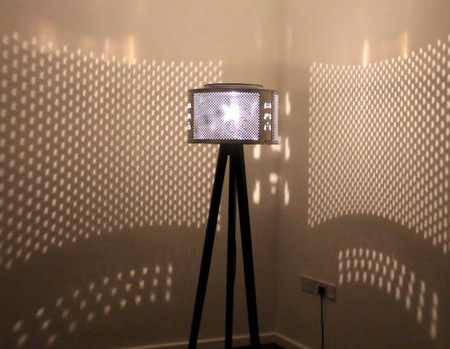
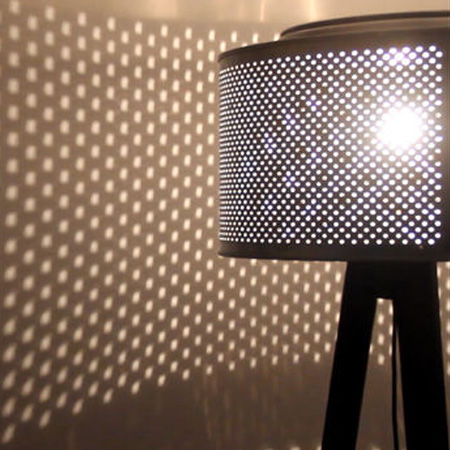
Recycling discarded items into unique items for a home has become increasingly popular over the years, as we look for new ways to re-purpose pieces that normally end up on the trash heap. This drum lamp is made using a few pieces of wood and a washing machine drum. At night, the drum lamp casts beautiful intricate patterns on walls.
Originally featured on instructables.com, the instructions have been modified for local materials and supplies.
YOU WILL NEED:
Washing machine drum
3 of 32 x 94 x 1800mm pine PAR - legs
1 of 69 x 69 x 120mm pine PAR - centre support
4 x 40mm screws [6]
Lamp holder
Electrical wire, 2 core and plug
Paint or stain and paintbrush
TOOLS:
Drill / Driver plus assorted bits
Table saw, band saw or mitre saw
Orbital Sander plus assorted sanding pads
Tape measure and pencil
Buy all your supplies for this project at Builders.
If you want to finish off your drum lamp in a shimmering metallic, pop into your local Builders to see the full range of Rust-Oleum spray paint products - or visit www.rustoleum.co.za to see the wide range of products and colours.

HERE'S HOW:
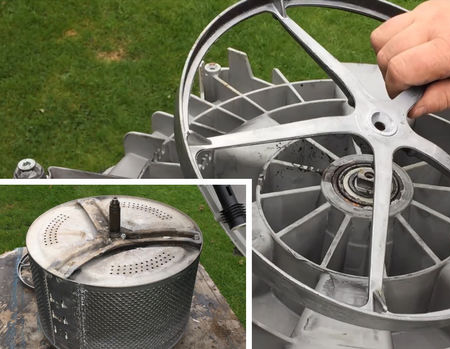
1. Take apart the washing machine to remove the drum. You may have to spend some time cleaning and polishing the drum. If you need to remove mineral deposits or limescale, apply vinegar to help break down and clean without scratching. Use a polishing compound to finish and give the drum a beautiful shine.
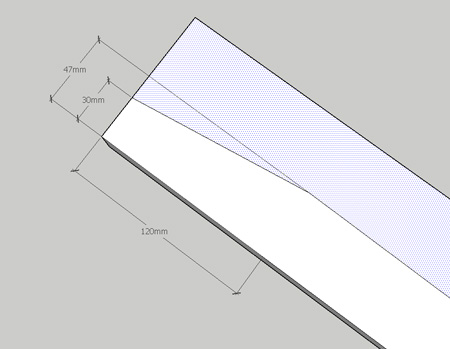
2. Cut the legs and centre section. The legs are 1472mm long and cut as shown above with a taper to the bottom (30mm wide).
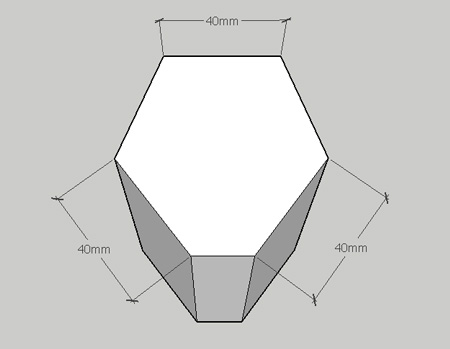
3. The centre section is cut from a piece of 69 x 69mm pine that is 120mm long. Drill a 10mm hole through the middle of the block to allow for the electrical wires to be threaded through for attaching the lamp holder.
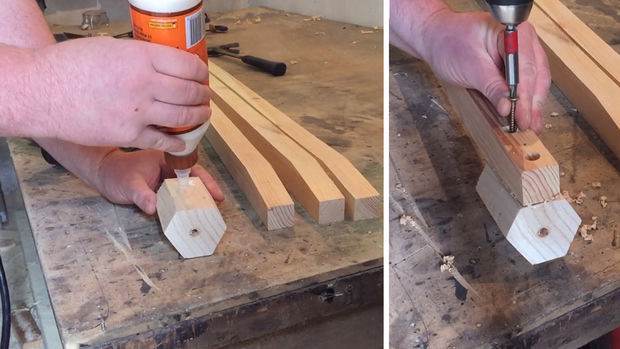
4. Once these pieces have been cut, sand smooth.
5. Use wood glue and screws (2 per leg) to secure the legs to the centre section.
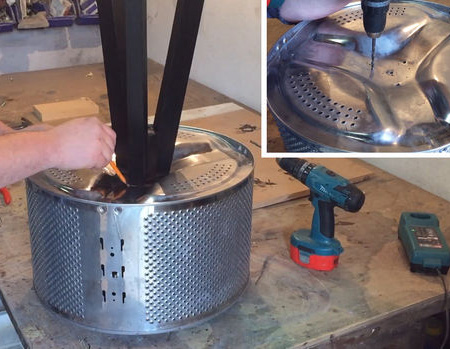
6. After assembling the stand, paint or stain before attaching the drum.
7. Mark the position for mounting the legs on the drum to drill holes through the drum.
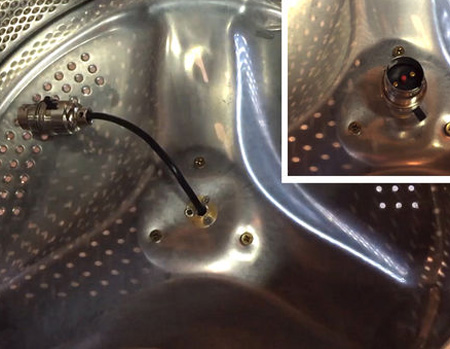
8. Strip the ends of the electrical cable and thread one end through the hole in the centre of the legs and into the drum. Attach the lamp holder and secure a plug on the other end.
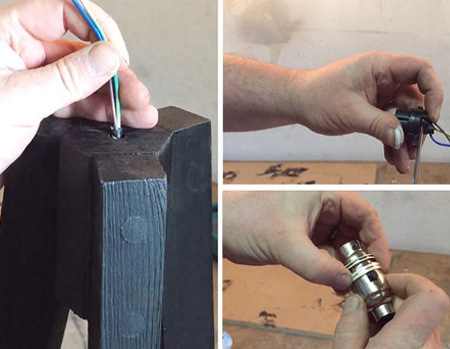
9. Screw the lamp holder securely onto the drum and check all is working before screwing the drum onto the legs.