
Install a Ceiling Rose
When renovating an older home, create an interesting focal point in a room by adding a ceiling rose.
20/09/2017


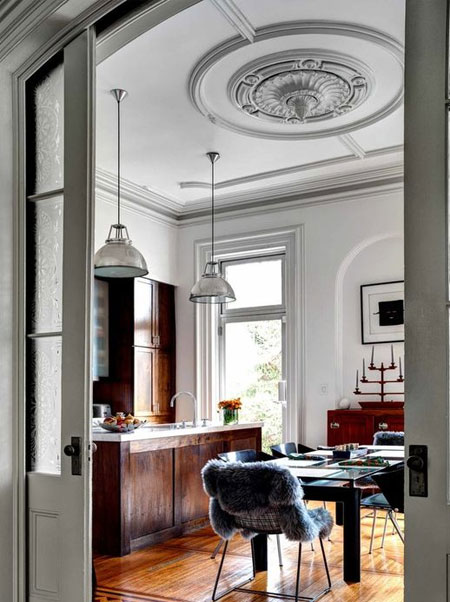
When renovating an older home you will want to restore as many of the original details as possible. The ceiling rose is a traditional feature in many older homes and even in more modern homes.
Made of plaster or polystyrene, a ceiling rose adds the finishing touch to a room that is decorated with crown moulding, door and window trim, and architectural detailing. It also adds an interesting focal point in an otherwise plain room.
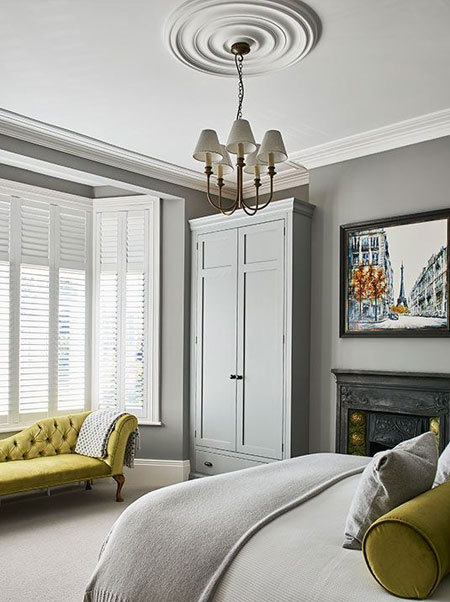
Nowadays, there are all types of ceiling roses on the market; from intricately detailed to more simplistic designs for a modern home. You can choose from a conventional plaster ceiling rose, or a lightweight extruded polystyrene ceiling rose.

How to install a Ceiling Rose:
YOU WILL NEED:
Ceiling rose (plaster or polystyrene)
Adhesive for plaster or polystyrene
Damp sponge
HERE'S HOW:
1. Switch off the electricity at the main Distribution Box before disconnecting an existing light fitting.
2. If not already done, drill a hole in the centre of the ceiling rose for electrical wires. Don't press too hard on the ceiling rose - especially a plaster ceiling rose - as it might crack.

3. Apply a liberal amount of adhesive all around the edge on the back of the ceiling rose. Choose an adhesive for your particular ceiling rose (plaster or polystyrene) - you will find the right adhesive at your local Builders Warehouse.
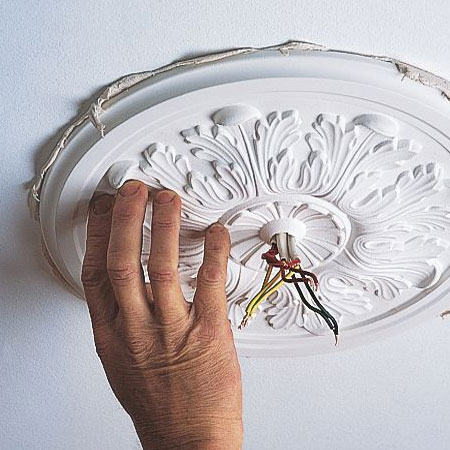
4. Carefully thread any wires through the drilled hole in the centre and position the rose on the ceiling. Gently press into place.
GOOD TO KNOW: Most adhesives have a certain amount of tack to hold the ceiling rose in place, but if you find it isn't staying put, use masking tape to temporarily hold in place.
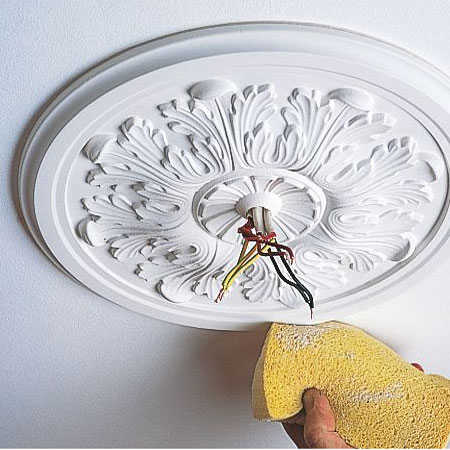
5. Remove any excess adhesive around the edge of the ceiling rose with a damp sponge. Let the adhesive cure overnight before re-fitting the light fitting. Use screws long enough to pass through the rose and into the joist above.
diy.com