Make a wigwam or teepee for indoor and outdoor fun for kids
Chilly days don't mean that kids have to stay indoors. This warm wigwam or teepee will keep them warm and snug and still let them enjoy their outdoor fun during the cooler days of the season. The wigwam / teepee is also perfect for indoor play, whether in a playroom or bedroom, and children will spend hours using their imagination.

toriejayne.blogspot.co.uk
Designed and created by Tori Jayne, this cosy wig-wam lets children play outdoors and stay warm, but also provides for plenty of play indoors.
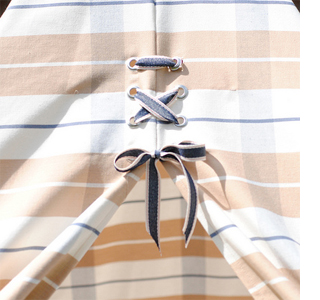
Tori says the hardest choice was what fabric to use. In the end she used a check canvas. For the ribbon threaded through the eyelets and tie backs she used denim stripe ribbon.
Tori advises going for a canvas or heavy-weight cotton and remember, due to the way the fabric pattern pieces are cut, the pattern will be sideways so ideally go for a pattern that looks good in any direction. Due to the way the pattern is cut, there is no need to hem the base of the wigwam as it uses the selvedge edge.
CONTINUES BELOW
YOU WILL NEED:
315cm canvas dropcloth, burlap or durable fabric (min 137cm wide)
10cm length of bias binding, width 20mm/10mm once folded
7 metres of 75mm wide binding or curtain tape
2.5 metres of ribbon - 15mm wide - or nylon twine
11 x metal eyelets/ washers and eyelet kit
Iron on interfacing
Sewing machine and accessories
Scissors
Iron and ironing board
Quick unpick
4 of bamboo canes 1.8 metres long - or pine dowels
HERE'S HOW:

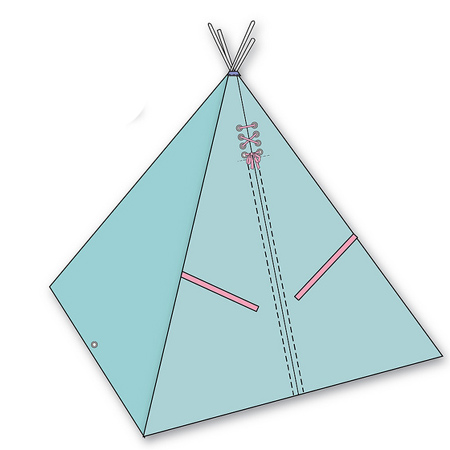
1. Cut the canvas dropcloth (or your fabric) using the cutting diagram above.
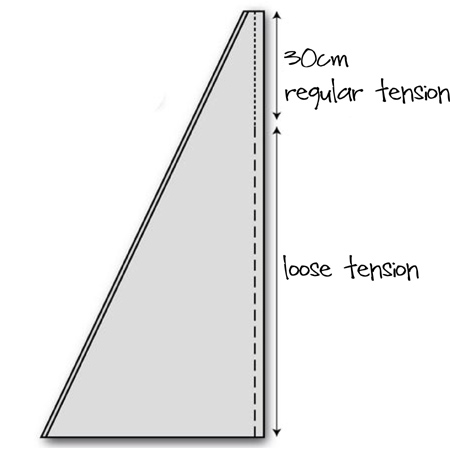
2. Right sides together and starting at the top, sew the two half triangles together using a 12mm seam allowance on tight tension for 30cm. Reverse stitch to secure and then continue stitching seam allowance on a loose tension to the end. This method will allow you to unpick for the opening later on.
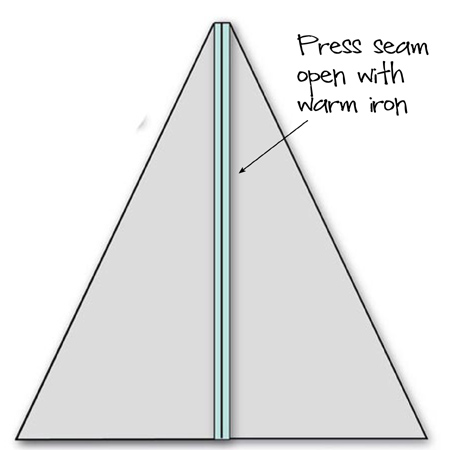
3. Press seam open.
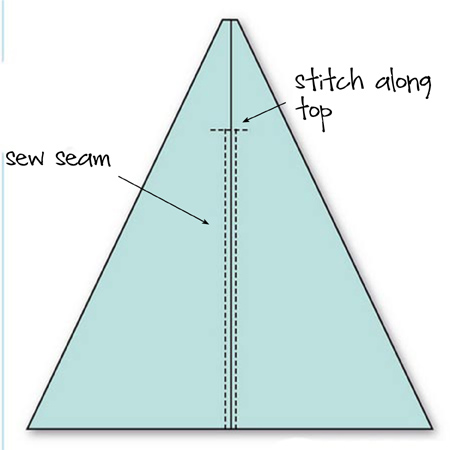
4. Stitch along the top at 30cm down from top of triangle and then stitch each side of the seam with a 12mm seam allowance.

5. Heat up your iron and secure a rectangle of interfacing to the inside of your front piece where you will apply the eyelets. Use an eyelet kit to insert 8 eyelets to the top front piece and insert your ribbon or nylon twine.
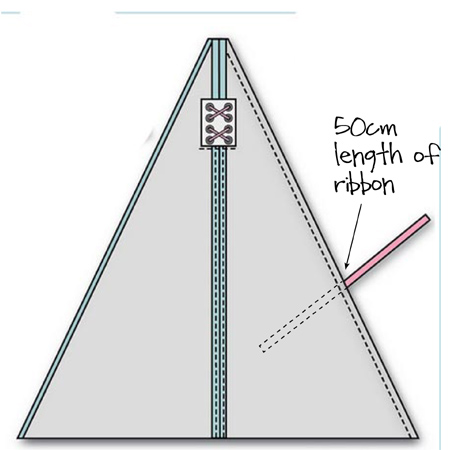
6. With front and side pieces with right sides together, pin a 50cm length of ribbon between the pieces, so that 25cm of ribbon is on the inside and 25cm is on the outside - approximately 50cm up from hem. Stitch together using a 12mm seam allowance. Press the seam open.
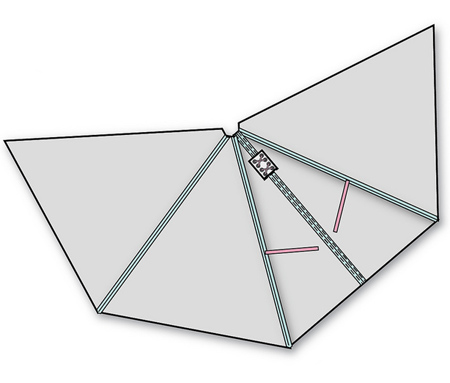
7. Repeat for the other side and then continue to add the rest of the panels with a 12mm seam allowance and pressed seams.
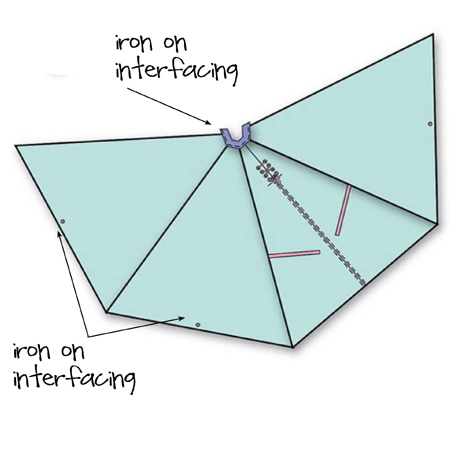
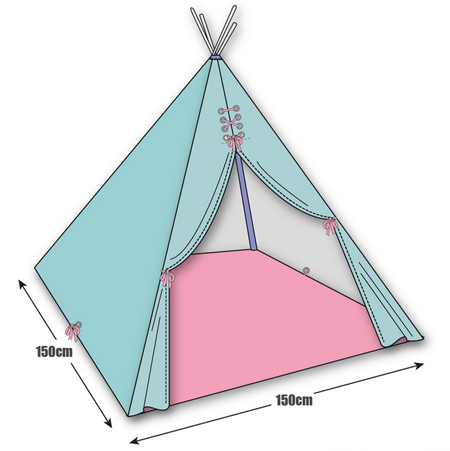
8. Where eyelets are placed at the base of each panel (30mm up from the bottom edge), iron on a rectangle of interfacing to the inside to add reinforcing. Insert one eyelet in the centre of each side piece and back piece to allow for securing a floor covering. This is optional and can be left out if you do not intend to add a floor mat.
9. Iron on interfacing to the top of the fabric to add reinforcing. Alternatively, sew on an extra layer of fabric.
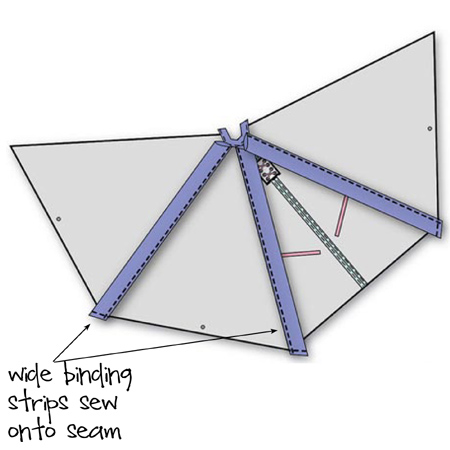
10. Take the wide binding and fold in half. Place over the side seam on each section, so the seam allowance of the side pieces is incased between the wide binding. Sew the binding in place, also stitching the opening at the bottom of the binding closed to allow for inserting the poles. Where the ribbon is attached, use an unpick to make a small insert in the side of the binding to pull the ribbon through.
11. Complete the fabric covering by sewing closed the back opening and attaching wide binding in the same way as mentioned above.
12. Now you are ready to insert your dowels.