
Summer Beach Bag
Make sure your beach bag is as gorgeous as you are this summer. A simple straw basket with plain leather straps suddenly becomes a thing of beauty when you add some material, a bow and some pyrography.

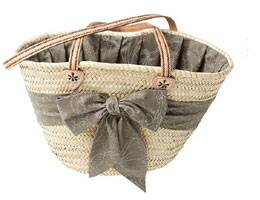
Big enough to carry your beachside essentials : suncream, purse, sunglasses, towel, cover-up, smart phone, ipod and book but light enough not to weigh you down. Simply follow our step-by-step guide. All you need is your Dremel Glue Gun and Dremel Versatip – and off you go!
YOU WILL NEED:
Dremel Versatip with Shaping Cutting Knife
Dremel Glue Gun 930 and clear glue sticks
Bag with leather handles
1.6m of 150cm wide lightweight cotton fabric
Scissors
Dressmaker’s pins
Fabric Pen
Ruler
Iron and ironing board
CONTINUES BELOW
HERE'S HOW:
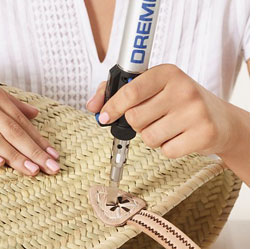
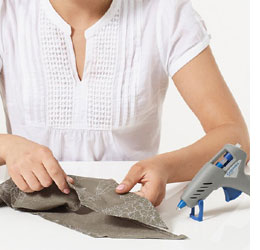
Make patterns on the leather handles
Fit the Shaping Knife 203 into your Dremel Versatip and set it to medium heat. Use the tool to burn patterns onto the leather handles of the straw bag.
Making the bow and fabric band
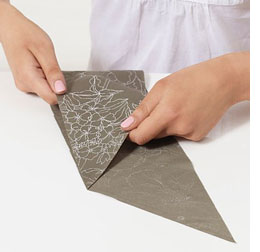
Following the grain line, trim the cut edge of your lightweight cotton fabric straight using scissors. Fold the cut edge across the piece to align it with the selvedge, making a triangle shape.
Use the iron to press along the fold made to establish the bias, i.e. a line running across the fabric at 45° to the selvedge.
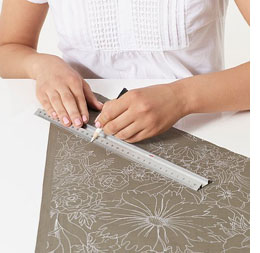
Measure and mark a line 12cm away from the bias edge. Take your scissors and cut along the line to create a 12cm wide bias strip. Repeat the measuring and marking process to make a second 12cm wide bias strip. Cutting the strips for the bow on the bias will allow the band to sit flat around a tapered bag.
Place one of the strips right side down. Lay the second on top of it right side up, matching the longest edge to the shortest edge. To make the profiles at the ends of the strips match, cut the lower strip following the angle at the selvedge of the upper strip. Repeat at the opposite end. Use the iron to press in a 1cm turning around each strip. Cut the shorter strip in half.
Mark a light pencil line around the circumference of the bag where the top of the band will sit. Measure around the circumference of the bag at this point. Fold the longest bias strip in half. Measuring from the fold, mark a point that is half the circumference of the bag, on both layers.
Unfold the strip, then lay the sections of the shorter strip on top of it, matching the ends. Transfer the marks made on the longest strip to the short sections. Place the two short sections together, matching the ends, and measure a point towards the straight cut edges that is 15cm from the marks made. Cut through both layers at the last marks made to make shorter strips with profiled ends that will match those of the longer strip.
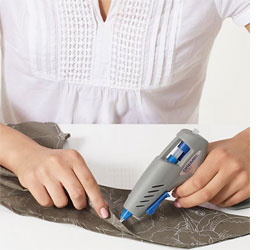
Place the full length strip wrong side up on the work surface. Lay the short sections on top, one at each end of the full length strip, right side up and matching the profiles at each end. Use the Dremel Glue Gun 930 and clear glue stick to glue the short sections of strip to the long band, wrong sides facing.
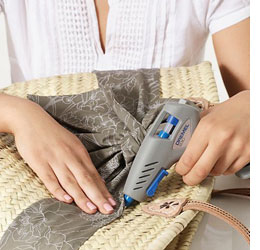
Position the centre of the full length band to the rear centre of the bag. Stretching the fabric slightly as you go, use pins to hold the band around the bag, positioning the upper edge of the band to slightly overlap the pencil line. Pin each end of the band to within approximately 3cm of the centre front of the bag.
Pin the lower edge of the band ensuring it sits flat against the bag. Tie the ends of the band in a bow. Glue small sections of the upper and lower edges of the band at a time to glue the band to the bag, removing the pins as you go. Arrange the bow, securing it with dabs of glue if necessary.
Lining the bag
Place the remaining fabric inside the bag, ensuring it extends slightly above the upper edge all the way around. To avoid the finished lining pulling when items are placed inside the bag, check that the fabric lays flat in the base.
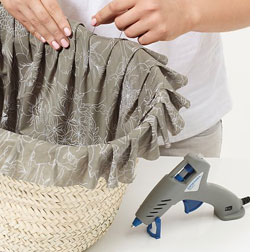
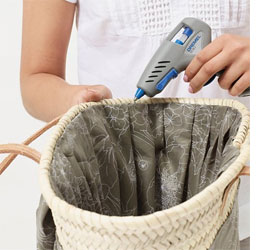
Cut roughly around the fabric extending above the edge of the bag leaving some extra fabric to allow for any repositioning. Hold the fabric around the top of the bag with pins, arranging the fullness into a series of roughly equal pleats, all facing in the same direction.
When happy with the arrangement, keep the pleats formed by using your Dremel Glue Gun to glue the front and back of each one. Trim the top of the lining to just above the top edge of the bag. Carefully fold the raw edge over and pin it so that it sits approximately 1cm below the inner rim of the bag.
Unpin a small section of the pleated fabric at a time and apply a thin line of glue close to the edge of the fabric. Press the glued fabric to the bag, repeating the process all around the edge to secure the lining.