
Make your own art with string
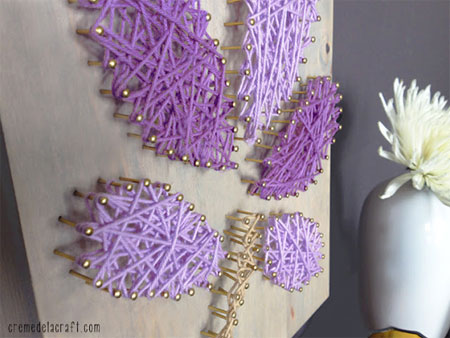
I have recently posted an article on the resurgence of string art. This is a fun way to create your own colourful and dramatic art with only a few accessories. If you start off with a small string art project, you will soon be creating intricate masterpieces for your home. Natalie at Creme de la Craft creates a beautiful flower string art piece in this tutorial.
YOU WILL NEED:
Colourful embroidery thread or wool in 3 colours
Piece of wood at least 112mm thick
Printout of your desired pattern
Box of brass nails
Hammer
Scissors
Tape
CONTINUES BELOW
HERE'S HOW:
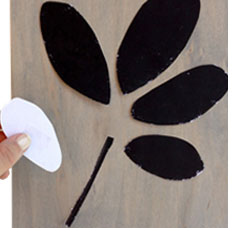
Cut out your desired pattern and tape the pattern directly onto the piece of wood.
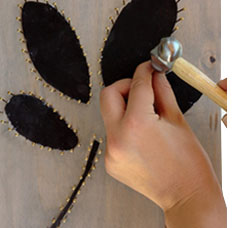
Nail around the edges of your pattern using a hammer. The nails can be as far apart as you wish, but I would recommend about 1cm apart for smaller patterns and up to 2cm apart for larger ones.
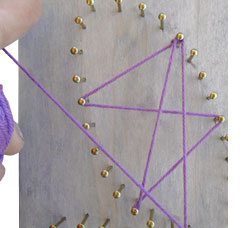
Remove the pattern so that only the nails remain on the wood. Grab your string and tie a knot around one of the nails to secure in place.
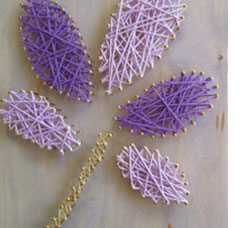
Start wrapping the string back and forth around the nails. The best part is there is no right or wrong way to do this. Just have fun wrapping away! Continue wrapping until you've reached your desired look. Get creative and experiment with switching between different colors of string. Once complete, tie the end of the string to one of the nails and cut off any excess.