
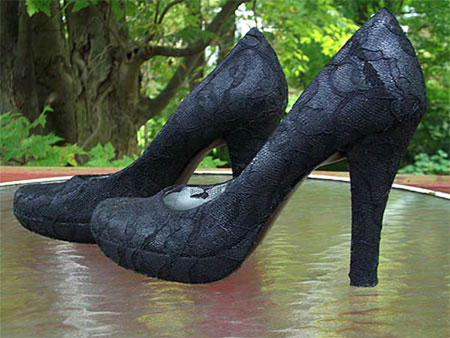
Lace up your shoes
Times are tight, right! So who can afford to buy new shoes all the time, unless you have OCD and just cannot resist. I came across a great idea at Carry on - Carry on for dressing up a scuffed pair of shoes with lace. What a great idea for giving shoes a makeover!
YOU WILL NEED:
Scruffed pair of shoes - this effect looks great on platforms
Lace- half a metre will be more than enough
Mod Podge or clear acrylic sealer (I buy mine from Prominent Paints)
Paint brush, smallish
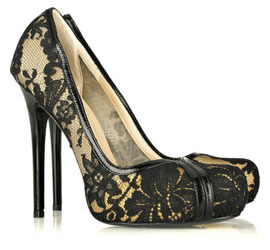
For contrast, apply lace over any colour shoe for a dramatic lacy effect.
CONTINUES BELOW
HERE'S HOW:
Step 1
First cut out a piece of lace that will cover the main part of the shoe. We will cut out a piece to cover the heel later. Start gluing the lace onto the shoe starting at the toe. Mod Podge does not need a ton of it to work so a medium thickness layer with work
fine. We’ll seal it better later.
Step 2
Next move up and glue the sides of the shoes. I do this one side at a time so I can work with it to make the lace lay flat. This is where it gets a little tricky though. Sometimes the lace doesn’t want to lay perfectly flat. I know the glue would probably still hold it if there were a small bubble in it but I prefer to have it flat so the lace doesn’t want to pull off the shoe.
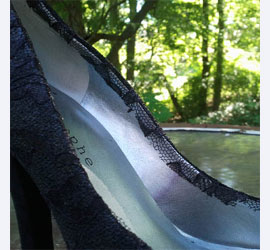
In order to alleviate this issue I spent time pulling the lace to see which way it laid best, it does take a little work. If it was giving me a problem in one area I made small snips in the excess hanging over the sides which seemed to help. In the middle I made a slice down the centre and cut the lace close to the sides leaving about a 1 cm excess. Then I ran a bead of glue along the inside and folded over the excess to give the top a finished look. Right around the toe I had to make a lot of snips so that the lace folded neatly around the curve.
Step 3
At the back where the side pieces of lace meet I cut both sides along the back seam so that when I glued it down the two pieces met perfectly and ended up looking like one continuous piece. Honestly you can’t even really tell where the two pieces came together. The lace kind of camouflages the seam.
Step 4
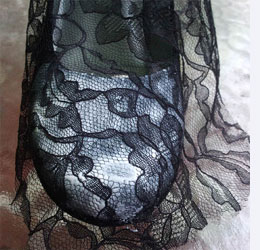
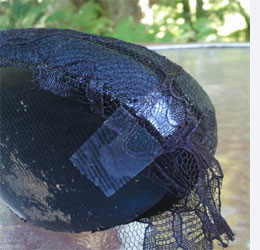
After the main portion of the shoe is glued I went and snipped off the excess around the bottom and up the sides to the heel, leaving it for later. Now we need to finish the toe and the heel. Finishing the toe requires a little work. I finish it in steps so that I can get the lace to lay as flat as possible. This is where the lace puckers the most because of the curve so some snipping here can help. It also helps to tug gently on the lace when you’re gluing it down.
I also placed a piece of tape on the excess lace around the toe to help it stay down while the glue dries. Continue gluing the toe until it is completed and dried and then clip the excess off around the bottom.
Step 5
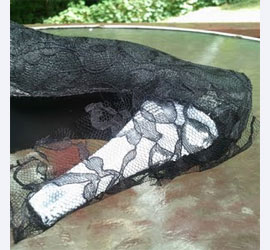
To cover the heel first cut a piece of lace large enough to cover it. I started by gluing down one side of the heel. Because the heel is curved and tapered this is another spot where you need to work with the lace to make it lay flat. It also really helps to snip the excess like before. Then move to the next side and do exactly the same thing.
I did not wrap the lace around to cover the inside. I just didn’t see the need to and I don’t feel my shoe is missing anything because I didn’t. If you want you could totally wrap the entire heel, it’s up to you. After the heel is dry go around and snip off the excess. For the part on the back where the heel meets the main part of the shoe I cut the excess lace following the original seam of where the heel was attached. This way the lace blends together nicely. Then I ran a small bead of glue where the back and heel met just to be sure the two pieces are glued down.
After the excess lace is all removed, go around and cut the lace more precisely, a small pair of craft scissors would really help at this point. After that if nothing else needs glued go ahead and give the shoes a coat of spray sealer. I chose to use a decoupage sealer because it gives better flexibility than standard sealer. This is important for shoes because you need them to bend and flex as you walk.
Voila! Go enjoy your fabulous new lace pumps now!