
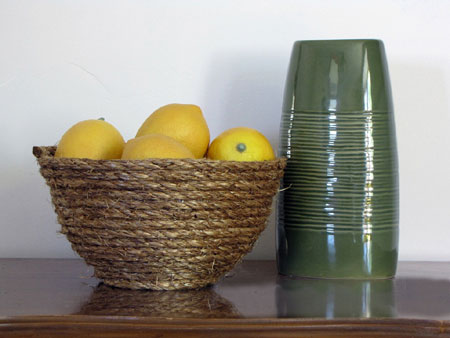
How to make a rope bowl
I love this rope bowl, it's so stylish and great and totally fits into my décor!
It is just so neutral but adds so much – and I know it will add to any room in your house too, and only costs as much as a roll of twine or rope.
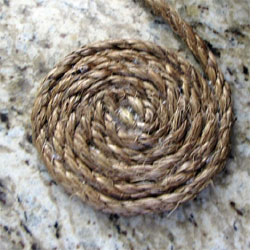
Step 1
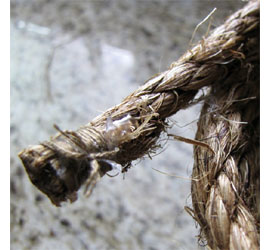
Before you start wrapping, adding a blob of hot glue to the ends of the rope to prevent fraying as you work.
CONTINUES BELOW
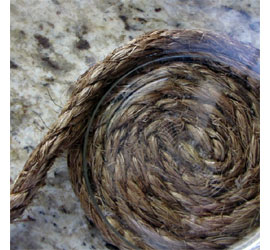
Step 2
As you wrap to create the base of the bowl, apply hot glue every 6 to 8 centimetres along.
Step 3
Use a suitably sized bowl as a guide for the shape, and start to wrap the rope up and around the side of the bowl, applying hot glue as you wrap around.
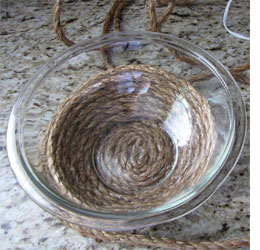
Step 4
Glue your rope together all the way up until your desired height. I applied my hot glue on the top outside edge of the rope bowl so I wouldn’t glue my rope to the glass bowl. (Note: I did get a little bit of glue on the glass but it washed right off in the dishwasher.)
Step 5
In order to keep the rope from fraying when I cut it – I knew I needed to add an end of some sorts. I didn’t want tape so I used some embroidery thread. I added a dot of hot glue and then tied a double knot pulling it tight into the glue. I glued the end down with the knot facing down so it was hidden between the two layer and I was done!