
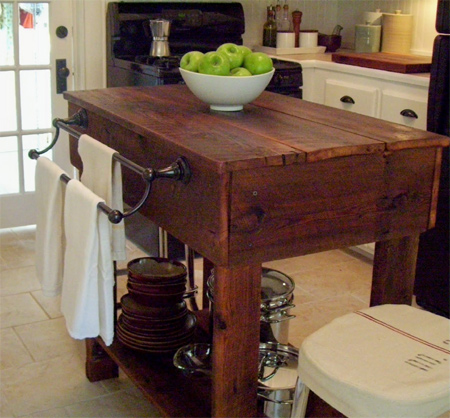
Rustic kitchen island with reclaimed timber
There are plenty of projects where you can use reclaimed timber in useful ways, and there are many sources of reclaimed timber. In this project you can make a kitchen island or convenient table for the kitchen.
ourvintagehomelove.blogspot.com
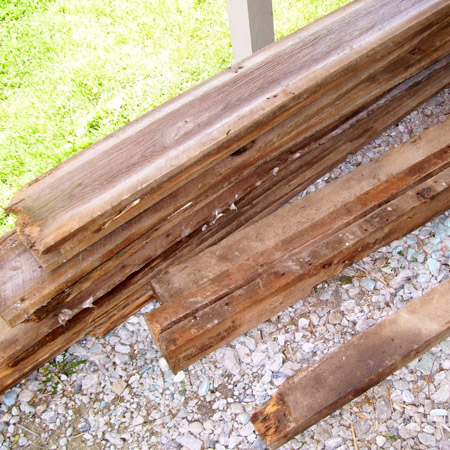
There are various sources for finding reclaimed timber. You will find sellers on many of the online auction sites such as gumtree and your local online classifieds. Old fences, demolished garden sheds and salvaged floorboards are perfect for making furniture. But do check the wood before you use it. Remove any signs of fungus or rot if you are going to be using in the kitchen.
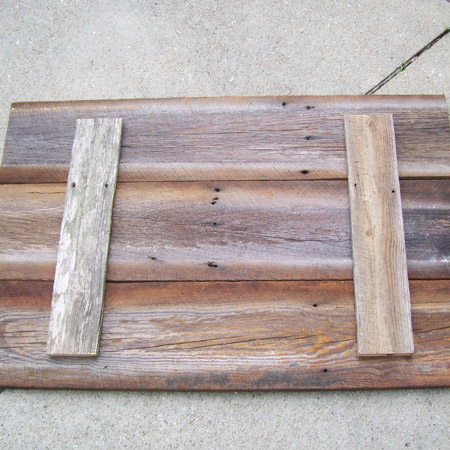
Whenever I build a table like this, I always start with the top first and then determine the rest of my measurements based on that. So, after I determined how big I wanted the top to be, I chose the best pieces of wood. Again, since you are using beautifully aged wood, look for your most visually pleasing pieces.
The table top measurements were 585mm 940mm. Three pieces of wood placed side by side was 585mm across, so that is how I determined that measurement. I cut three of those planks to be 940mm in length and layed them top side down, side by side on the ground. You don't want any gaps between the boards.
I then took another two boards and cut them to be 460mm in length. These are the pieces that will connect all three planks together. Place these across the three planks and attach using wood screws. It's important to note that when using screws, it's best to pre-drill your holes first with a drill bit so your boards won't split and doing so makes it much easier to sink your screws.
As you can see, you want the cross pieces to be shorter than the length of the planks to allow for the sides (aprons) of the table. This is the under side of your table top.
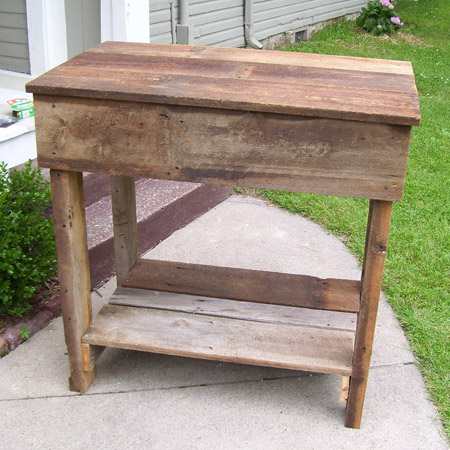
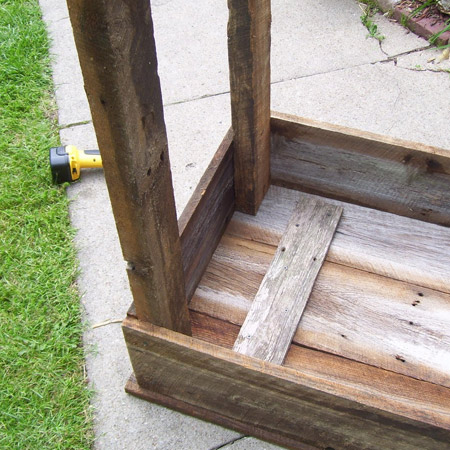
Determine the height of your table. I wanted my table to be countertop height, so, I cut four 50 x 100mm sections to be 900mm in length. Place them on each corner of your table top. You want them about 20mm in from each edge. Make sure they are in the correct position because this is how we will determine the measurements for the apron (surrounding sides)) of the table.
Starting with the short end of the table, measure from the outside of one leg to the outside of the other leg close to the tabletop. Cut a piece of wood that length. In my case, it was 520mm. This is the side of your table for one end. You can go ahead and measure the other end and do the same thing. If everything is lined up, attach the side to the legs by using wood screws. I used two 5 x 55mm screws and just inserted them from the outside - this is a rustic table, doesn't need to be perfect.
Make sure that the ends of each side are flush with the outside of the table legs. Do the same thing for the long side but this time measure from end to end starting at the side you just attached.
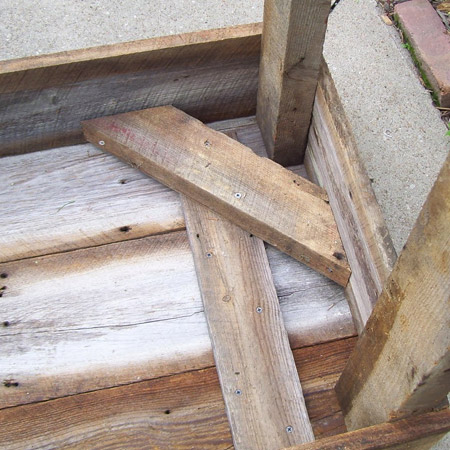
To reinforce the table grab some wood scraps and cut both ends at a 45 degree angle. Use a mitre saw, or mark with a tirangle and cut with a handsaw. These will fit into the corners underneath the tabletop. Make sure your screws are short enough that the will go through the wood into the table but not come out the top of the table. Insert a screw at an angle into the end of the cut wood and screw into the apron (side) of the table.
Do this with all four corners. Flip it over and there is your table. Now, I wanted a bottom shelf on my table to hold my larger dutch oven pots and I didn't get any photos of the process so I will tell you how I did it, it's easy. While my table was still upside down on the ground, I measured 200mm from the base of the leg and marked it. I did this for each leg. Now, cut two more pieces of wood to match your two end cuts for the apron, again, mine were 520mm. Attach this piece, flat side against leg, with wood screws.
Repeat for other side. This will give you a support for adding planks for a bottom shelf. Measure the distance from ledge to ledge and cut three more planks accordingly. Since this is the bottom shelf of your table, it is okay if there are gaps between your planks and you don't have to use three if you don't want to. I used two planks that were the same width as my top table and one smaller one. Remember, it's rustic. It's not supposed to be perfect.
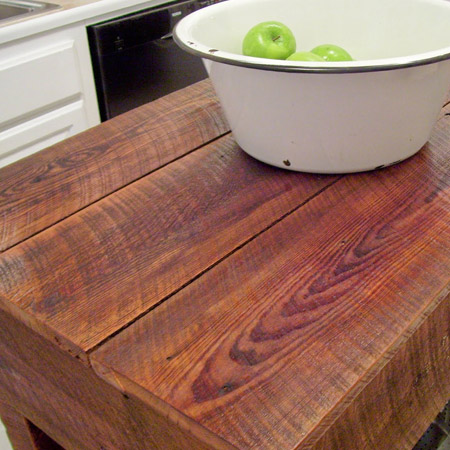
Next step is the sanding. Grab yourself some 120-grit sandpaper or an orbital sander and sanding pads and sand the wood to remove the roughness and then sand with 240-grit until it's smooth. After all your sanding is complete, give it a good wipe clean. Plascon Ultra Varnish is an excellent-quality, polyurethane varnish suitable for a wide range of interior woodwork applications. Ideal for use in most wood surfaces – furniture, cupboards, skirtings, floors and counters, for example.
Using a clear varnish will allow the natural beauty of the reclaimed wood to shine through.