Make your own paper beads
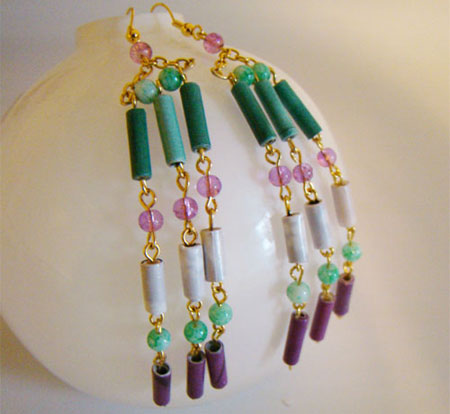
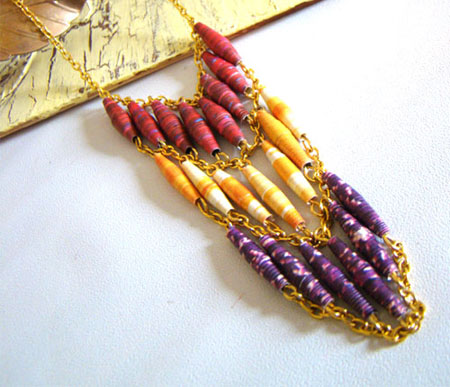
I'm not much of a jewellery person, but when I do wear jewellery I like to go over the top and really wear lots of it. The idea of being able to make my own really big, bold and colourful jewellery is exciting and I can't wait to get started on my first pair of paper bead earrings! Click here for more ideas for jewellery with buttons and beads.

mzuribeads.com
HERE'S HOW:
Paper: wrapping paper, scrapbooking paper, thin fabric, magazine pages, etc
Sharp craft knife and cutting mat
Toothpicks
Mod Podge
Rust-Oleum spray varnish - gloss
Old paintbrush, small
Cloths to wipe us the inevitable mess
Craft glue, or any glue that dries clear
A drying stand – a container or box slightly narrower than the toothpicks
madmim.com
Follow these instructions by Mirian at madmin and find out how to make your own paper beads.
HERE'S HOW:
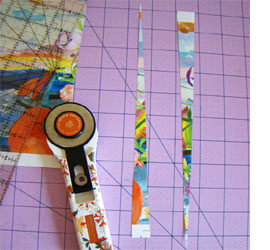
Cut your paper into long strips that taper to a point at one end. Start off with a width of around 2cm for a round bead and 3 to 4cm for a long bead. You can use any paper for your strips. I cut from magazine ads.
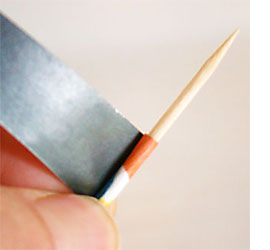
Start rolling a strip at the wide around a toothpick. You can use anything here, just as long as it’s pretty slender.
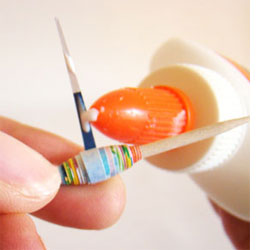
Keep rolling until you reach the very tip and then add a dab of glue. Wind the last bit of paper around the bead and hold until it stays. I usually rolled two beads per toothpick, and rolled all my beads to this point before I applied mod podge.

Coat the beads in Mod Podge, and lay on top of a container to support the edges of the toothpick, so that they can dry. Recoat after a good 4-8 hours. Or don’t wait that long, I won’t judge you. I then took my tray loaded with toothpicks outside and sprayed (two coats) of Rust-Oleum polyurethane spray varnish. I had semi-gloss, and wished I had high gloss. The more shine the better I say.