
How to make a knitting fork
What's the latest craft craze... knitting with a fork. Not your average fork, mind you, but a carved wooden fork. Since I haven't been able to source a knitting fork locally, as usual I decided to make my own!
YOU WILL NEED:
Block of pine 200mm x 40mm x 20mm thick
Jigsaw and fretsaw (thin) blade
Dremel MultiTool + large/small sanding rings - or sanding paper
180-grit sandpaper
Drill/Driver and 10mm wood bit
Tape measure and pencil
Workbench and quick clamps
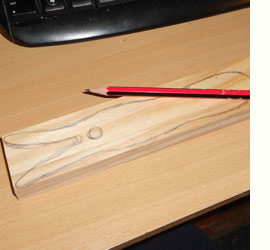
1. I started off by drawing the outline of the knitting fork with a pencil. For those of you who aren't very artistic, I have included a drawing below. The shape needs to be curvy and easy to hold, so that you won't suffer from hand fatigue when knitting with your fork.
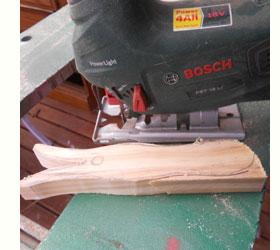
2. After outlining the shape from your knitting fork you can cut this out with a jigsaw. Use a fretsaw (thinner) blade to cut nice curves and be sure to clamp the wood to your workbench. The cutting doesn't need to be perfect as you will be sanding in the next step.
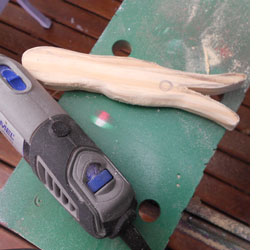
3. I used my Dremel MultiTool and large sanding ring to smooth out the roughness and curve all the side edges. Once again, perfection is not required as you will be sanding again with a smaller disk.

4. Using a smaller sanding ring, go over the edges again and get into the smaller parts where the prongs of the knitting fork are. Use the smaller ring to try and achieve a smooth, curved edge all the way around.
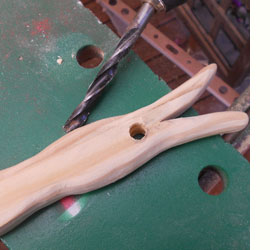
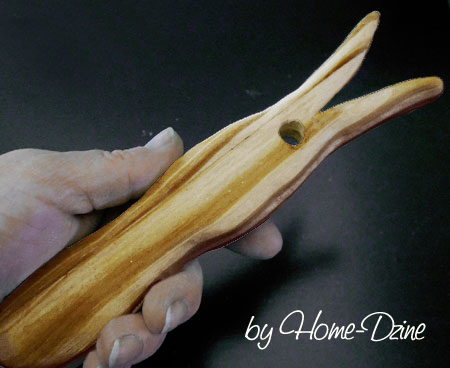
5. Before final sanding, use a 10mm wood bit to drill a hole in the knitting fork. Use the image left as a guide for positioning the hole.
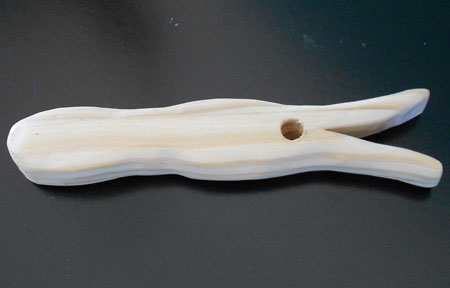
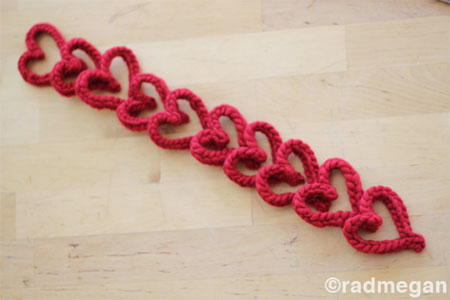
6. Finally, use 180-grit sandpaper to smooth the knitting fork. Now that you have a knitting fork, click on the links below for step-by-step instructions on how to use knitting forks for some really cute projects.
radmegan.blogspot.com
radmegan.blogspot.com
radmegan.blogspot.com

radmegan.blogspot.com