
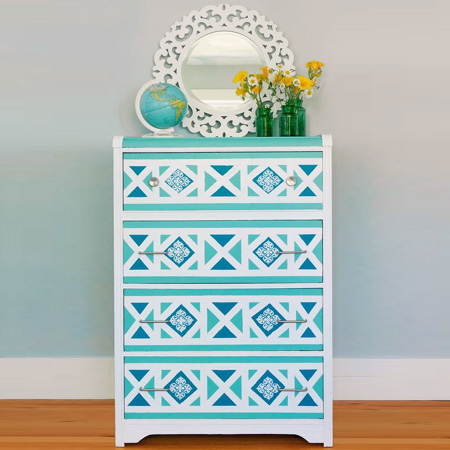
Dress up a chest of drawers with paint and geometric design
This project shows how easily you can transform a chest of drawers, or any piece of furniture, into a wonderful show piece for a home. This plain chest of drawers is finished with a geometric design in aqua hues.
YOU WILL NEED:
400-grit sandpaper
120- and 240-grit sanding pads
Masking tape
Optional stencil
Foam application, stencil brush and paintbrush
Plascon Kitchen & Bathrooms
Plascon waterbased glaze coat matt or gloss
Orbital or random orbit sander
Tape measure and pencil
Buy all the materials and supplies for this project at your local Builders Warehouse.
HERE'S HOW:
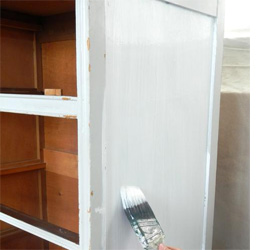
Remove all handles and hardware before you begin. The first step in this dresser makeover is the sanding and painting of the unit prior to adding the design. Sanding will smooth the finish and providing a surface for the paint to adhere to. Start of with 120-grit and then sand again with 240-grit sandpaper. An orbital sander is best for this but a random orbit sander is even better.
If you don't know the difference between an orbital and random orbit sander - find out more here.
What paint should I use?
Plascon Kitchens and Bathrooms paint is the best choice for this project. Although it leaves a matt finish, you will be adding a clear glaze coat once complete and this will add a level of sheen to the finished project.
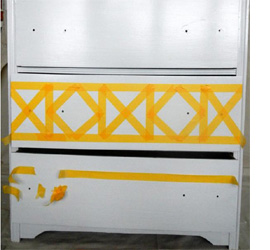
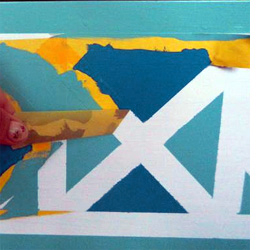
It's easier to plan your design on a piece of paper and then transfer this onto the drawer front - using masking tape to mark out the pattern. For this pattern, measure down approx 2cm from the top of the drawer and place a piece of masking tape horizontally across the drawer. Repeat this at the bottom of the drawer. Use a tape measure to find the centre point of the drawer front, so that you can work out from there to create alternating shapes. Every drawer will be different, but try to make sure that each space is equal in size.
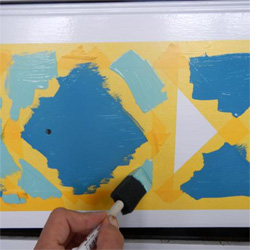
Use a small paintbrush (or sponge applicator) to carefully paint on the first colour. A darker colour was used in the centre area and a light colour on the outside. Use a stencilling technique to apply the paint - dabbing rather than spreading, to prevent any paint leakage under the masking tape. Leave the paint to dry and apply a second coat if necessary.
Let the paint dry completely before carefully peeling off the masking tape. Use 400-grit sandpaper to lightly sand the drawers to remove any excess paint bumps. You can use a small artist's paintbrush to touch up any bleeding or missed spots and then let this dry.
Paint over the completed drawer with two coats of clear acrylic sealer or glaze coat. This will offer a layer of protection to the painted detail. Let this sealer coat dry overnight before continuing on with the next step.
diynetwork.com
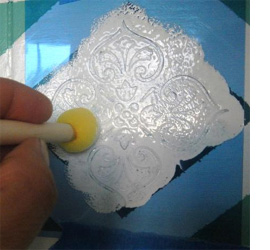
To add more interest you can use a stencil over the top of the painted areas to add another layer of design. We added a delicate pattern within the diamond shape to. Place stencil (which you can buy or make your own) in the middle of the diamond and tape in place. Use flat-head sponge or stencil brush to dab on white paint. Let the paint dry before removing the stencil.