
Colourful clock with embossed detail
Colourful card stock can be used to make a colourful wall clock that won't cost much and you can colour coordinate to match your decor - and change it anytime you want!

craftynest.com
As soon as I saw this Embossed Numbers Wall Clock I wanted to make my own. It’s made by Karlsson and one of the best features are the chunky numbers they use. I couldn’t find a font to match, so I created my own pattern. With the multiple cut-paper pieces, I never would have attempted this project without using the Silhouette CAMEO.

1. Measure up the inside dimensions of the frame. You will also need to allow enough card to fit up the inside edges of the frame.
2. Cut the corners and then use a bone knife or blunt edge to score the card and them fold
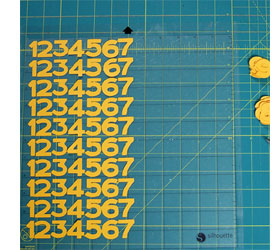
3. Use the Silhouette cutter to cut out the numerals. These machines are pretty expensive, starting at R4100 upwards plus software.
Not something you can easily afford. So, if you don't own a Silhouette cutter - like me - you can always print out the numbers on card stock and then cut them out with a sharp craft knife!
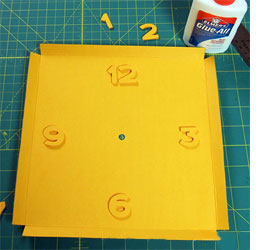
4. In Monica's project, she glues together 10 layers of card to create the raised effect. My trick is to use a sticky glue dot to attach the numbers to the clock face. It doesn't give you the thick effect but does create the illusion of embossed - or raised - numbers. Starting with 3, 6, 9, 12, stick your numbers to the clock face. Place the numbers about 1 cm from the edge.

5. Use a circular object (I used a bowl) as a guide for placing the rest of the numbers in a circle. Make sure the numbers are evenly spaced between your 3, 6, 9, and 12. Glue them to the clock face.
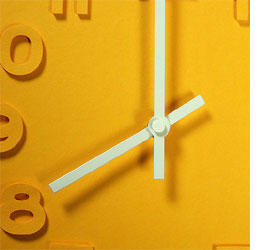
6. Carefully insert and assemble the clock hands and motor. If you need to trim the hands to length use a pair of cutting pliers.
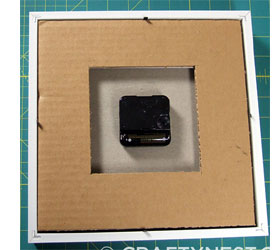
7. Remove the back of the picture frame and picture mat. Insert the clock face into the picture frame, face down. Insert the battery and set the time with the hand set knob.
8. Insert the mat and cardboard. Replace the wooden back of the frame. Fold over the tabs. You’re done! Hang your clock on a wall, set it on a shelf, or place it anywhere you want.