
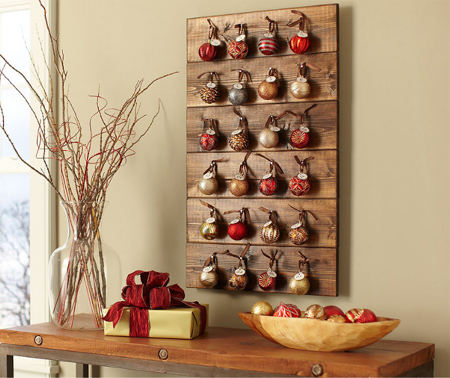
Make an advent calendar
Love this idea for an advent calendar, plus you can use the board for other purposes when it's not used as an advent calendar. You will find PAR pine at your local Builders Warehouse for this project, and you can recycle old Christmas ornaments.
YOU WILL NEED:
6 of 150 x 600mm PAR pine
2 of 150 x 800mm PAR pine
12 of 3.5 x 30mm wood screws
Medium panel pins
Varnish or sealer, choice of colour
Picture hangers and 16mm screws
White cardstock
Key rings
Christmas baubles
Ribbon
TOOLS:
Drill/Driver + assorted bits
Tape measure and pencil
Hammer
Paintbrush
HERE'S HOW:
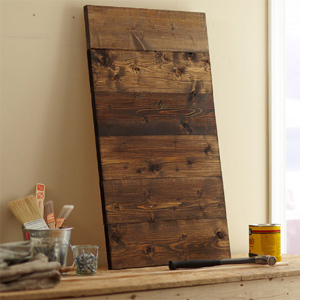
Make up a board using PAR pine as the backing for your advent calendar. You can re-purpose the board after the festival season by painting with Rust-Oleum chalkboard spray, using a stencil to add an inspirational message, or any other creative ideas you may have in mind.
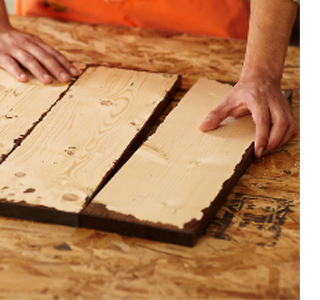
It's easier to sand and varnish the six front boards before you assemble, so that you completely cover the visible edges. Allow the varnish to dry overnight before beginning.
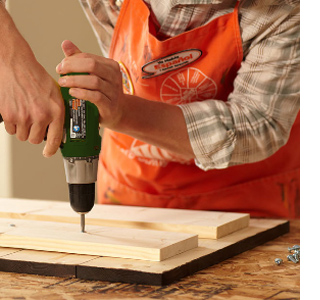
Lay 6 varnished boards down on a flat surface and position two boards lengthwise from top to bottom along the back. Use 3.5 x 30mm wood screws to secure the backing boards to each of the front boards.
You can also screw picture hangers to the top of each backing board if you plan to hang on a wall.
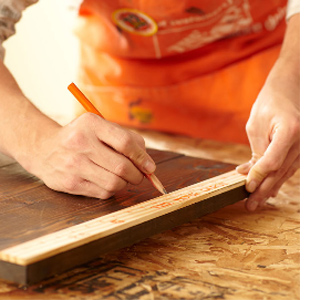
Use a tape measure and pencil, or ruler, to make marks 30mm down from the edge of each of the front boards at 120, 240, 360, 480mm. On these marks hammer in a medium panel pin. You will use 24 pins in total.
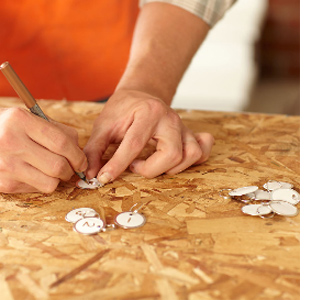
Use a hole punch, or cut out circular tags from cardstock. Write out the numbers 1 - 24 for each day of the Advent. Make a hole in each tag and place onto a key ring. Find key rings at Builders Warehouse.
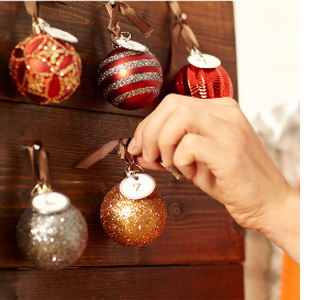
Secure the key rings to your Christmas baubles and thread through a piece of ribbon to make a hanger. Simply attach the ornaments in sequential order on your calendar, and your calendar is ready to be hung