
Use Spray Paint to Create a Custom Rug Design
Here is an easy way to take a plain piece of carpet and turn it into a designer rug, custom-designed for your home.
29/03/2022
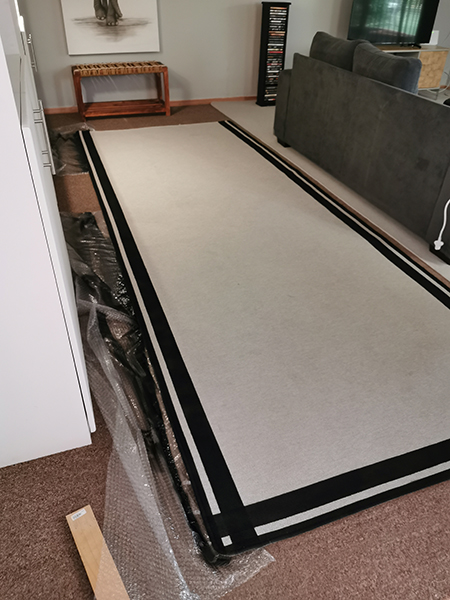
When I posted about cleaning the carpet in what used to be the workshop for the DIY Divas, I'm not sure if I mentioned why I decided to keep the carpet in the room. The idea is to leave the carpet down and cover this with rugs of cut-to-size and edged from Belgotex. Where the window currently is in the room will eventually be knocked out and a French door fitted, and it doesn't make sense to spend a fortune on flooring when this might be damaged when the renovation eventually takes place.
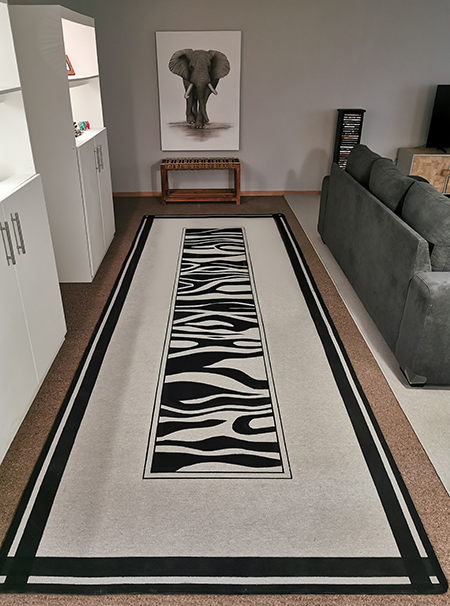
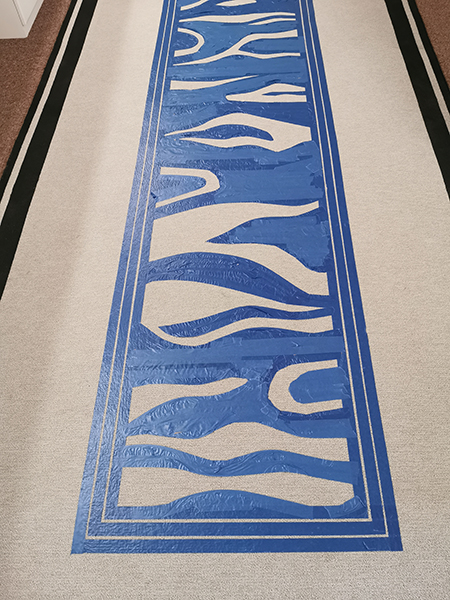
I purchased 2 trimmed carpets from Belgotex, both a custom size to fit exactly into the room and cover up the old carpet. At the entrance to the new living room, a long carpet runs from the opening to the end of the room. I wanted to give this a design that would tie it into the decor in the room and I had already decided to use a zebra print.
Tips for Spray Painting a Rug
There are literally hundreds of photos and images of painted carpets and I have also previously tried this project several times with excellent results. I have even used spray paint on curtain fabric. After purchasing a plain edged carpet cut to size from Belgotex, it provided me with the perfect opportunity to put the painting test to good use and have a custom painted carpet as well. Follow the tips below to paint a new or old carpet.
YOU WILL NEED:
Clean carpet or rug
Plenty of bubble wrap or plastic
Painter's tape (lots)
Spray paint, I only use Rust-Oleum flat paint **
Craft or utility knife
Templates and long ruler
** You must use flat paint as other types of paint (sheen or gloss) will leave a tacky, hard finish.
HERE'S HOW:
Step 1
If the carpet is not new, make sure it is thoroughly cleaned. Any dirt trapped in the carpet will spoil the finish, so clean, and then vacuum well.
TIP #1 Have enough plastic or bubble wrap to cover up and protect the surrounding area.
Step 2
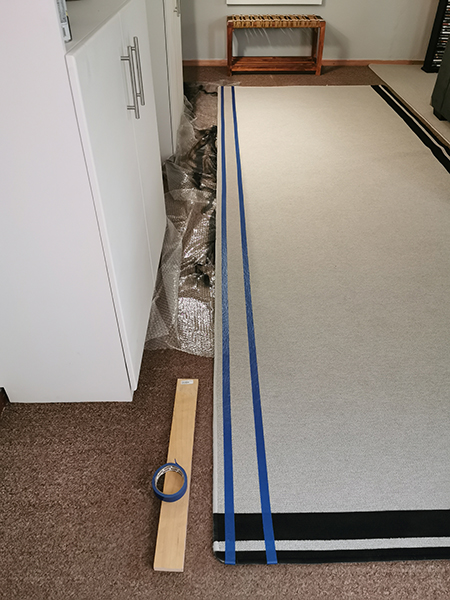
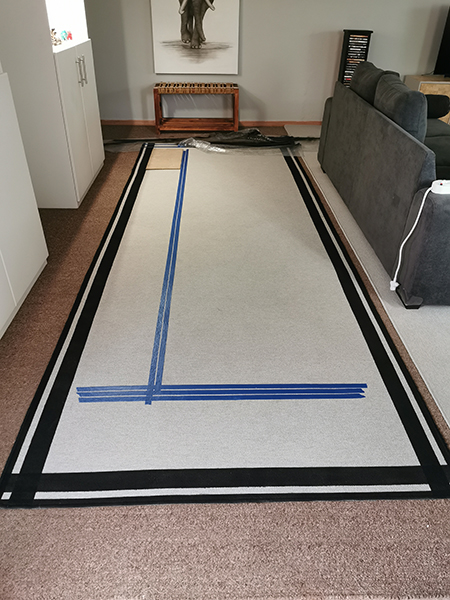
Once you have a design in mind, you can use painter's tape and a ruler to mark this out on the carpet. I started with a straight border around the edge of the carpet, as shown below. DO make sure that your lines are 100% straight before you paint. Once you start, there is no stopping.
TIP #2 Don't bother using masking tape as it will not stick to the carpet. Painter's tape sticks and stays while you paint.
TIP #3 Shake the spray paint can well before use and then again before every use afterwards.
Step 3
Before you spray paint the marked areas, mask off the surrounding area with bubble wrap or plastic. I purchased a large roll of bubble wrap at the hardware store at a cost of around R300 for a massive roll and it works out much cheaper than a drop cloth or plastic bin liners. Make sure the tape covers the edge of the tape and that the plastic covers a substantial distance from where you are painting, as overspray can go far.
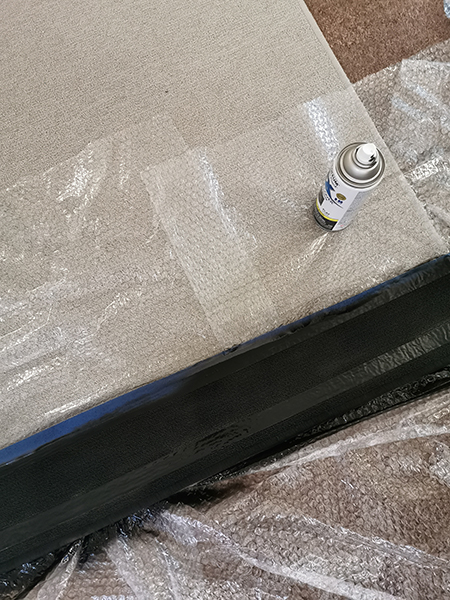
Spray painting the masked off areas around the edge of the carpet.
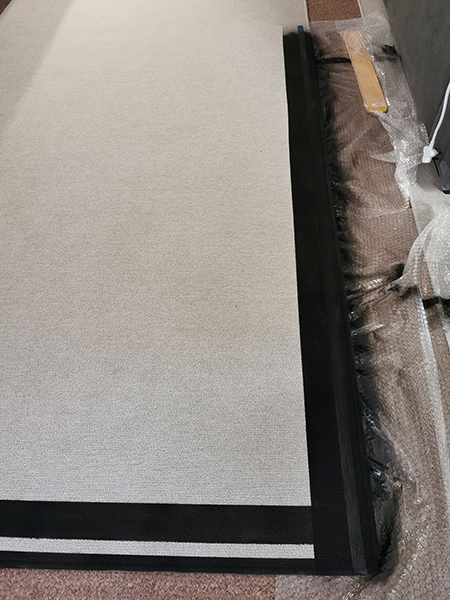
Almost finished spray painting the border around the edge of the carpet.
TIP #4 Only remove the painter's tape once the paint is absolutely dry. If there are any wet areas this may transfer onto the rug.
Step 4
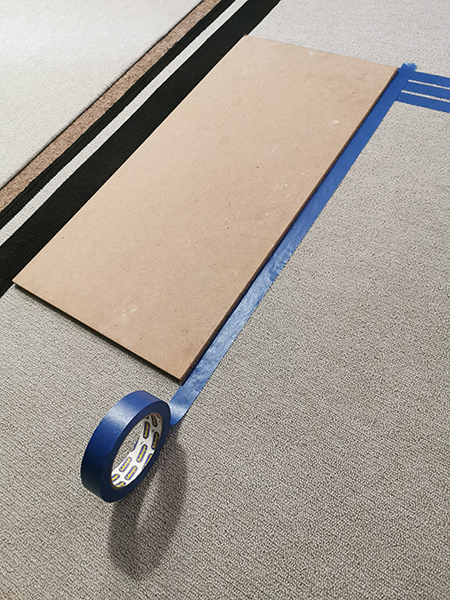
After the border, I moved on to the centre of the design. This will also be a straight line and is marked using painter's tape. To mark the area and make it easier to achieve a perfectly straight line, I used a scrap piece of board as a template and moved this along as I went around the carpet.
TIP #5 Find a suitable template that you can use to assist you when laying the painter's tape. This will ensure a straight line or design.
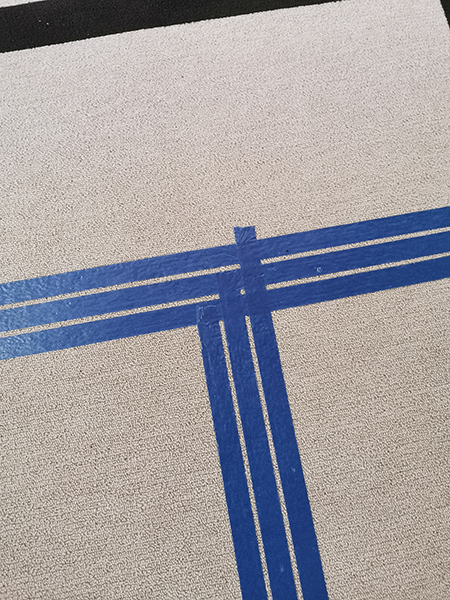
At the corners, all the lines come together neatly.
Step 5
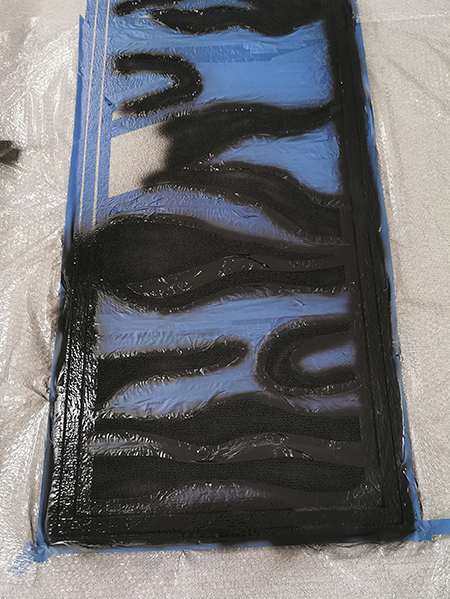
The centre section of the rug is where the zebra pattern will be. I did plenty of searching online until I had an idea of what I wanted to do. You can't do any intricate designs on a rug or carpet, so keep any pattern as basic as possible. All the areas that aren't being painted were covered with painter's tape.
TIP #6 Make sure that the painter's tape is stuck down well around the edges. Rub your fingers over the edges repeatedly until the tape is flat.
TIP #7 After shaking the can, apply the spray directly over the unmasked areas. Try not to tilt the can too much.
Step 6
Only remove the tape once the paint is dry. If you try to remove before you run the risk of getting paint on the rug where you don't want it.
TIP #8 If, by mistake, you do end up getting some paint on the rug, use an eco-friendly gel paint remover. Test this on a small area before applying to the rug.
IMPORTANT
After you have finished painting, leave the carpet for a day or two for the paint to dry thoroughly and then use an old cloth and a steam iron to seal the paint into the carpet fibres. Place the cloth on top of the painted carpet and go over this with a hot iron on steam function. This will bind the paint to the fabric for a permanent finish. For added protection, you can apply a coat of fabric sealer or ModPodge over the painted areas and this will prevent wear.