Use Cardboard to Make Decor Accessories for your Home
This stunning shabby-chic style clock is made using cardboard and coated with chalk paint... who would have thought?
15/09/2021
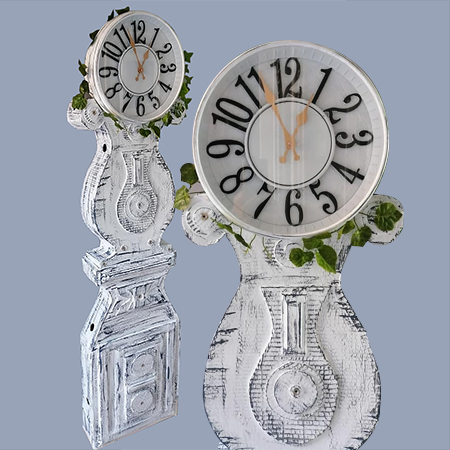
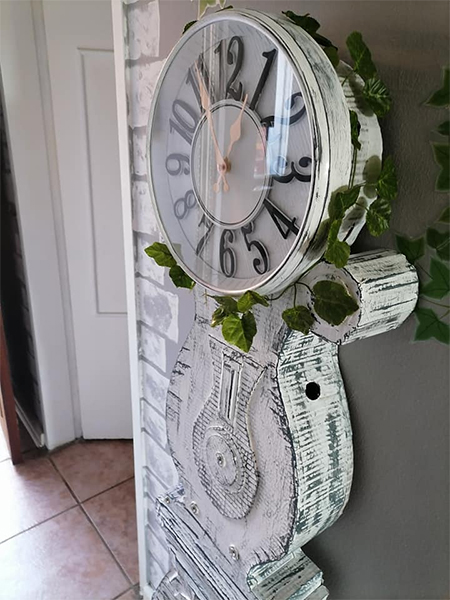
When I first spotted this project, I could hardly believe my eyes. Created by Amanda Barnard, this Shabby Chic clock looks almost like the real thing, but the difference is that it is made using recycled cardboard boxes. That's right. Amanda crafted the entire clock body using cardboard boxes.
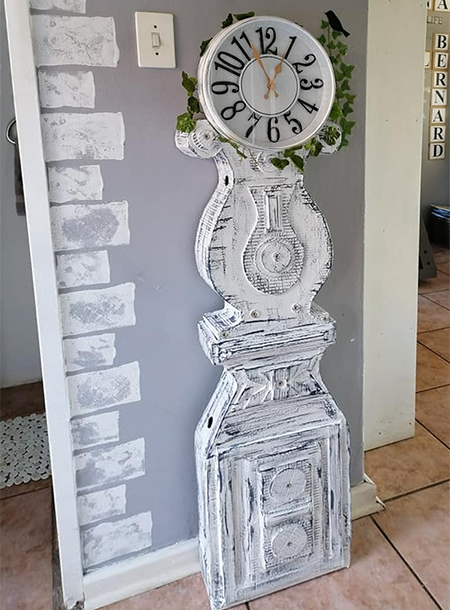
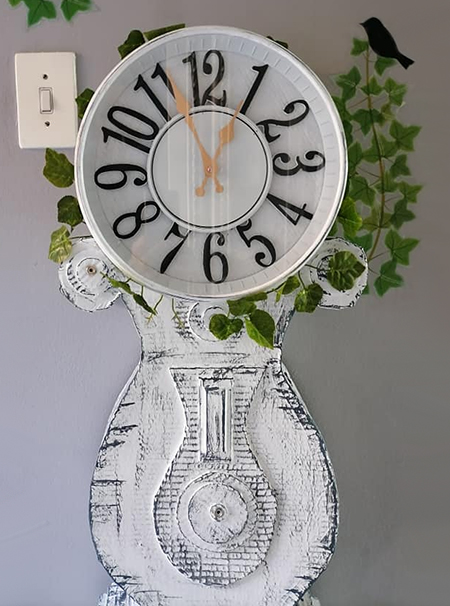
The only part of this project that isn't made of cardboard is the clock at the top. This is an ordinary wall-mounted clock that has been re-purposed for this particular project.
If you look closely, you can still see the corrugated cardboard that forms the basis for the decorative clock base. If you don't want this to show through, simply apply more coats of chalk paint to cover up and disguise the cardboard underneath.
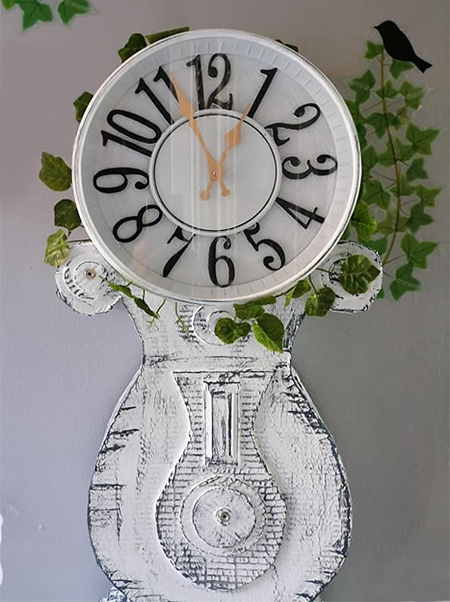
I also love the way that Amanda has wrapped artificial ivy around the top of the clock. It gives the entire production an even more realistic look, despite the fact that it is cardboard.
Want to make your own Shabby-Chic clock? Or perhaps use this clever idea to make other decor accessories for the home? We take you step-by-step through the process and you won't believe how easy it is.
YOU WILL NEED:
Sheets of plain paper to make the stencils
Corrugated cardboard boxes, not too thin
Craft or utility knife
Painter's tape
PVA glue or Contact Adhesive
Chalk paint, 2 colours
Paintbrush
HERE'S HOW:
Step 1
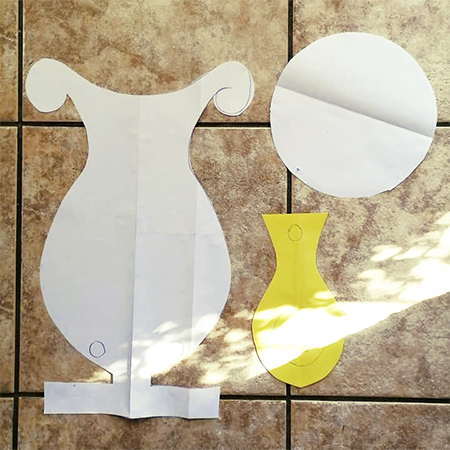
The first step is to decide on what you want to make and how it will look. There are thousands of ideas on sites such as Pinterest and Instagram, etc., so browse around until something catches your eye. Once you have a project in mind, it helps to create templates, especially if you need to cut out more than a single shape for your creation. At least with a stencil, you can use this over and over again.
Step 2
With the templates cut out, you can start to play around with these until you are happy with how it will look once finished.

Step 3
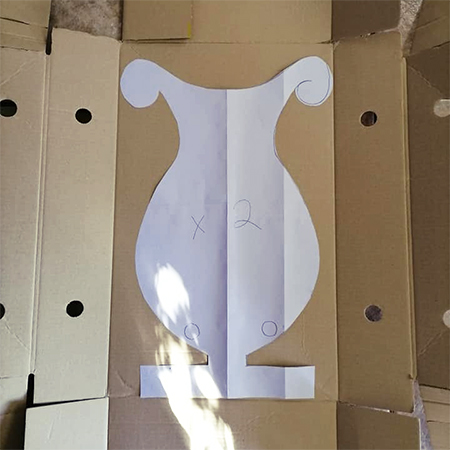
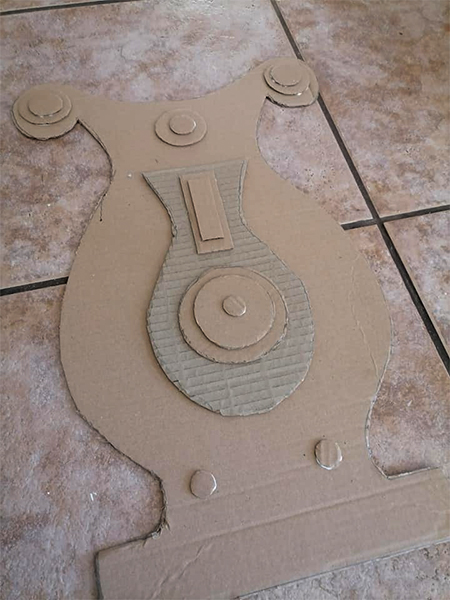
Using the templates, you can start cutting these out on corrugated cardboard. Work on a flat surface or cutting mat that won't be scratched when you use a craft or utility knife to cut out all the components you need.
Step 4
Make the cut-outs as neat as possible around the edges, as these are what makes up the whole and if not cut neatly it will show once you are finished.
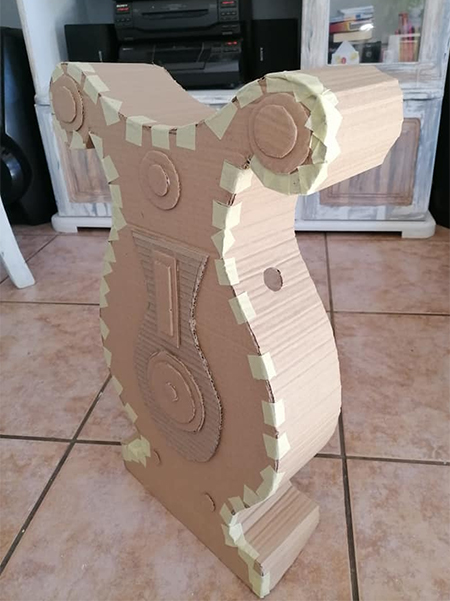
Step 5
After cutting out all the pieces you need, it is time to put everything together to build up the shape. Use painter's tape rather than masking tape to fasten everything together as it has more tack than masking tape. Use enough tape to securely fasten all the components together. Where the pieces are glued onto each other, I recommend Contact Adhesive as it doesn't need time to dry.
Step 6
Although not done for this project, try to cover all the ends with painter's tape so that you have no irregular edges when it comes to painting over.

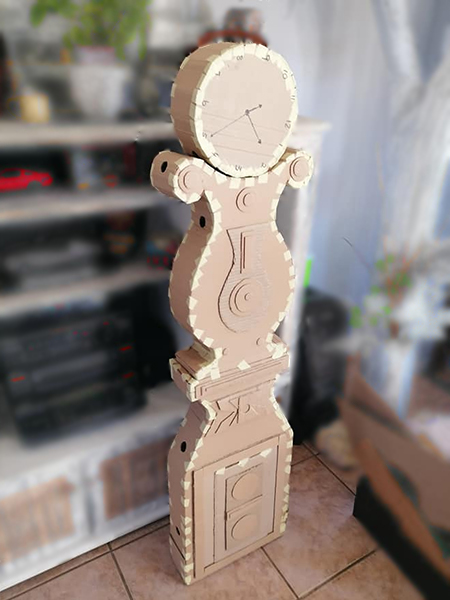
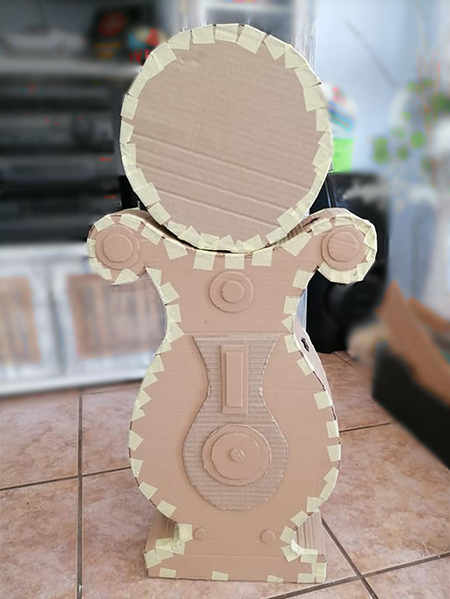
The complete TOP assembly
Full view of the entire assembly ready for painting
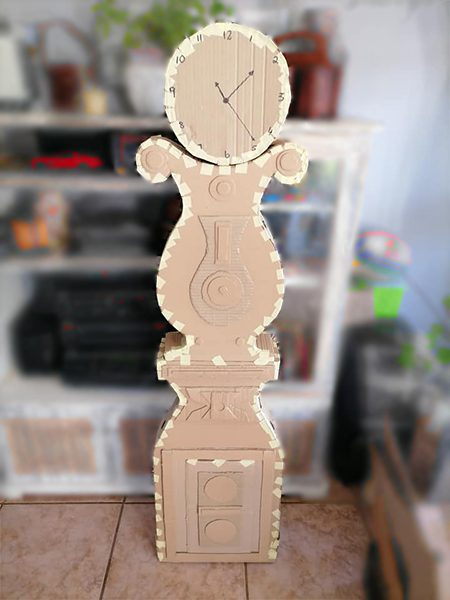
After assembly and having taped all the sections, go over everything before you start painting. Because chalk paint is thicker than most other paints, it allows you to apply several liberal coats to cover up the cardboard. In this project, Amanda used dark charcoal grey and linen white chalk paint. The dark colour was applied first, and the second lighter colour applied over the top and then distressed to give it a Shabby-Chic appearance.