
Update an Old Table with Graphic Mosaic Tiles
Take an old table or two and cover with graphic white or black mosaic tiles for an eye-catching feature for the home.
11/05/2022
ikea.com
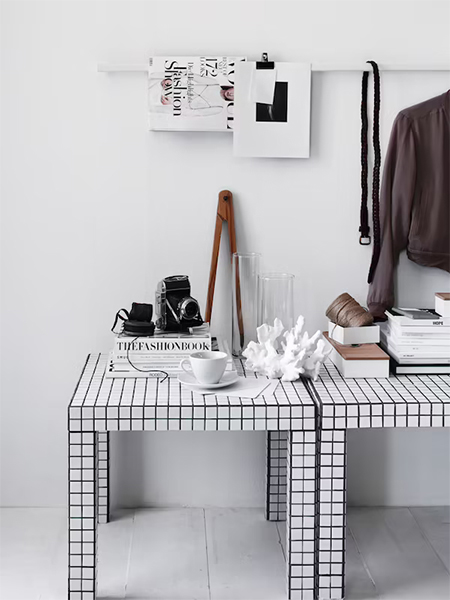
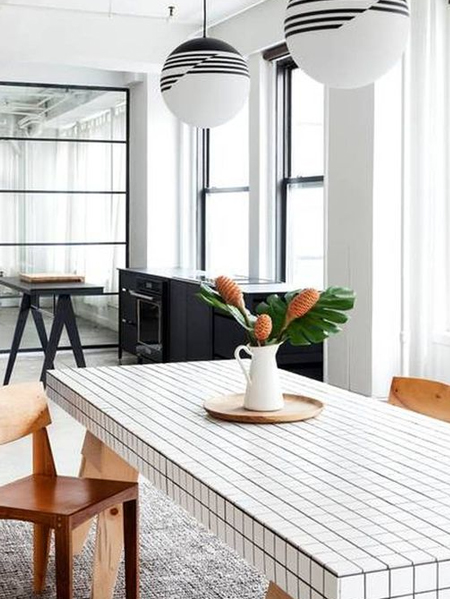
Mosaic tiles are very versatile and can be used on many other surfaces besides walls or for a splashback. You can use mosaic tile sheets to clad countertops in a bathroom to add a splash of colour or you can use them on old furniture to give them a new look. These two side tables were given a brand new look with graphic white mosaic tile sheets and black grout, or you can use black or coloured mosaic tile sheets and add a contrasting colour with grout. Whatever you choice, the table will pop.

What's great about these tables is that you can use them as a side table or coffee table, or you can use them as bedside table and match the colour of the mosaic tiles to your room decorating palette. This project is not a difficult one and you will be able to source a variety of mosaic tile sheets at Builders or your local tile supplier, plus all the other supplies and materials required for this quick and easy DIY project.
Don't toss out furniture if it is old and worn, there are plenty of tricks you can use to makeover old furniture and provide it with a new place in your home and the effort will be well worth it.

YOU WILL NEED:
Mosaic tile sheets in black, white, or choice of colour
Flexible ready-mixed tile adhesive
Grouting in a contrasting colour
Plastic comb to apply the adhesive
Squeegee to apply the grout and fill the gaps neatly
Sponge for cleaning up
120-grit sandpaper
HERE'S HOW:
Step 1
Measure up the table to determine how many
mosaic tile sheets you will need to complete the
project.
Step 2
Sand the entire table with 120-grit
sandpaper. This will give the tile adhesive a
decent surface to stick to. Wipe clean
afterwards to remove all traces of dust.
Step 3
Starting at the top of the table, use a
plastic comb to apply the tile adhesive
uniformly over the entire surface. It will be
easier to do the top first and once this is dry
you can work down the sides and the legs.
Step 4
Take care that all the mosaic tile sheets
line up and that grout lines are straight in all
directions.
Step 5
Let the tile adhesive set overnight before
using a squeegee to apply the grout over the
surface of the tiles. The squeegee will help to
make it easy to fill the gaps and can also be
used to remove any excess adhesive, making it
easier for you to wipe the surface with a damp
sponge to clean off any remaining grout mixture.
Leave the grout to set overnight before
repeating this procedure for around the top of
the table and down the legs
Finishing
Apply grout sealer over the finished table to
make it easier to keep clean.
More Inspiration
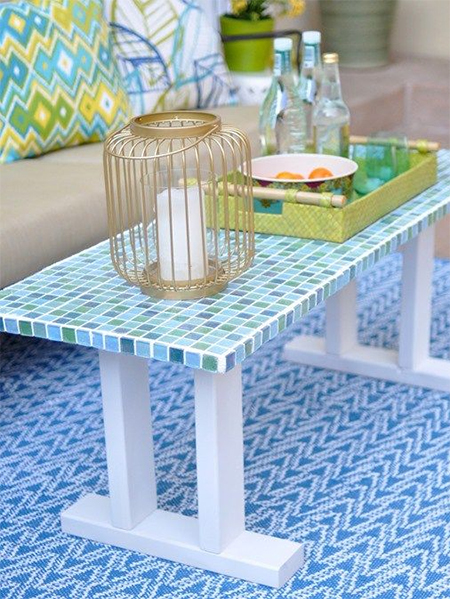
You can use the above method to apply mosaic tile sheets to all types of tables. Why not take an ordinary outdoor table and apply colourful mosaic tiles to add some colour to your outdoor entertaining area?
pinterest.com/pin/159737118016424170/
Indoors or outdoors, rather than sand and paint over an old table, make it more practical and longer-lasting by applying mosaic tile sheets to the table.
pinterest.com/pin/296463587967582807/