
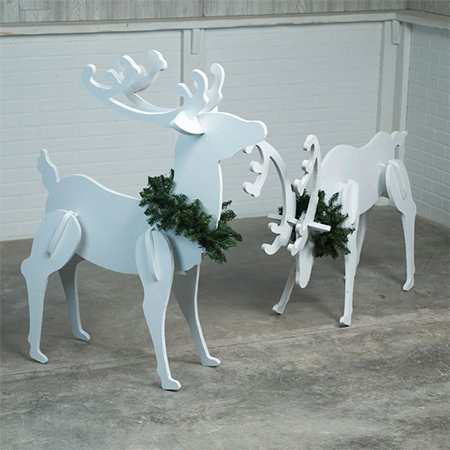
Make these Plywood Reindeer to Decorate the Garden
Bring a festive touch to your home with this pair of plywood reindeer that you can make in an hour or two.
13/12/2021
family handyman magazine
This pair of plywood reindeer add just the right amount of festive cheer to the home when assembled and placed on the front lawn or to decorate your garden for celebrations. Spray them in a solid colour or add details to finish.
Bring festive cheer to your garden with this pair of plywood reindeers that you can pack away until next year once Christmas is done and dusted. A full-size template is provided and you can purchase 21mm shutterply (1220 x 2440mm) @ R640, 12mm pine plywood (2440 x 1220mm) @ R550, or 9mm pine plywood (2440 x 1220mm) @ R440 at Builders stores countrywide.
YOU WILL NEED:
Sheet of plywood, see above sizes and prices
Rust-Oleum enamel spray paint, white or your choice of colour
Template, click to open full-size PDF
Scissors or craft knife and self-healing mat
Painter's tape
120-grit sanding paper or medium sanding sponge
Gloves to protect from splinters
Access to A4 printer and printer paper
TOOLS:
Jigsaw and steel or fine-toothed blade to prevent ripping
Workbench or work table
Tape measure and pencil
Clamps
HERE'S HOW:
Step 1
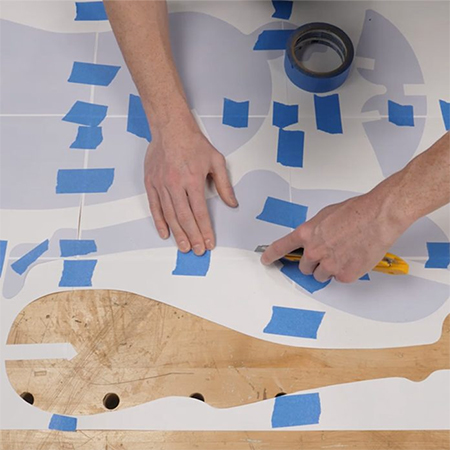
Download and print out the template for this project. The original template is set for 8 ½" but you can modify this to A4 size printing that will set the drawing over 21 sheets of paper when set at 100%.
Step 2
Tape all the pages together to make the full-size pattern template. Place this on a worktop or self-healing cutting mat to cut out the individual pattern shapes.
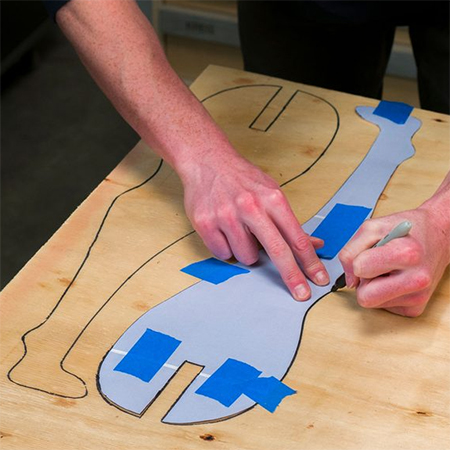
Step 3
Take each individual pattern piece and place this on the plywood sheet. Use a marker pen to outline each shape. If you do each piece individually, you can space them out to make full use of the plywood sheet. Keep in mind that you will need to repeat the front and back legs, shoulders and antlers for each reindeer.
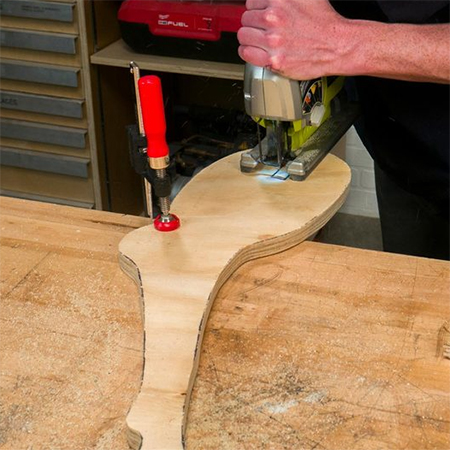
Step 4
Roughly cut out the shapes using a jigsaw and then do more precise cutting on each individual pattern piece. Using a fine-toothed or jigsaw blade intended for steel reduces the amount of splintering along the cut line and after cutting, sand each piece with 120-grit sandpaper for a smoothed edge.
GOOD TO KNOW: Don't forget to cut the notches that are used to join the pieces together. Test the width using a scrap piece of plywood. It needs to be a snug fit.
Step 5
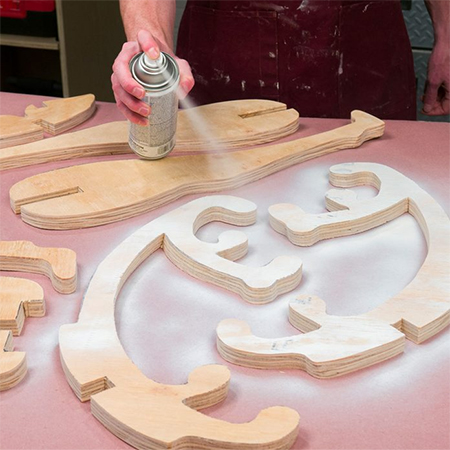
Before assembling the reindeer, spray the front, back and edges with Rust-Oleum spray enamel. This will provide some protection from the elements when placed outdoors. If you plan to use the reindeer again, be sure to apply another coat next time. Apply a second or third coat of spray enamel as necessary and let this dry for a couple of hours.
Step 6
Make sure that the paint is dry before you start to assemble the reindeer. All the pattern pieces should fit together easily.