
Make New Doors for Old Furniture
There are plenty of ways to give old furniture a new look and in this article, we explain how to install new doors for a more modern piece.
17/02/2022
all about diy
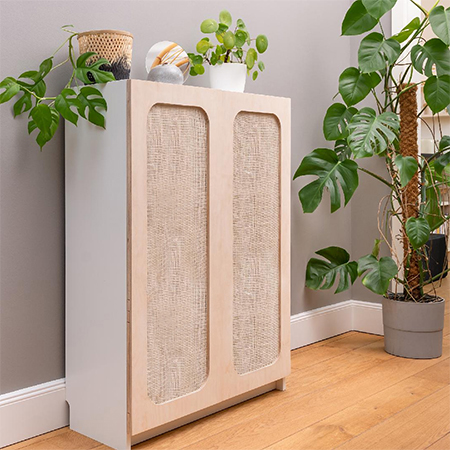
A inexpensive melamine bookshelf is given a new look with a pair of DIY doors to provide out-of-sight storage.
When it comes to upcycling, recycling, or updating, there are more than a few clever tricks at your disposal to transform an old fashioned or dated piece of furniture. You can give a piece of furniture new handles, paint the piece, or in this case, you can fit new doors that give any piece a brand new look - one that is more modern and fits in with your home decor.
When having doors cut to size and edged, don't forget to factor in the thickness of the edging to be applied as this will make a huge difference in whether or not the doors will fit.
Making new doors for old furniture is an easy process for any DIY enthusiast. Simply measure the width and length of the cupboard or cabinet where the doors will be mounted. Divide the total width into 2 - for two doors - and then subtract 2mm from each side measurement to allow for a slight gap in-between the doors. The 2mm subtracted will allow for any paint finish you apply, but if you do not intend to paint the doors, only subtract 1mm from each side.
The thing about making doors is that they are probably one of the easiest projects to DIY
There are a few different types of board products that you can use to make the doors, all depending on the finish you require. Choose veneered plywood or hardwood if you want a wood finish that can be stained and varnished in matt, satin, or gloss. If you prefer to paint the doors with any type of paint, you can use 16mm SupaWood to make the doors. Another option is to have Melawood (laminated board) cut to size and edged at your local Builders, but keep in mind you will need to cut out the centre panel yourself. The same applies to any other laminated board product such as BisonBord or SuperLam, both of which are affordable options.
Use the method shown below to many any size of doors for cupboards, cabinets, or even a chest of drawers that needs updating or modernising.
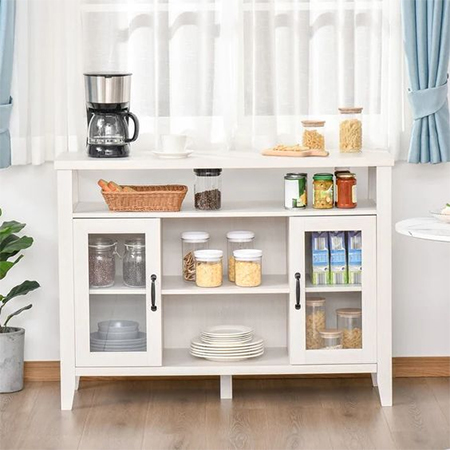
Sanded and painted and fitted with new doors, this replica Shaker-design cabinet now fits perfectly in the kitchen and serves as a coffee station.
YOU WILL NEED:
Choice of wood or board for the doors, we used 9mm Birch plywood
Choice of wood or board for the back frame of the doors
Offcut for the door divider
Hessian fabric for the door panels
Cup, Euro or Concealed hinges [4] plus 16mm screws
16mm screws
TOOLS:
Drill plus assorted bits
Jigsaw plus blades
Orbital sander and assorted sanding pads
Clamps
Tape measure and pencil
Safety gear
HERE'S HOW:
Step 1
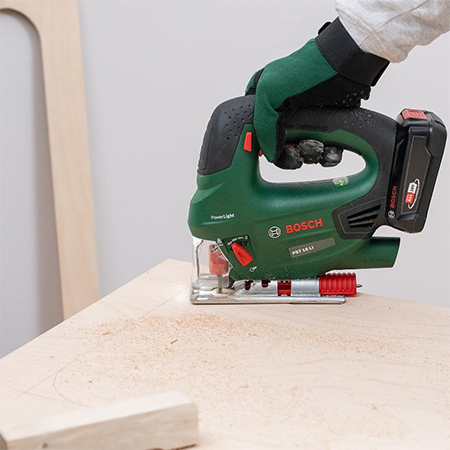
While you can have timber and board products cut to size at your local Builders, keep in mind that they only cut squares or rectangles and they will not cut out the centre section of the door. For this, you will need a jigsaw. Decide on the width you want for the outside frame and measure and mark this around both sides of the door before cutting out the opening with a jigsaw. Your cutting needs to be as neat as possible, so take your time and don't rush this step.
Step 2
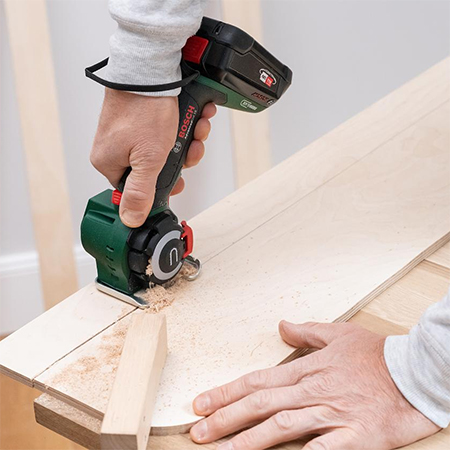
If you have drawn up a sketch with the measurements taken, you can have the sections for the back frame cut to the exact size. Alternatively, you can cut these sections at home using a jigsaw, circular saw, or table saw. The width of the frame sections is the same as for the door frame.
Step 3
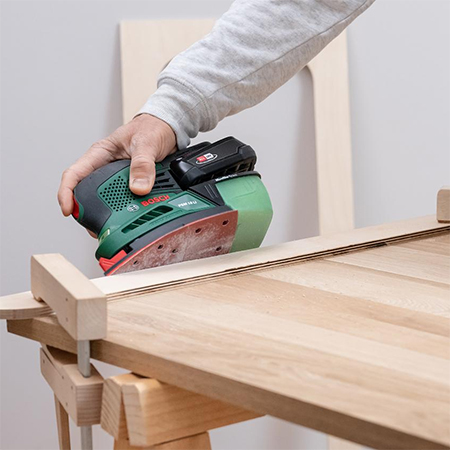
Sand all the pieces before you begin the assembly process.
If you are not a fan of the hessian fabric panels. you can substitute this for a different material or fabric.
Step 4
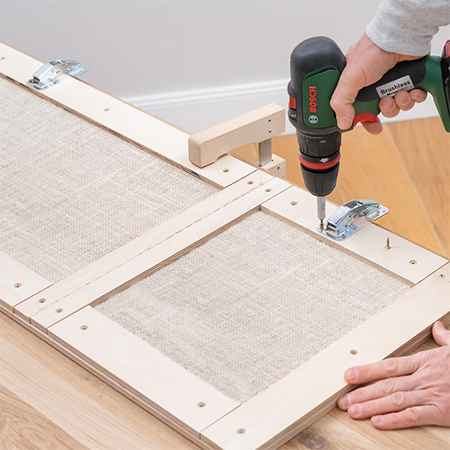
Cut [2] pieces of hessian that are larger than the opening in the centre of the door. It doesn't have to be a neat cut since the edge will be underneath the surrounding frame. Place the hessian pieces over the opening in each door so that it is equally centred.
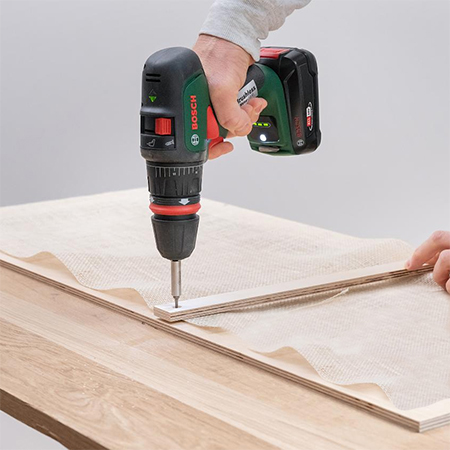
Step 5
Starting with the [2] centre crosspieces, you can start screwing the frame surround over the hessian fabric. As you work, make sure that the fabric is flat and taut, or this will spoil the finished project. It is a good idea to start adding the frame on one side, pulling the fabric to the other side and then adding the frame as well. Repeat this until the entire frame is secured in place and then add the hinges.
Finishing
The finish for the doors is entirely up to you, A sealer or varnish will protect the piece from damage and make for easy cleaning if not painted, while painting the doors with a satin or sheen paint will provide a washable finish.