
How To Make Cement Plant Pots
Here's a fun and inexpensive way to make custom cement plant pots with almost any decorative design.
09/05/2021

https://www.youtube.com/watch?v=hvR2sNQCDXA
Don't know about you, but I battle to find decorative plant pots that have a design that I love and the perfect size for whatever plants I want to pot up. I'm not talking about cheap plastic plant pots, but something chunky in either terracotta or cement with a decorative design that fits in with my home decor.
I was so glad to stumble upon this particular project that shows you have to make plant pots using a plastic bottle and some white cement. It's something you can do at home and also a project that you can customise to make plant pots of almost any size for your home.
YOU WILL NEED:
White cement and cement waterproofer
Scrap fabric or offcuts, or even old clothes cut into scraps
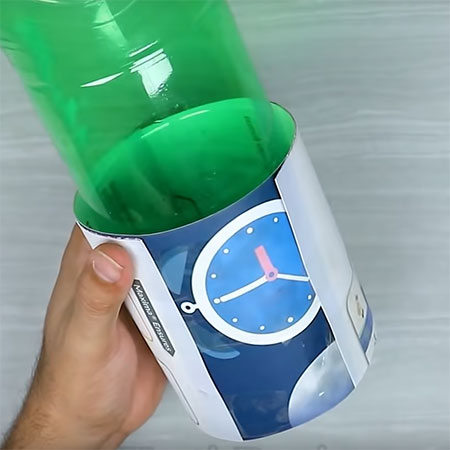
2 Litre plastic cold drink bottle
Thin cardboard
Mixing bowl
Bucket of clean water
Wet sanding paper
Acrylic craft paint and ModPodge or clear acrylic sealer
Scissors
Sellotape
Painting tools
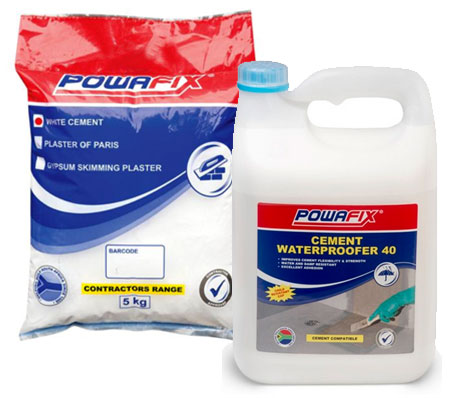
Powafix White Cement and Cement Waterproofer
HERE'S HOW:
Step 1
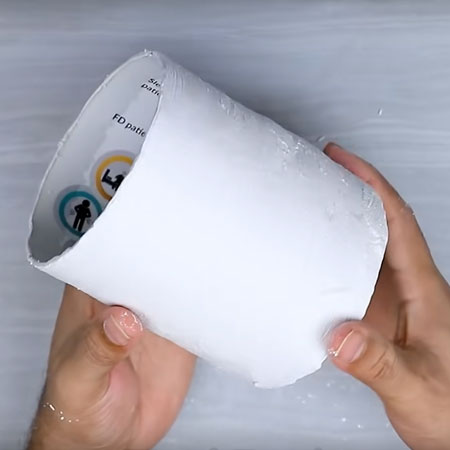
Begin by wrapping the base of the plastic bottle with thin cardboard and secure the edges with sellotape. Don't worry about underneath the base at this stage.
Step 2
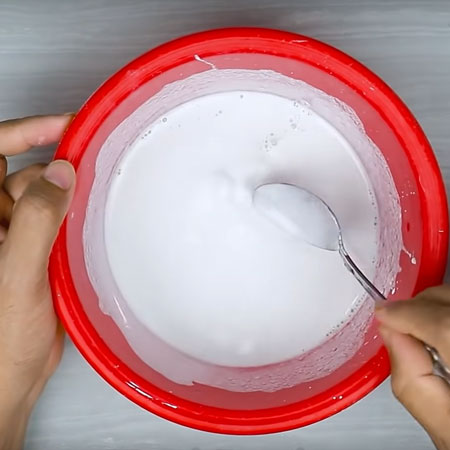
Mix a batch of white cement until smooth. The consistency should be a little runny but not watery.
Step 3
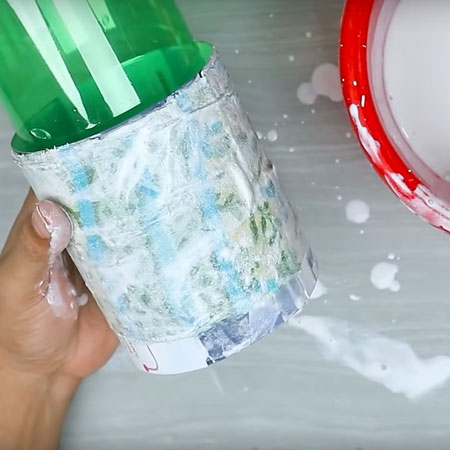
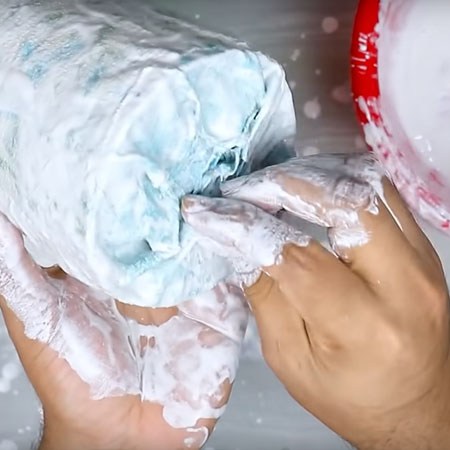
Soak a scrap of fabric in the white cement mixture and then apply this to the base of the bottle. Use enough scraps to cover the entire cardboard wrapper.
Step 4
Soak another scrap of fabric in the white cement mixture and wrap this around the bottom of the cardboard wrapper, covering up the base. Use your fingers to fold the fabric as neatly as possible at the bottom.
Step 5
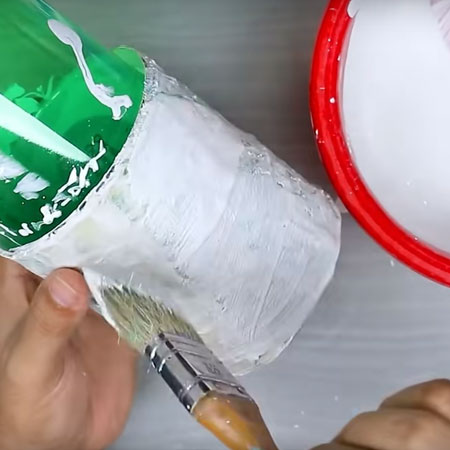
Use a paintbrush to apply the white cement mix over the entire covered section.
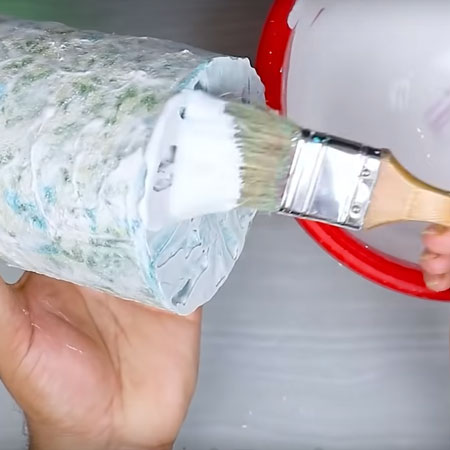
Step 6
Continue to apply a few more coats of white cement mixture.
Step 7
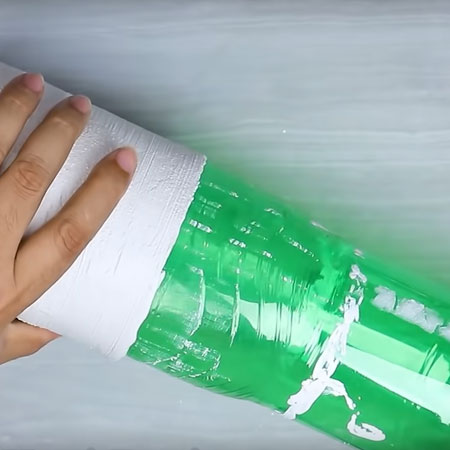
Just before the cement hardens, jiggle the bottle to remove from the cardboard wrapping. Be careful. You don't want to damage the plastered wrapper. You might battle to get this right the first time but keep at it. You will soon know the best time to take out the bottle without damaging the plastered wrapper.
This is how the hardened cement-covered wrapper should look. Let this dry completely before moving on to the next step.
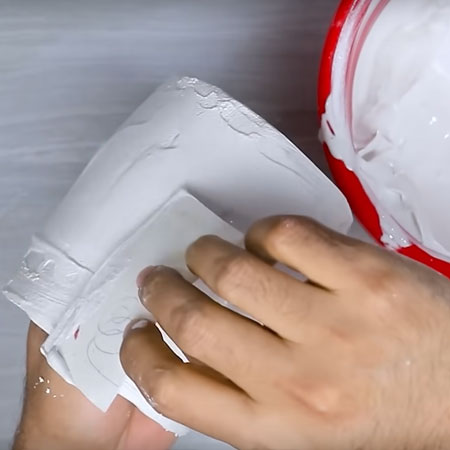
Step 8
Mix up another batch of white cement, but this one should be much thicker - the consistency of porridge or thick cream. Use a piece of cardboard as a spatula to apply the cement to the pot.
Step 9
Continue adding plaster layers, allowing each layer to dry before adding more layers. You want the final thickness to be that of the pot as shown in the image below. Leave overnight to dry thoroughly in a warm, dry location.
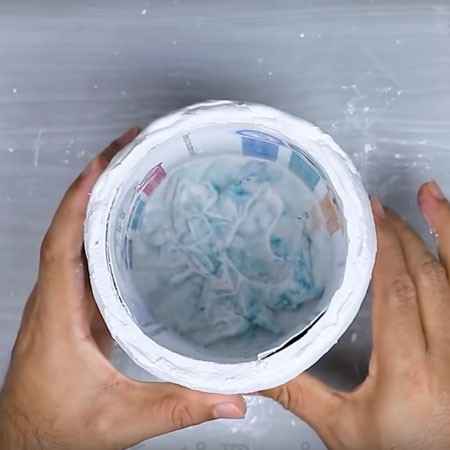
Step 10
Gently peel away the cardboard from inside the pot.
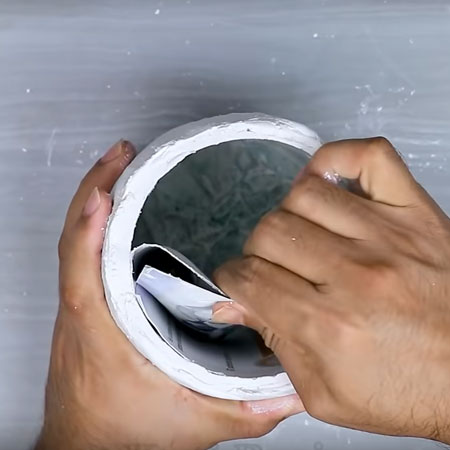
This is how the pot should look at this stage of the project. It should also be completely dry.
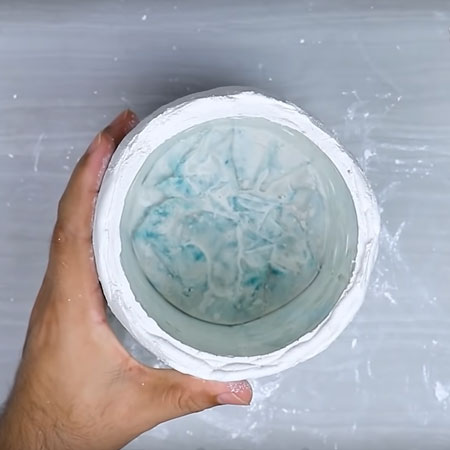
Step 11
Follow the instructions for mixing the cement waterproofer slurry and pour this inside the pot. Twirl the pot around to make sure that the entire inside surface area is covered. You can pour any excess mixture back into the bowl. Note that you are not using any membrane for this step.
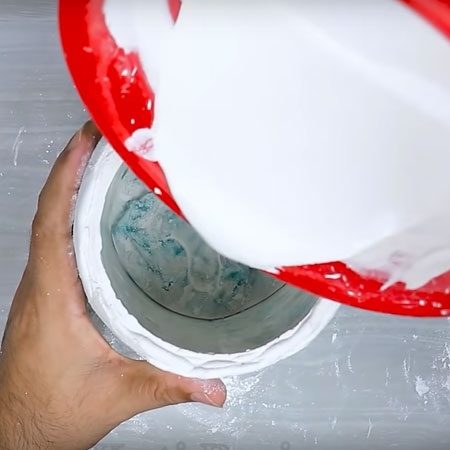
Step 12
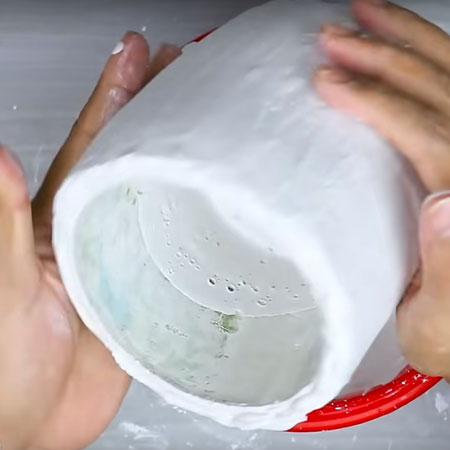
Let the cement harden slightly and then repeat and allow to cure and harden overnight in a warm, dry location.
Step 13
For this step, you will need the bucket and clean water. Place the pot in the water and use wet sanding paper to sand smooth.
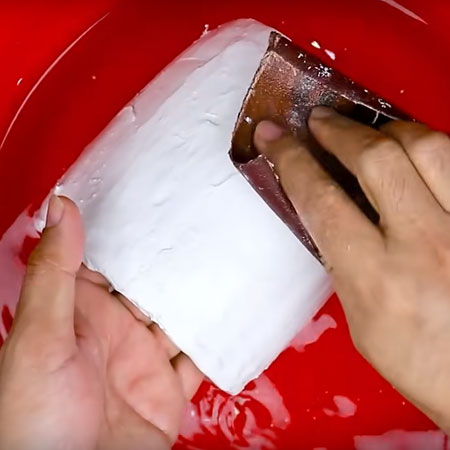
GOOD TO KNOW: As you are sanding the pot smooth, dip and rinse in the water so that you can check the progress.
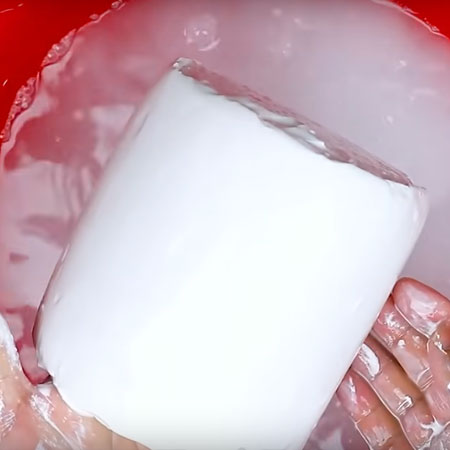
Your cement plant pot should be smooth and nicely shaped with all edges rounded off before moving on to the next step.
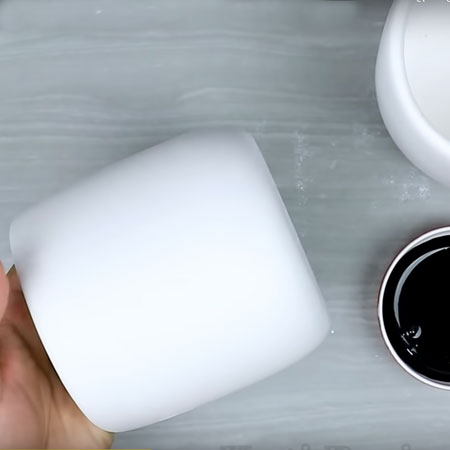
FINISHING
The finishing of your cement plant pot is entirely up to you. In this project, there is a white and black plant pot that is finished as follows...
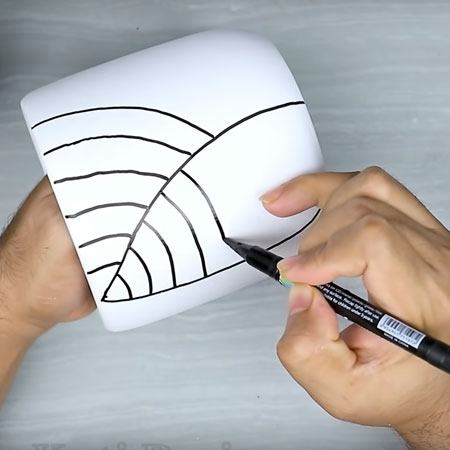
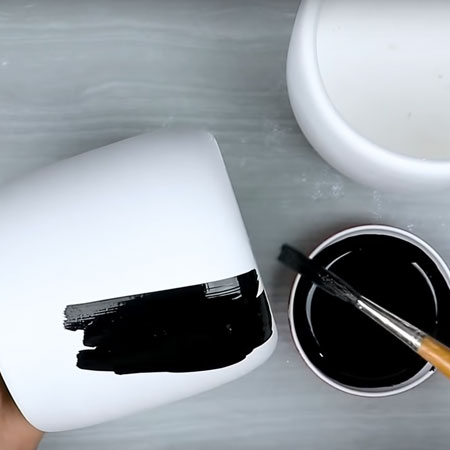
For the white pot, a black permanent marker pen is used to dry a design onto the outside of the plant pot. No finishing sealer is applied, as this will smudge the marker pen design. If you prefer, you can apply a couple of coats of white acrylic paint before painting on your design and finishing with sealer to protect the outside of the plant pot.
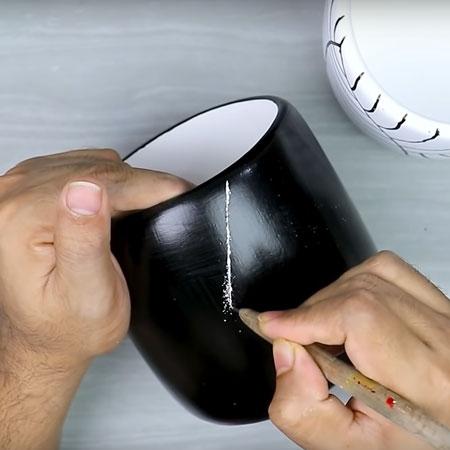
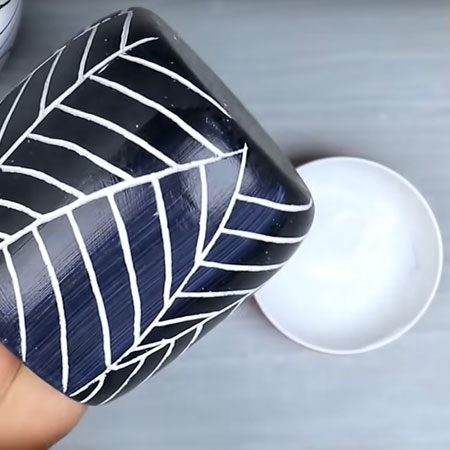
The black pot design is painted with acrylic craft paint and the surface scratched with the design using a sharp object.
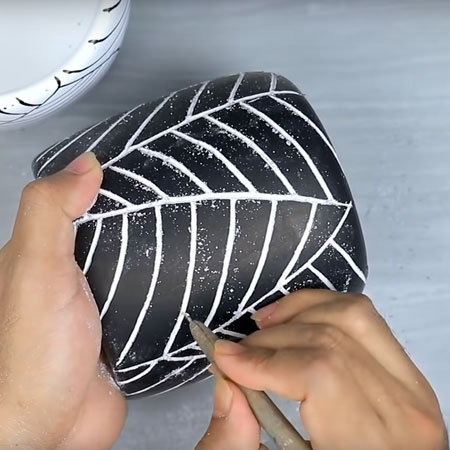
Once the entire design is complete and cleaned up, the entire pot is given a couple of coats of sealer.
What design will you give to your cement plant pots?

For more of the same projects, visit https://www.youtube.com/watch?v=hvR2sNQCDXA