
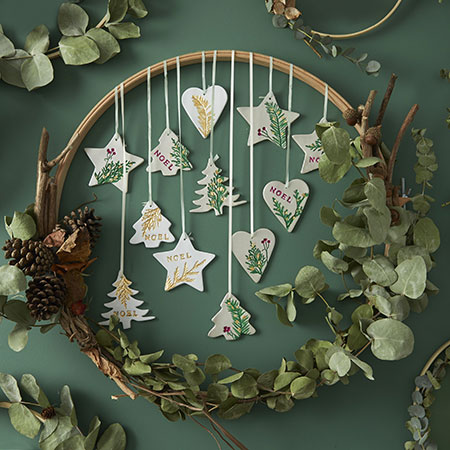
Make a Festive Wreath with Air-Dry Clay
Air-dry clay is fun to use for many different crafts but. since the festive season is almost upon us, why not make a festive wreath?
03/12/2023
pebeo.com
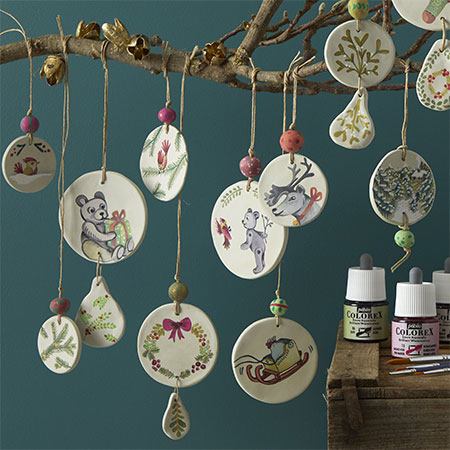
Air-dry clay is an affordable and fun way for all types of crafty projects and this festive wreath is a quick and easy project that even the kids will enjoy. You will find several brands of air-dry clay at Builders stores around the country and a 500g pack will cost around R70. That's not bad when you think about all the projects you can do with air-dry clay. Scroll down to the bottom of this page for some of our favourite air-dry craft projects that you can do.
pebeo.com
Unlike conventional clay that has to be fired (baked) in a high-temperature kiln, air-dry clay dries as soon as it is left in the open. That is why you have to keep any unused clay in an airtight container so that it does not dry out. When working with air-dry clay, you can dampen your fingers with a little water to make it easier to work the clay and you can use a wet fingertip to smooth out any wrinkle.
When setting finished crafts to air dry, place them in a cool spot and not in direct sunlight as allowing the clay to dry too fast results in cracks.
YOU WILL NEED:
Air-dry clay
Rolling pin
Toothpicks and skewers
Moulds or shapes for cutting
Craft knife
Assorted paints and paintbrushes
Embroidery hoop
Ribbon or string
Assorted embellishments
HERE'S HOW:

pebeo.com
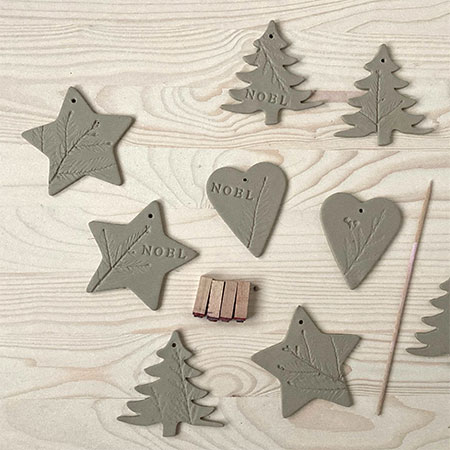
Step 1
Make sure the work surface is clean before rolling out your clay to a 3 to 4mm thickness. For this project, you will use freshly cut foliage from the garden to impress onto the surface of the clay. You only need to roll lightly to transfer onto the clay and then use shaped cutters to create the ornaments for the wreath.
An optional way to decorate the clay ornaments is to use an Alphabet Punch. These can be pricey but if you plan on making more ornaments or selling them for profit, it may be worth the cost.
pebeo.com
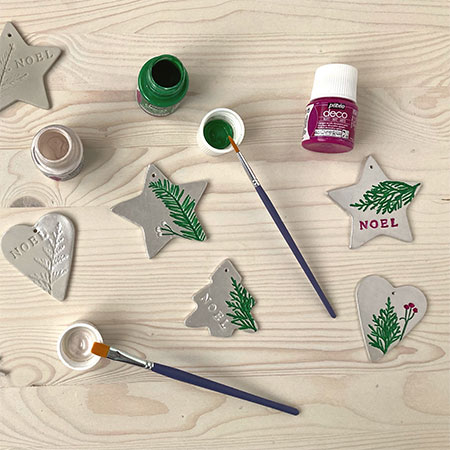
Step 2
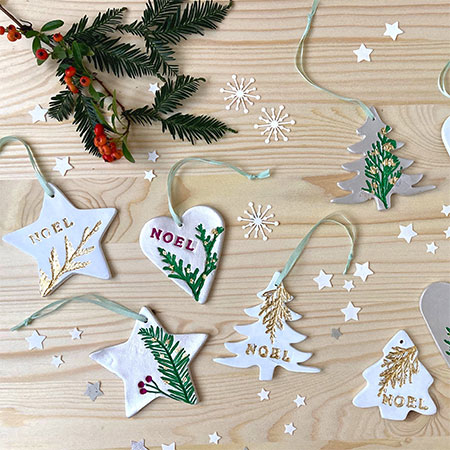
Acrylic craft paints in assorted colours can be used to decorate the ornaments.
pebeo.com
Step 3
Place the ornaments in a cool spot and allow to dry for 24 hours. It is a good idea to check on them after a few hours to see if they need to be turned over to complete the drying process.
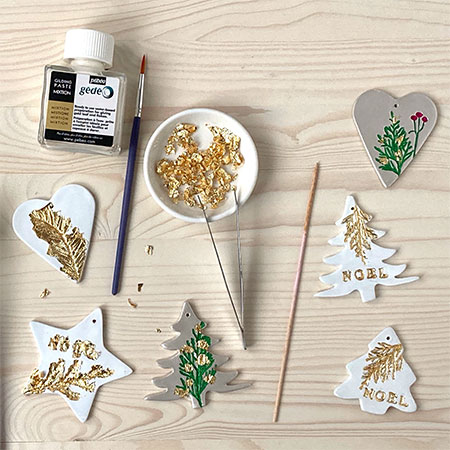
Step 4
This step is optional but adds a truly festive touch to the ornaments. Used guilder's size, a type of adhesive for use when gilding, and gold, silver or other metallic leaf to decorate the dried ornaments. Simply brush on a small amount of size and leave until it becomes tacky to the touch which means it is ready for the gold leaf to be gently applied over the size. Use a soft brush to remove any excess leaf.
pebeo.com
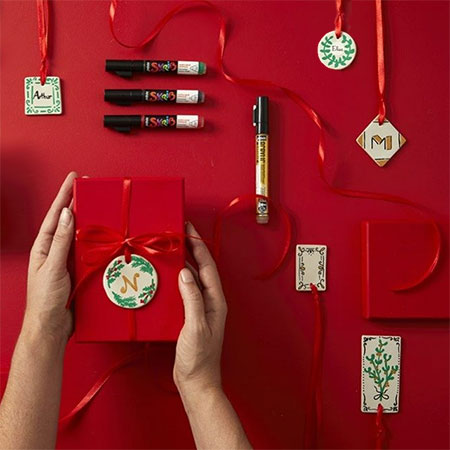
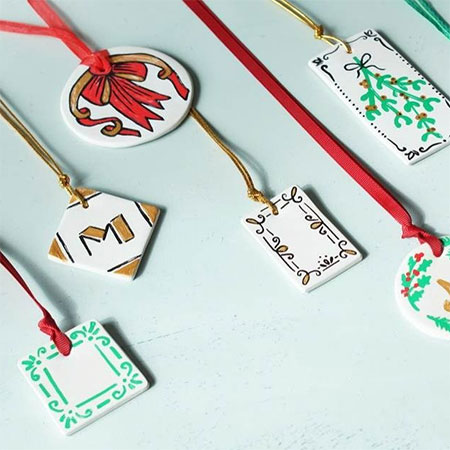
There are plenty of other ways to use air-dry clay for festive projects, like the one below where you can make custom clay tags for gifts.
pebeo.com
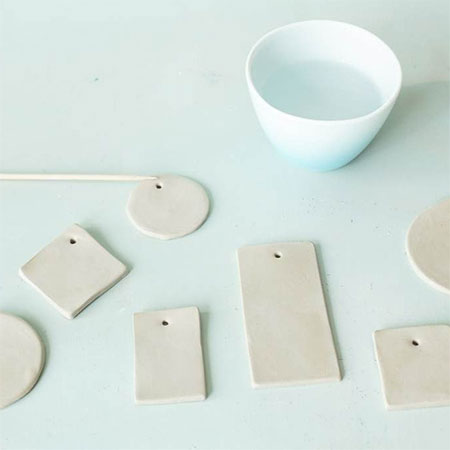
Step 1
Roll out the clay to a 3 to 4mm thickness and then use a cutter to cut out the shapes you want for the gift tags. Make a hole using a skewer or similar object so that you can thread a thin ribbon or string through the hole.
pebeo.com
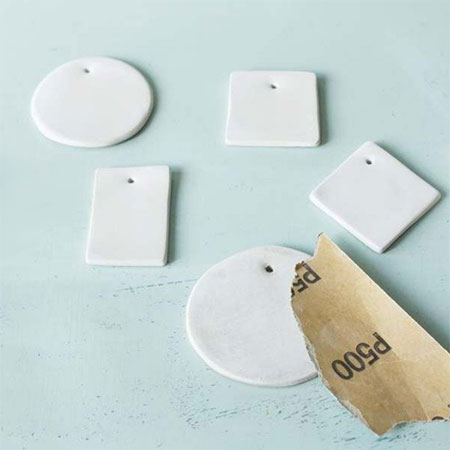
Step 2
Allow 24 hours for the clay to dry, flipping halfway so that both sides dry properly and then sand smooth with 500-grit sandpaper.
pebeo.com
Step 3
Paint the gift tags in your choice of acrylic paint colours using festive designs.
pebeo.com
There are so many uses for air-dry clay for festive crafts. What will you make today?
pebeo.com