Make Circular Shelves to Hang on a Wall
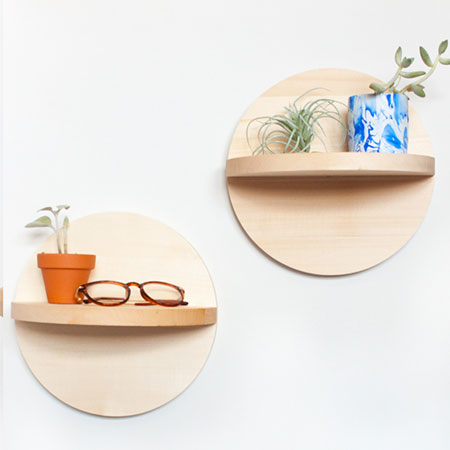
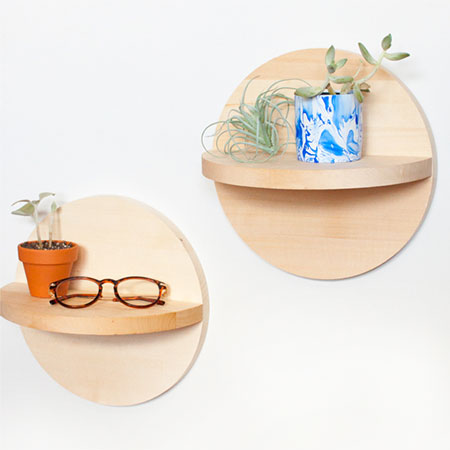
Wall shelves are not just great for storage, they can also be used as a decorative feature on a blank wall and these circular shelves look good on their own or with a plant or two.
14/05/2018
whydontyoumakeme.com
Not just good looking for your home, these circular wall shelves would make great gifts for family and friends.
I love how these circular shelves look so good on a wall and, best of all, they are super simple to make and won't cost you a fortune. You can make these shelves using laminated PAR pine that you can purchase at Builders or you can glue together any scrap wood you have left over from your projects. Finishing the shelves is just as easy and you can leave them natural and apply a matt, satin or gloss sealer, apply a tinted wood sealer or you can paint them with acrylic paint. Alternatively, if you have any SupaWood or MelaWood scraps in your workshop, these would look just as good once they have been painted.
Make these circular wall shelves using laminated PAR pine, scraps of pine or pieces of SupaWood/MDF left over from previous projects.
You do not need any fancy power tools to make these circular shelves just a jigsaw to cut out the shapes, a sander to smooth the edges and a drill to assemble the shelves. They are so easy to make by following the instructions below that even a beginner DIY enthusiast will be able to make them.
YOU WILL NEED:
Laminated PAR pine, plywood or SupaWood/MDF - enough for a shelf of the size you want
Circular template - a plate works well
Wood glue
4 x 45mm chipboard screws
Clear or tinted sealer or paint to finish
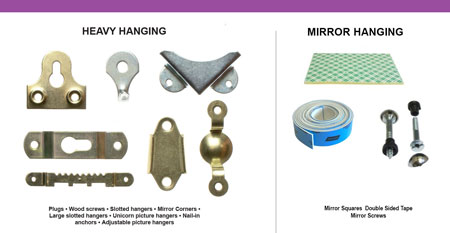
Hardware to hang onto a wall
TOOLS:
Drill plus assorted bits
Jigsaw with clean-cut jigsaw blade
Quick clamps
Orbital Sander plus 120- and 220-grit sanding pads
Straightedge or steel rule
Spirit level for straight hanging onto a wall
Tape measure and pencil
Safety gear
HERE'S HOW:

Step 1 - Cut out the shapes
Use your template to draw [3] circles and use a jigsaw to cut out the shapes. Secure the material to a firm surface with clamps to stop it moving around as you cut.
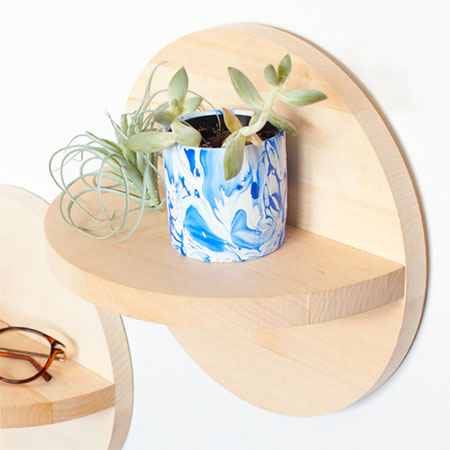
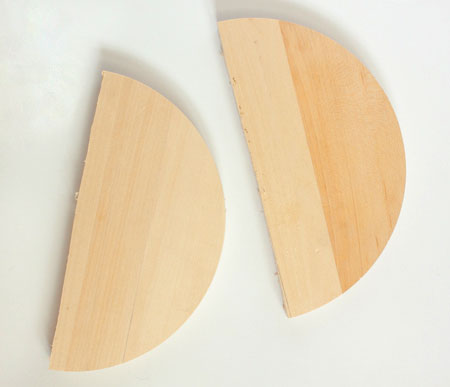
Step 2 - Create the shelf section
Determine the centre of one of the shelves and cut this in half with your jigsaw, as shown in the image below.
Step 3 - Sanding
Use 120-grit sanding pads on the cut edges and 220-grit sanding pads all over for a smooth finish.
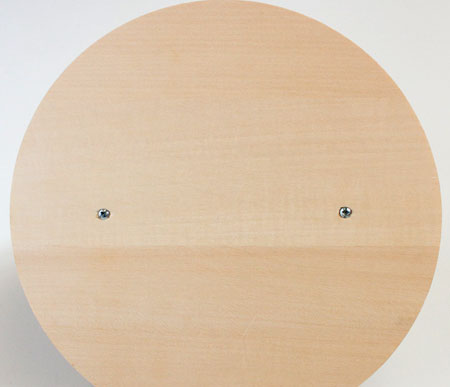
Step 4 - Attach the shelves
Use a straightedge or steel rule to draw a pencil line along the centre of both whole circles - on the back. This will be your guide for securing one of the half-shelves to the front. Using the pencil line as a guide drill [2] 3mm holes at both sides of the pencil line, as shown below. Use wood glue and screws to secure the shelves onto the front of the circles.
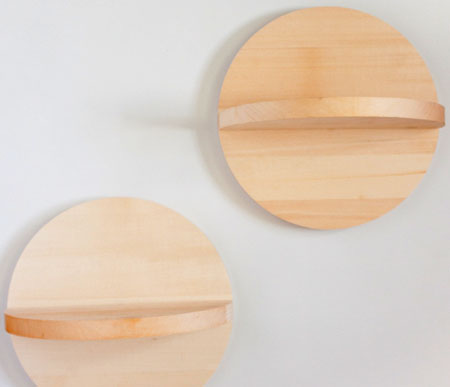
How easy was that!
Finishing
Do any final sanding to ensure that all the edges and surfaces are nice and smooth before applying a clear or tinted sealer or if you are painting the shelves with acrylic paint.
If you are leaving pine shelves raw, add some Howard Feed-N-Wax or antique wax to make it easy to keep the shelves clean.
To hang the new shelves onto a wall, make sure that you select the correct hardware. The images below will provide insight into the various methods of hanging items onto a wall and are available at any Builders store.
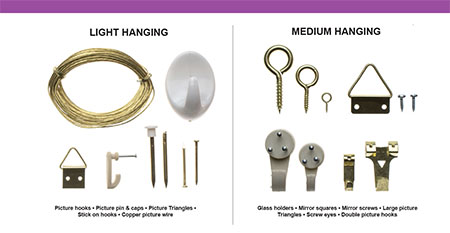
To hang your new circular shelves onto the wall, you can choose from selected hanging options for light, medium and heavy items. Pop into your nearest Builders or hardware store to stock up on what you need.