
How To Start Doing Your Own Upholstery
We receive a lot of enquiries for upholstery workshops and there are a lot of people wanting to do upholstery projects but don't know where to start, so here's how.
06/11/2021
pinterest.com/pin/9288742971063035/
Having done several different types of upholstery projects for www.DIY-Divas.co.za and having done more than a few upholstery projects of my own, I thought I would share some helpful tips for those that want to learn how to do upholstery, whether it is for themselves or to start up a small upholstery business.
What is upholstery?
There are varying ideas on what upholstery involves so I think we should clear that up before we continue. Upholstery is the practice of upholstering an entire piece of furniture that can include all types of seating, headboards, ottomans and so on. Upholstered pieces have a fabric covering that is padded to give it a luxuriously soft finish.
Reupholstery is the process of taking an old, upholstered piece and replacing the existing upholstery with something new. It can include removing all the old fabric, padding and fittings or it can be just recovering the old fabric with something new to refresh the piece.
In this article, we discuss both upholstery and reupholstery so that you can decide for yourself what type of upholstery or reupholstery you want to do.
How hard is it to do upholstery?
When you think of upholstery, the first thing that comes to mind is upholstering a sad, tired lounge suite or sofa, or perhaps coming across a bargain that you found online or in a second-hand store and you want to give the piece a new life. Upholstery is not difficult, and it is like everything else, you need to know the basics, you need to acquire some skills and then you can start with a small project and work your way up from that.
What is the best way to learn about upholstery or reupholstery?
The advent of the Internet and social media has allowed us access to so many different skills and crafts and now, more than ever, we are seeing projects we would like to do ourselves or to use to start a business to generate more income. Upholstery and reupholstery projects are everywhere as people post their completed jobs on social media. What used to be considered a difficult job has been made easier by watching other people and how they go through the process.
TIP 1 - Start with smaller projects to build up your skill level.

Not too long ago, you couldn't think about making an upholstered headboard for your bed and now there are tutorials everywhere that explain how to do it. This is how you should start learning about any type of upholstery - by watching others do it. I have spoken to people who have attended local upholstery workshops and they all say the same thing. They learned a lot at the workshop but when the time came to do it themselves, they still didn't know where to start. I can sympathize with this and have been in a similar situation and that's why I always tell people to start a small project that gives you the basics and then work up to more difficult and intricate projects. I truly believe that the easiest way to learn something is by trial and error.
Projects to get you started
A few projects you can consider for gaining skills for upholstery projects is this upholstered bench - shown above that can be found on https://www.aliceandlois.com/ikea-hack-mudcloth-upholstered-bench. This is a simple project that introduces you to padding and upholstery fabric and using a heavy-duty stapler. Once you have completed that project successfully - or not - the next one you could try is an upholstered headboard. Nothing too fancy just yet, just a plain headboard design wrapped in a pretty fabric like the one shown below at https://hymnsandverses.com/diy-headboard-tutorial.
TIP 2 - Choose simple projects that let you get used to using tools and upholstery accessories.

As you gain more confidence and a better understanding of the upholstery process (board, foam, batting and fabric) you can then look at tackling slightly more difficult projects like the ones below.
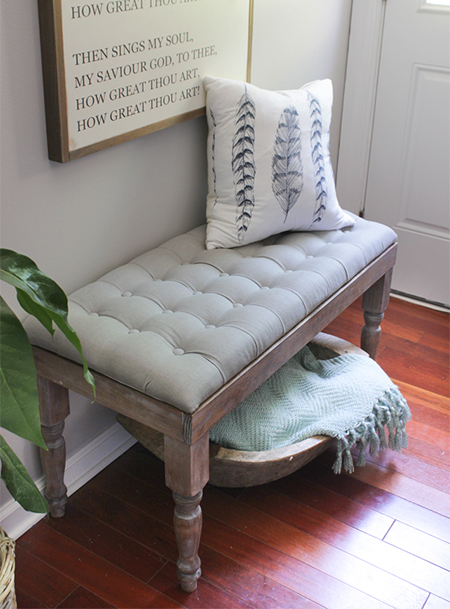
This upholstered bench features a tufting design that is what elevates a basic upholstery project to one that is classy and stylish without being expensive to do. The only difference between a plain upholstered bench and a tufted upholstered bench is the tufting or detail that folds the fabric by adding buttons to pull the fabric tight. You can give this bench a try at https://www.shadesofblueinteriors.com/diy-tufted-bench.
TIP 3 - Add upholstery techniques to your skillset.
As the upholstery projects you try get a little more difficult or intricate, it helps to build up your knowledge base and gives you more confidence. The more projects you attempt the better your skill and the greater your confidence. Tackling a basic tufted bench can then lead to an upholstered headboard like the one shown below by https://placeofmytaste.com/make-tufted-headboard/
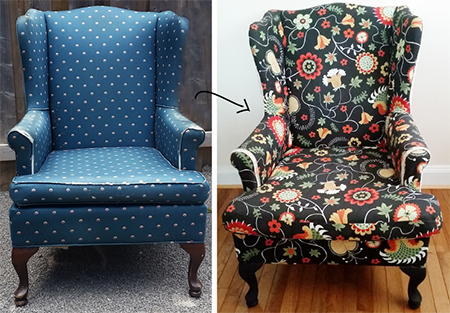
TIP 4 - Be confident enough to move up to larger, more detailed upholstery projects.

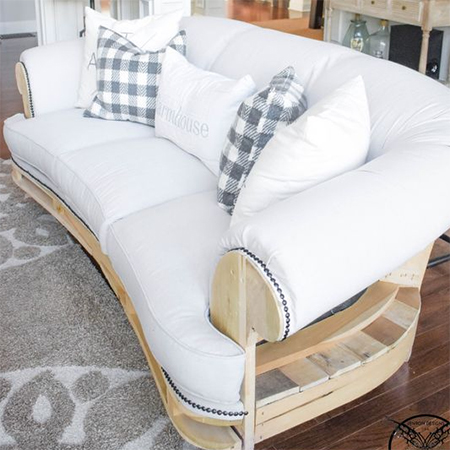
To keep your confidence level going, the next step would be to try and find a cheap and nasty chair that you can strip down to the bare bones and rebuild and reupholster to make it new again. This is the part that many find difficult, taking that leap into totally gutting a piece and then rebuilding it - the not knowing where to start and what to do first.
TIP 5 - Always assess the furniture to determine whether it needs to be disassembled or can simply be reupholstered.
Steps for reupholstery project
Step 1
Organise the tools you need and the fabric you want to recover the piece with. If you are doing this for the first time it might be a good idea to choose a cheaper upholstery fabric than spend a fortune on designer fabric, just in case! There are always going to be a few boo-boos along the way.
For essential tools, you will need, get in touch with a supplier of upholstery tools and hardware such as http://www.gtp.co.za/GTP_Home.html.
Step 2
TTake the chair apart piece by piece. Don't view the piece as a whole but rather a collection of sections that are joined together. Keep in mind that the piece had to be upholstered before assembly and it can be disassembled the same way. Flip the chair upside down so that you can remove any backing on the base to see the inside frame of the chair. This should reveal how the chair is fastened together and the order in which to take it apart - usually the arms first and the back second.
Step 3
AAssess what needs to be removed and replaced. When you remove the original fabric, which you should try to do as neatly as possible to use as a pattern for the new fabric, you will then see what is underneath the chair or sofa. In a vintage or antique chair this can be horsehair, hay or hemp but in a more modern piece it is usually different layers of foam and batting. You may also encounter steel springs (in older pieces) and nylon webbing.
Step 4
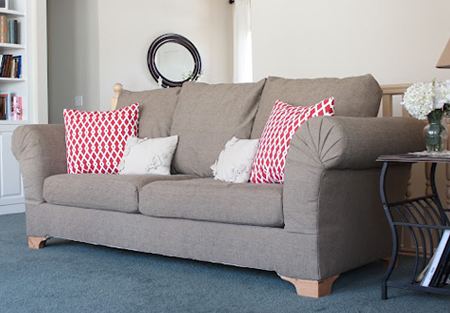
After taking the chair apart the rest falls into place. Use the removed fabric as a pattern to cut the new fabric, making sure to add an allowance that will also cover the new padding that you will fit. Sew the pattern together where necessary or staple directly onto the frame. This first experiment will give you plenty of inspiration for what to do next and how to overcome problems.
The Bottom Line
The more small upholstery projects you tackle - the better your skill and confidence levels. Ask family and friends if they have any furniture you can test out your skills with if you don't have any of your own or do some online hunting for bargain second-hand furniture.