How to Make these Gorgeous Cement Pots
All you need a white cement and a few supplies to make these gorgeous shimmering pots that you can use for storage or decoration.
02/01/2022
facebook.com/KutiBariCraft/videos/289184523122992/
This year, I have promised myself to start a new craft. Not that I am giving up on my DIY projects, oh no, just something that I have been thinking about for some time especially after seeing some of the projects to be found on KutiBariCraft's facebook page. Although there is a video for this project, I wanted something I could put on the screen to guide me step-by-step through the process. Videos are all fine and well, but you have to keep pausing them or going back to keep up on the steps.
I'm sharing this one with you because this is the first project, I plan to do using white cement which, by the way, you can buy at Builders and it is fairly inexpensive.
Use pearlescent craft paints for this project to give the finished pots a shimmering finish. You will need black, blue, teal, silver and gold.

YOU WILL NEED:
White cement
Assorted plastic bowls, small and large
Newspaper, cut neatly into strips
Craft glue
Cheap balloons
Wet and dry sandpaper, 120-grit, 300-grit and 800-grit
Cling wrap
Acrylic craft paint, pearlescent
Paintbrushes
Clear acrylic sealer, spray
TOOLS:
Clay sculpting and moulding tools (I bought mine from takealot)
HERE'S HOW:
Step 1
Inflate a balloon to the size that you want to pot to be. Add a bit of water to the craft glue and use a paintbrush or your hands to smear this over the balloon. Once the entire balloon is covered, you can start applying the strips of newspaper. You need to apply 3 to 4 coats of newspaper, layer upon layer, letting each coat dry a bit before applying the next layer.
Step 2
Let the newspaper dry overnight and then pop and remove the balloon. Use scissors to trim off neatly around the top opening.
Step 3
Mix white cement and water in equal ratios or until it is a thick soupy mix. Pour this into the opening at the top of the casing and spin around so that the entire inside of the casing is covered in cement. Continue twisting and turning for about 5 minutes before pouring any excess back into the mixing bowl. Repeat this process 4 times, allowing 4 hours drying time between each.
Step 4
Fill a large plastic bowl with clean water. The bowl needs to be large to submerge the pot in the water. Let the pot sit in the water for about 10 minutes and then start to peel away the newspaper. As you remove a layer, soak the pot again until you can remove most of the newspaper. Any remaining newspaper can be sanded away using 120-grit wet and dry sandpaper.
After removing all the newspaper, sand again with 300- and 800-grit sandpaper until the outside of the pot is nice and smooth. Also, sand around the opening of the bowl, starting with 120-grit and finishing with 800-grit sandpaper. Keep dipping the pot in the water to wash away dust and to be able to check the finish.
Step 5
Use the sculpting tools to score and shape a lip around the top of the pot. If you need to, dip in the water again and sand smooth with 800-grit sandpaper.
Step 6
To make a lid to fit the pot, wrap the top of the pot tightly with cling wrap. Make sure it is pulled tight around the pot. Use a rounded container to stretch the cling wrap over the opening. The idea is to make a bowl shape to form the lid.
Step 7
Mix another batch of white cement and water, but this should be thicker, much like a thick cream. Spoon this over the cling wrap and fill up the depression. Let this dry for an hour or so and then apply more white cement on top of this until you can the curved shape of the lid. Smooth the finish with wet fingers. Make a thick ball of white cement that can be moulded onto the lid as a knob handle. Again, smooth this with wet fingers and make sure that the knob is firmly fitted onto the lid. Let this dry overnight.
Step 8
Remove the hardened cement lid and use a clay shaver or sharp whittling knife to remove excess cement and shape the lid. Carve off as much as possible to outline the shape of the knob handle.
Step 9
Put the lid in the bucket of water and use the sandpaper to smooth and finish.
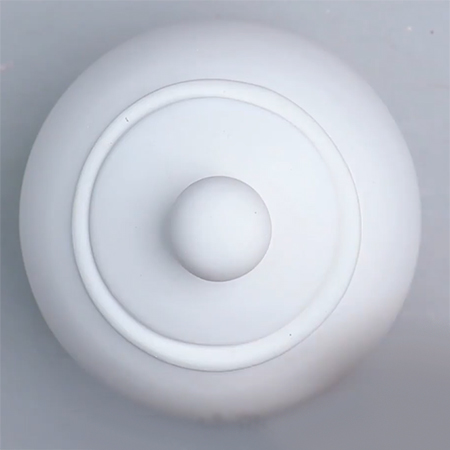
The complete pot and lid before painting.
Step 10
Use a sharp scoring tool to draw the design onto the pot. The shapes do not have to be perfect but are randomly scored into the cement surface.
Step 11
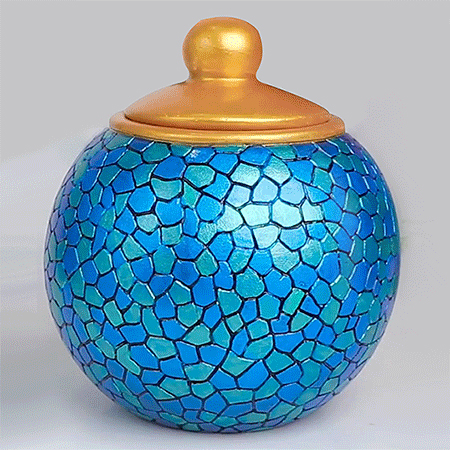
Apply the black base coat over the entire pot but excluding the lip around the top. Let this dry and then apply the second cover but avoid filling the scored lines so that the black will still show through. Use a third colour to paint random areas around the pot to provide the shimmering effect.
Step 12
Finish off the pot by painting the top in a gold colour as well as the lid. Protect the finish with 2 coats of clear acrylic spray.