
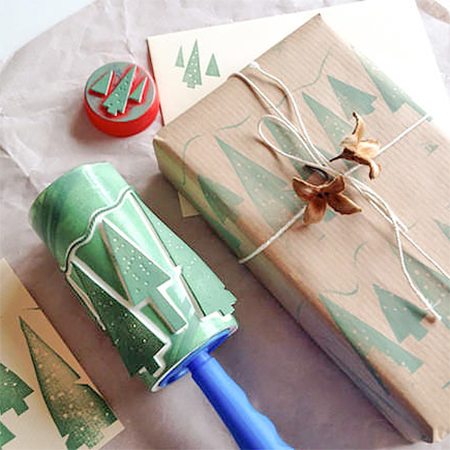
Christmas Craft: Make a Wrapping Paper Stamp using a Lint Roller
It is so easy to make your own wrapping paper or holiday decorations by turning a lint roller into a stamping tool.
17/11/2021
handmadecharlotte.com
It is so easy to create your own wrapping paper and Christmas cards by re-purposing a lint roller into a paint stamp!
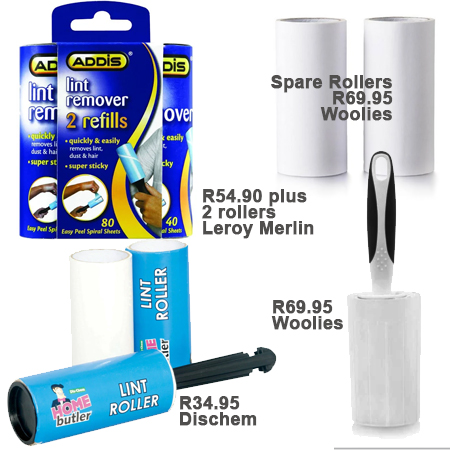
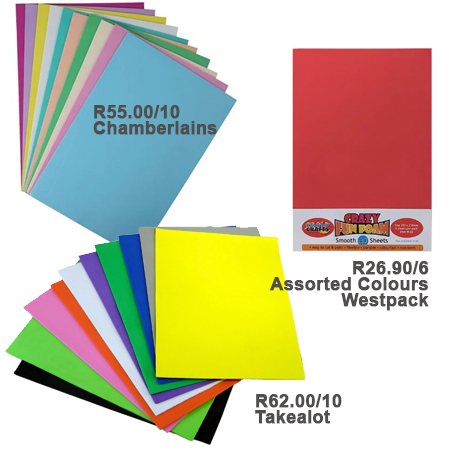
With the focus this year on saving money wherever possible, I would like to share a post by blogger handmadecharlotte.com where she shows how to make a wrapping paper stamp using a regular lint roller. Before I put together the article, I did some online research and found plenty of suppliers of lint rollers. You will also see details below for where you can buy foam craft sheets and roll of white paper. With these supplies, you can make your own wrapping paper and Christmas cards for many years to come. All you have to do is remove and replace old stencils with newer designs.
Lint rollers are not that expensive and can be used over and over again for different stamping crafts.
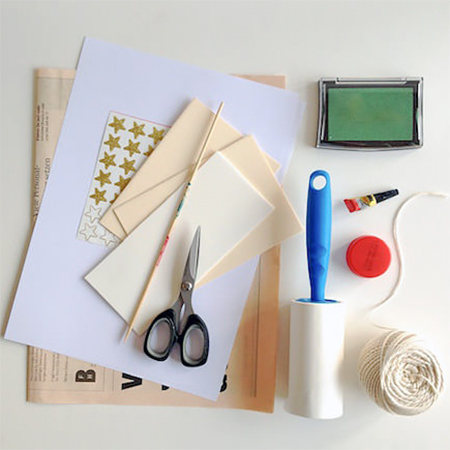
YOU WILL NEED:
Lint roller
Roll of white paper (R51.00/10m @ takelot.com)
Foam sheets (see image below)
Acrylic craft paint in your choice of colours
Superglue or contact adhesive
OPTIONAL: Stamp pad
Scissors and craft knife
Self-healing cutting mat
Ruler and pencil
You can purchase foam craft sheets at online suppliers for delivery to your door.
HERE'S HOW:
Step 1
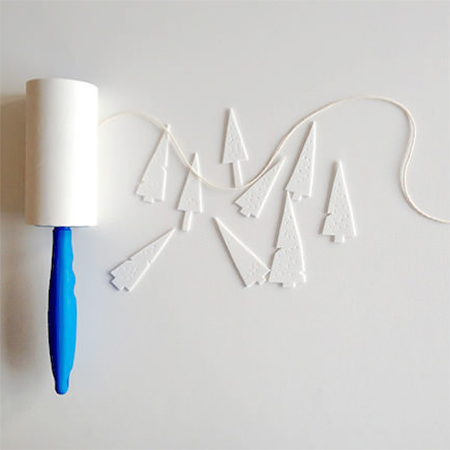
Gather all your tools and supplies together. The first thing you need to do is to decide on the shapes you want to cut out to attach to the lint roller. For this project, we focus on a small Christmas tree shape for the Christmas cards and wrapping paper, but you can choose any design you want to, for your own project.
handmadecharlotte.com
Step 2
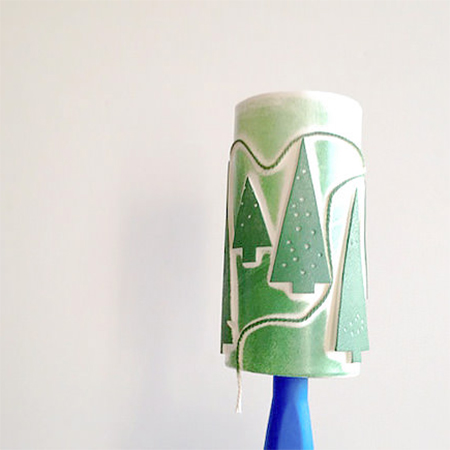
Use sharp scissors or craft knife to cut out the shapes. I prefer to use a cutter and self-healing mat for a crisp, neat edge. After cutting out the shapes, use superglue or contact adhesive to glue them onto the roller.
handmadecharlotte.com
Detail is everything. Using a pine skewer to prick holes in the foam adds even more detail, as does the piece of string incorporated into the design.
handmadecharlotte.com
Step 3
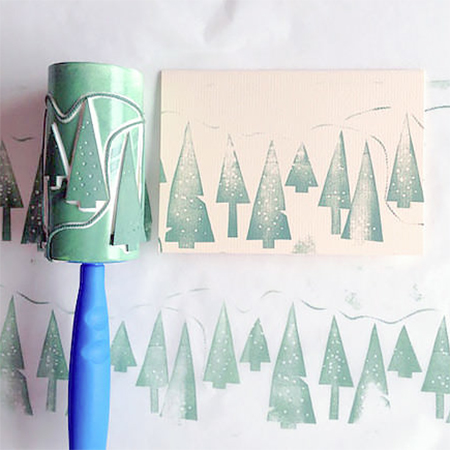
Now you are ready to roll! If you are using a stamp pad, make the paint runny and pour this into the stamp pad before rolling to stamp over the paint to transfer onto your paper. Do a few test runs beforehand so that you know how much paint and how much pressure is needed for the perfect print. If you don't have a stamp pad, you can apply the paint onto the stencil with a sponge.
The designs that you can print with your lint roller stamp is only limited by your imagination. You can re-purpose the stamp for Valentine's Day, Easter, Birthdays, Weddings or any other celebration, saving you even more money throughout the year.
handmadecharlotte.com